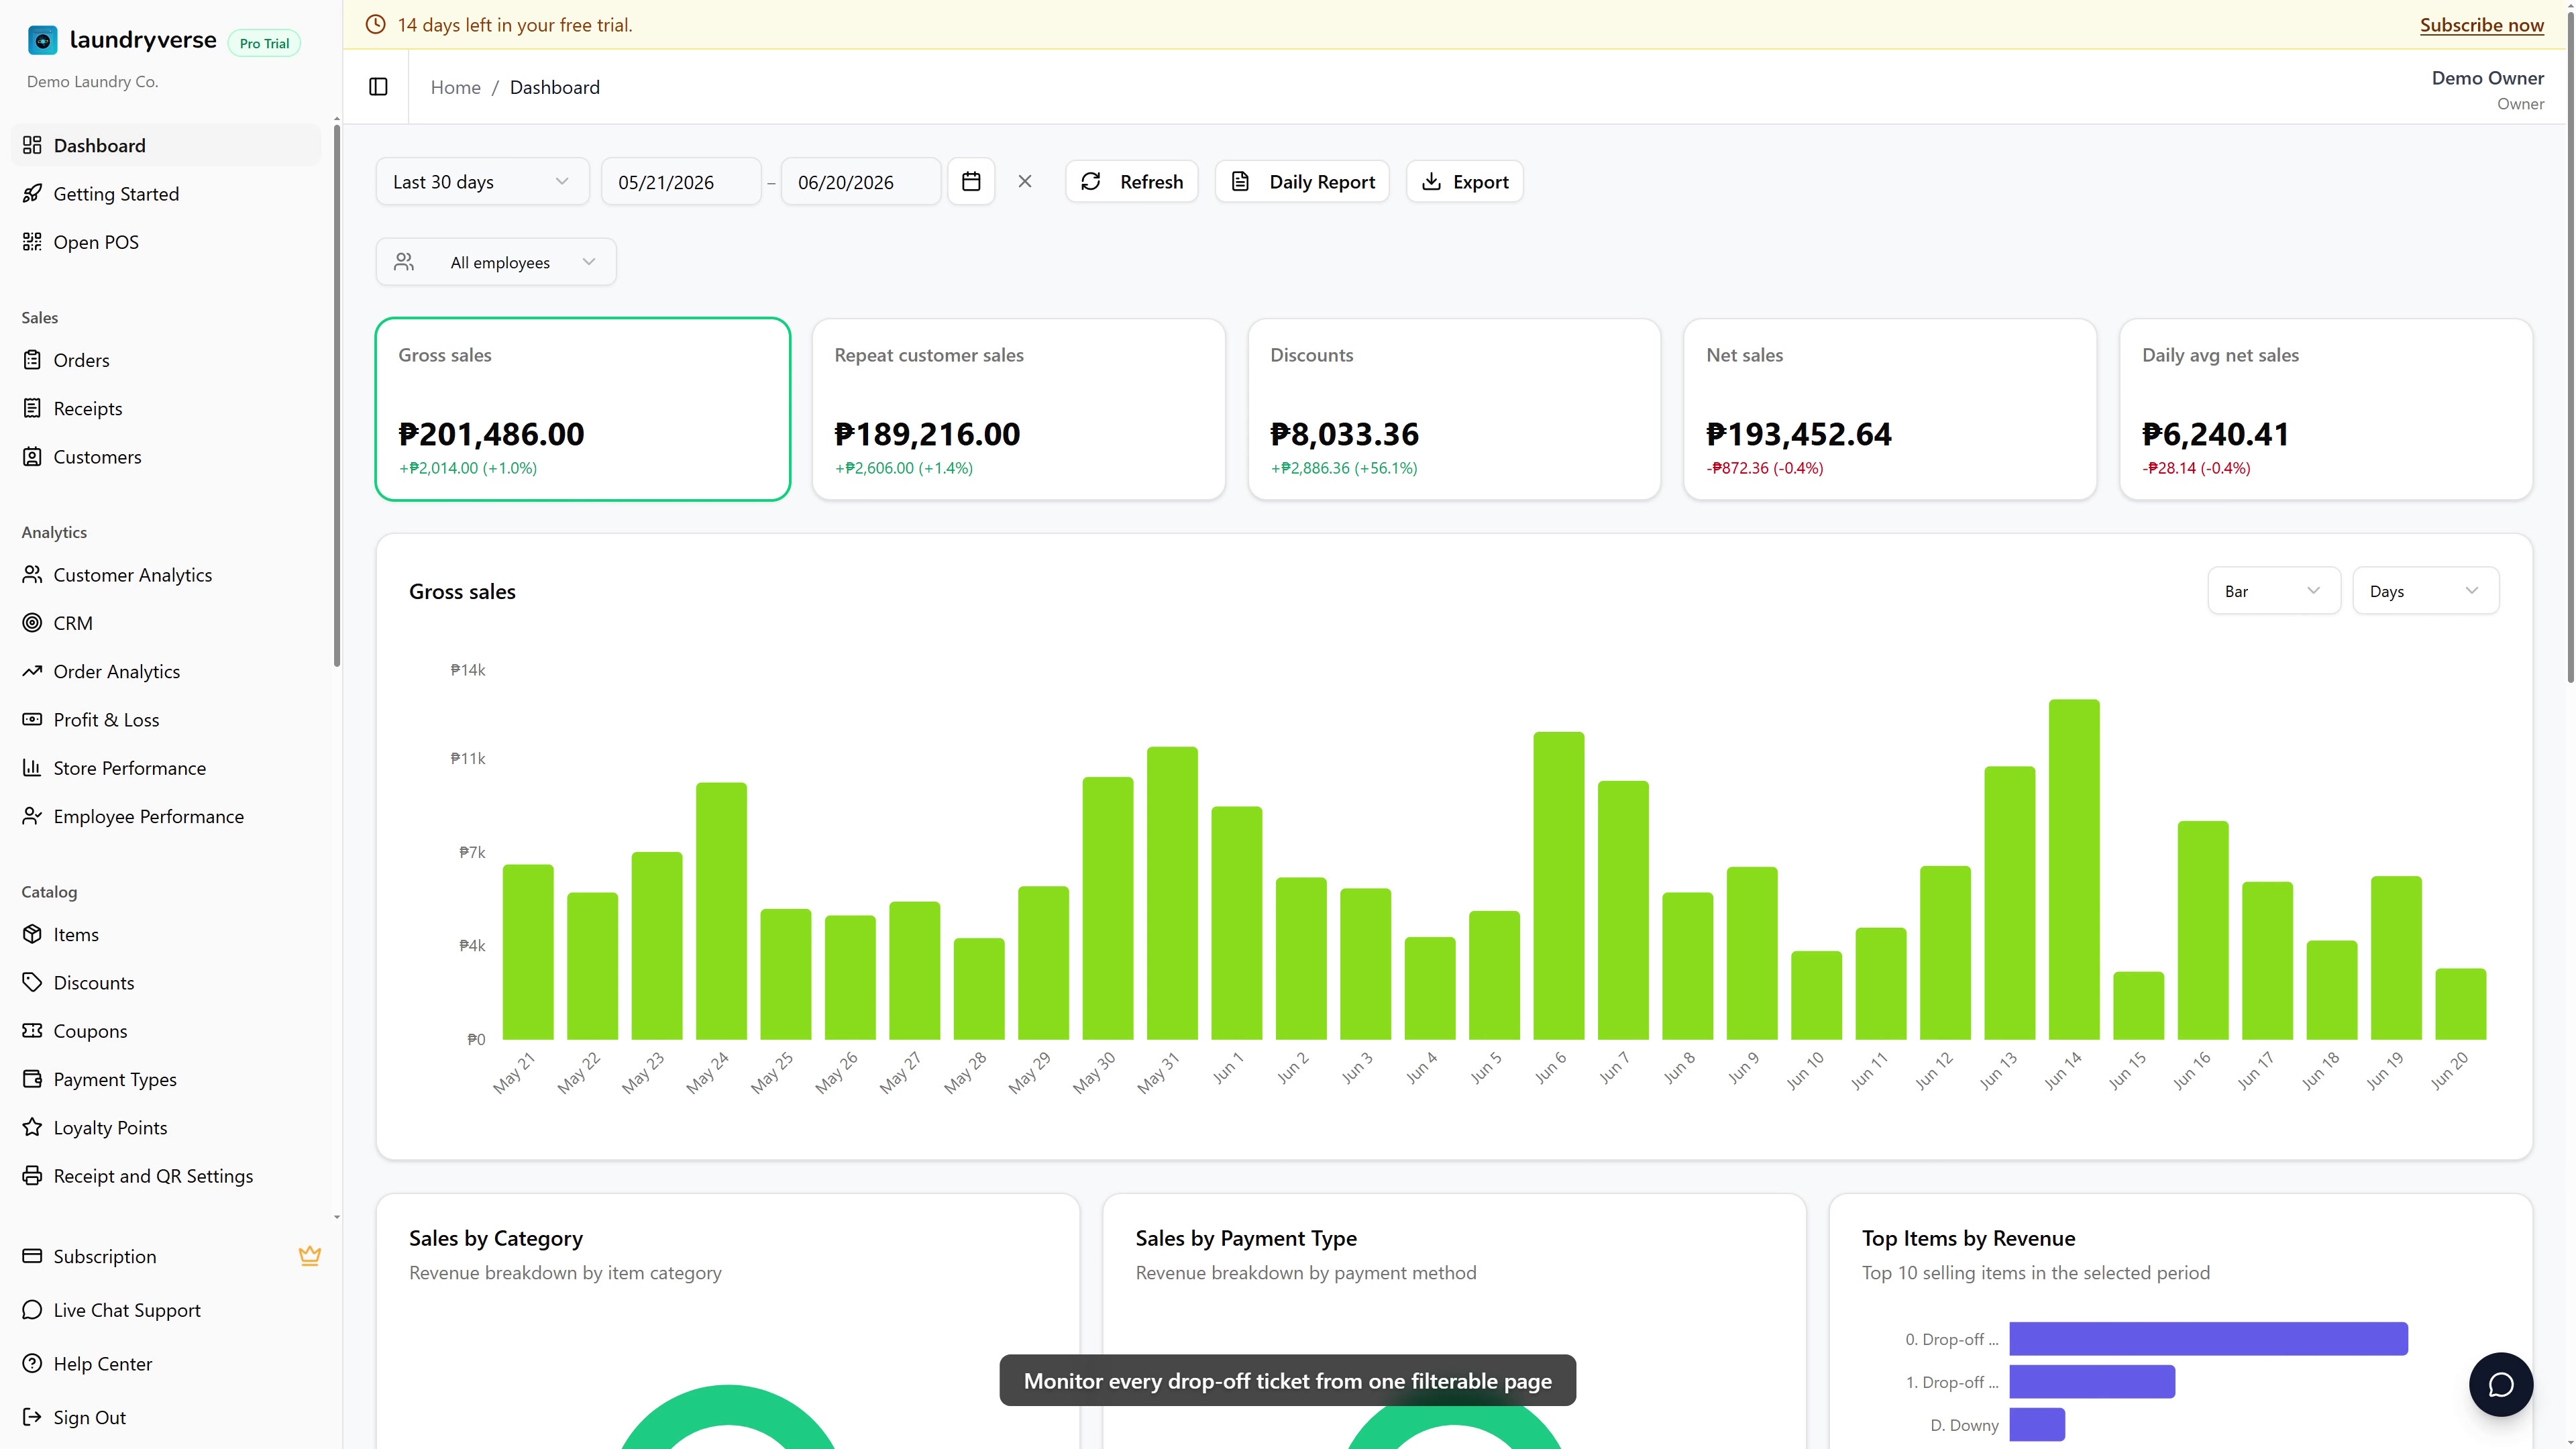
Orders
Orders is the dashboard's read-mostly view of every drop-off ticket your shop has ever opened. One filterable table for finding a specific order by receipt number, customer, phone, or date, a date-based Board for eyeballing the next few days of work, and a single detail page that surfaces loads, payments, the activity timeline, and the manual-override controls owners need when something needs unsticking. The live cashier workflow lives on the POS Order Board, this page is where owners and managers monitor it. About 4 minutes.
Opening the Orders page requires the Sign in to dashboard permission (dashboard:view). The page itself has no separate view permission, anyone with dashboard access sees every order. Deleting an order requires the additional Delete orders permission (dashboard:orders:delete). The default Owner, Admin, and Manager roles hold both. Cashier holds neither at the dashboard level, cashiers work orders from the POS Order Board instead. To let another role open the page or remove orders, grant the matching permissions in Roles & Permissions.
Before you start
This page is the dashboard side of the order lifecycle. Orders are created at the POS register during checkout, see Register and Attaching Customers. Loads are advanced from Received to Washed to Dried to Packed at the cashier-facing POS Order Board or at the Stations screen. By the time an order shows up here, those things have already happened, the dashboard's job is monitoring, lookup, and the occasional manual correction.
A few things worth knowing up front:
- The table lists all orders, including drop-off, retail-only, and even soft-deleted rows so the page works as an audit surface. Deleted orders render muted with a Deleted (or Archived) badge instead of disappearing.
- The Board view groups orders by scheduled pickup date, not by workflow status, that's the same shape your staff sees on the POS but read from a wider screen. Workflow stages still appear as a colored badge on each card.
- CSV export works on every plan. On Starter it covers the last 30 days of orders, floored by creation date; Business and above export the full history. See Subscription & Billing.
- Deletes are soft deletes with a required reason, and the server refuses to delete any order that already has a payment recorded, you have to refund or void from the receipt first.
- Workflow filtering uses MIN-stage semantics: an order is at the slowest load's stage, so a ticket with one Washed load and one Packed load is Washed, not Packed. The badge agrees with the POS board exactly.
1. Open the Orders page
From the dashboard, navigate to Sales -> Orders in the sidebar.
The page is a single card with a header (Orders icon, a count badge of total orders on the current filter, a view tab switcher, and an Export menu), a filter toolbar with search and dropdowns, and either the table or the board below. Every filter is reflected in the URL as a query string, so a filtered view is shareable, paste the URL into Slack and a teammate lands on the same slice.
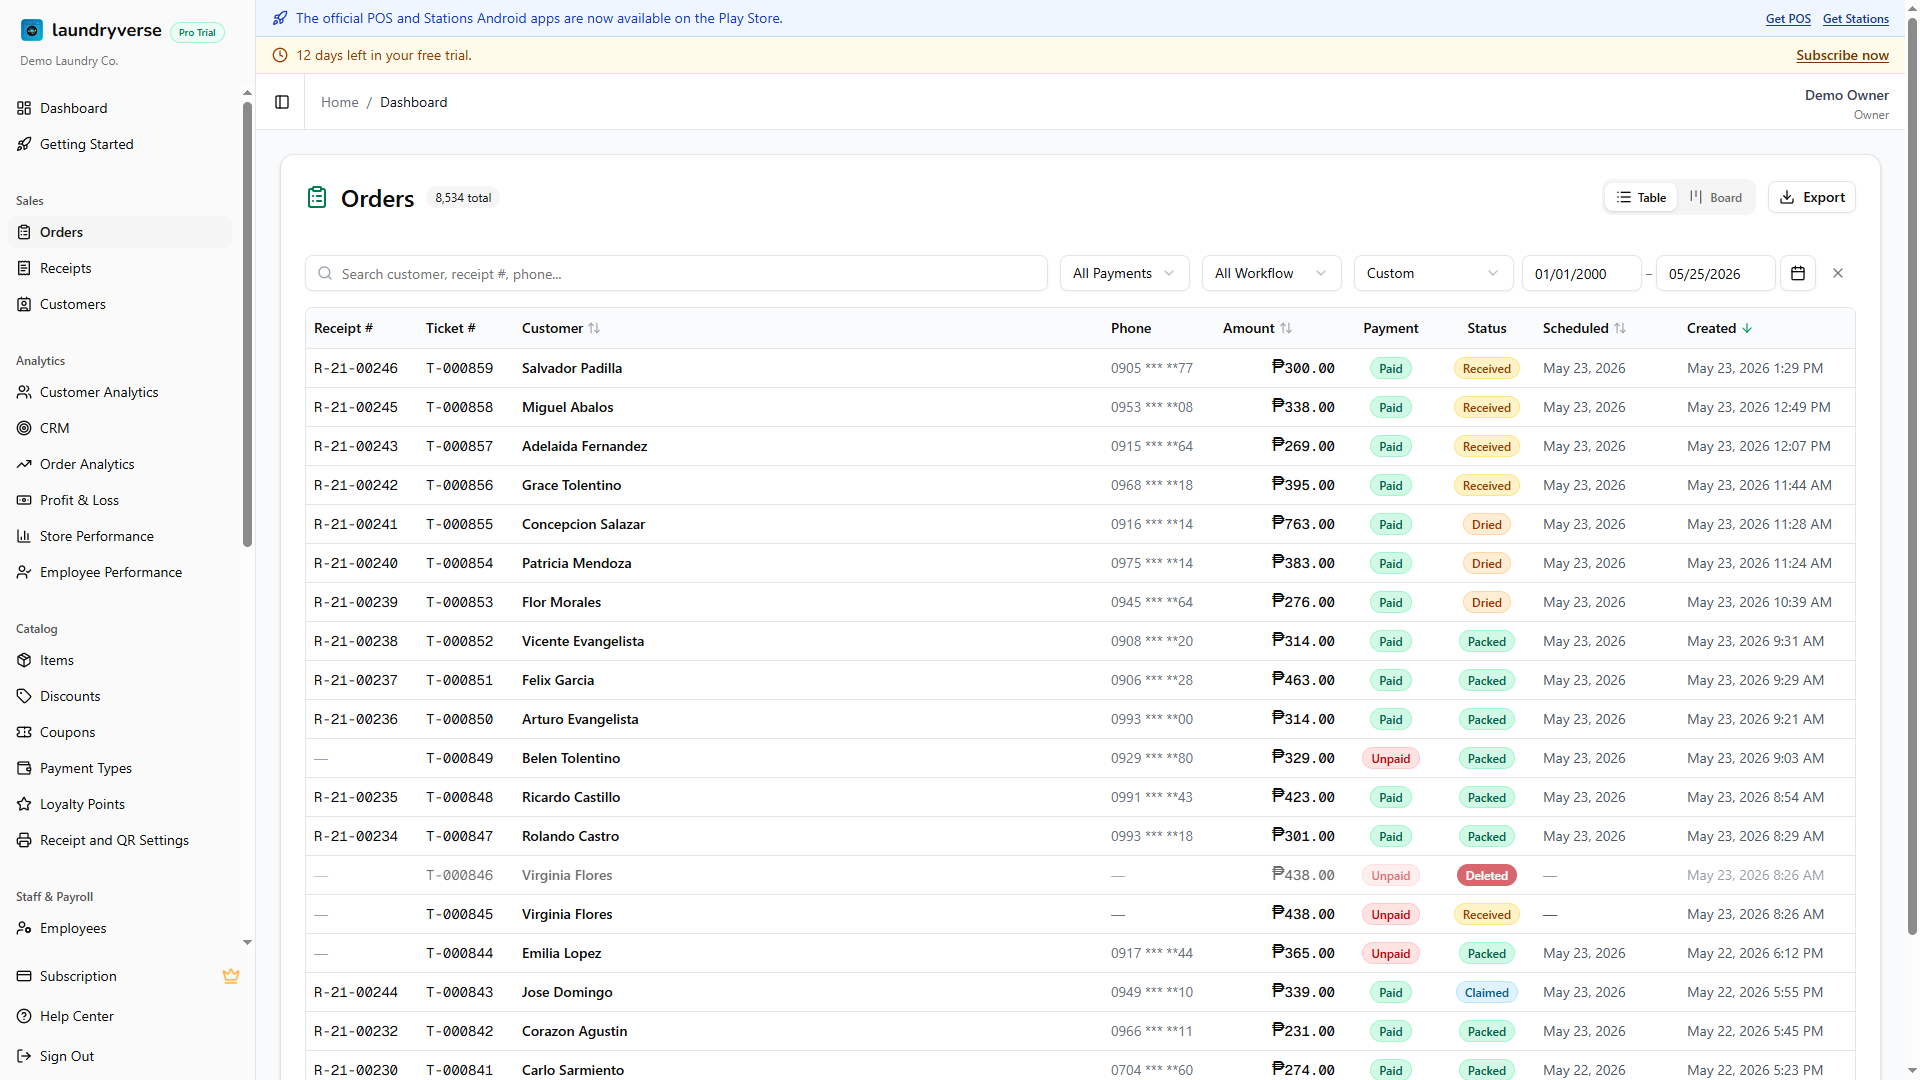
2. Table view
Table is the default. Each row is one order, ten columns including the store column on multi-branch tenants.
| Column | What it shows |
|---|---|
| Receipt # | The receipt number printed at the register. Em-dash if the ticket hasn't been paid yet and no receipt exists. |
| Ticket # | The shop-local ticket counter shown on the bag label and QR code. |
| Customer | Display name attached to the order. Sortable. Click the column header to sort ascending or descending. |
| Phone | The phone number stored on the order at attach time. Em-dash if the customer was a walk-in or no number was captured. |
| Amount | Order total in pesos, right-aligned mono. Sortable. The format is P1,234.56. |
| Payment | Badge showing Paid (green), Partial (amber), or Unpaid (red). |
| Status | Badge showing Received (amber), Washed (blue), Dried (orange), Packed (green), Claimed (sky), or Deleted/Archived for soft-deleted rows. |
| Scheduled | The scheduled pickup or delivery date, sortable. Em-dash if the order is unscheduled. |
| Created | When the order was opened at the POS, includes the time. Sorts the table by default, newest first. |
| Store | Which store the order belongs to. Shown only on multi-store tenants. |
Click any row to open its detail page. Deleted rows are clickable too, the detail page renders them with a red Deleted banner and disables the destructive actions.
The total count badge in the page header reflects whatever filter is active, so you can see at a glance how many rows match before you scroll.
3. Search and filter
The search box matches customer name, phone number, or external receipt number with a case-insensitive substring match. Type a few characters and the table debounces for six tenths of a second before re-querying, no Enter key required. The search term is pushed to the URL as ?q=....
The toolbar has three more controls:
| Control | What it does |
|---|---|
| All Payments | Filter to Paid, Partial, or Unpaid. Default is All Payments. |
| All Workflow | Filter to Received, Washed, Dried, Packed, or Claimed. Defaults to All Workflow. Washed and Dried are table-only, the Board collapses them into Received. |
| Date Range | A from-and-to calendar picker that scopes the table by creation date, not scheduled date. Table view only. |
The active filter pills sit in the URL, so the back and forward buttons jump between filter states. The table refresh is debounced and runs through a transition, you'll see a green spinner overlay during the round-trip.
4. Switch to Board view
Tap the Board tab in the page header to swap the table for a date-grouped board.

The board is not a workflow board that groups by status, that's the POS Order Board. The dashboard board groups orders by scheduled pickup date so an owner can see what's queued up for today, tomorrow, and the next few days at a glance.
- Unscheduled is always the first column, drop-offs without a scheduled date land here.
- Yesterday, Today, Tomorrow, then weekday abbreviations for the days after that, five date columns plus Unscheduled by default.
- The Today column is highlighted in green for quick visual lock-on.
- Each column header shows two load counts, total loads in the column and how many are still pending (anything not yet at packed).
- Each card shows the customer name, a status pill and a payment pill, an optional Loyverse receipt number, item icons with counts, and a short-change flag if applicable.
Use the left and right arrows below the toolbar to scroll the date window. If you move away from today, a Today button appears, tap it to jump back.
Two interactions on the dashboard board are intentional:
- Drag a card to a different date column to reschedule the pickup. The change is optimistic on the dashboard and writes through to the order's scheduled date so the POS board reflects the new column next time it refreshes.
- Click a card to open the order detail page, same as the table.
Workflow status (Received -> Washed -> Dried -> Packed) is not advanced from this board, that happens at the POS register, the POS Order Board, or Stations where the loads are actually being handled. The dashboard board surfaces the status as a badge so the owner knows where each order is, but the action lives on the floor.
When a search or filter is active, the board collapses into a flat grouped list, results are still sorted by date and the date columns become section headers.
5. Open an order's detail page
Click any order (in table or board view) to open the full detail page.
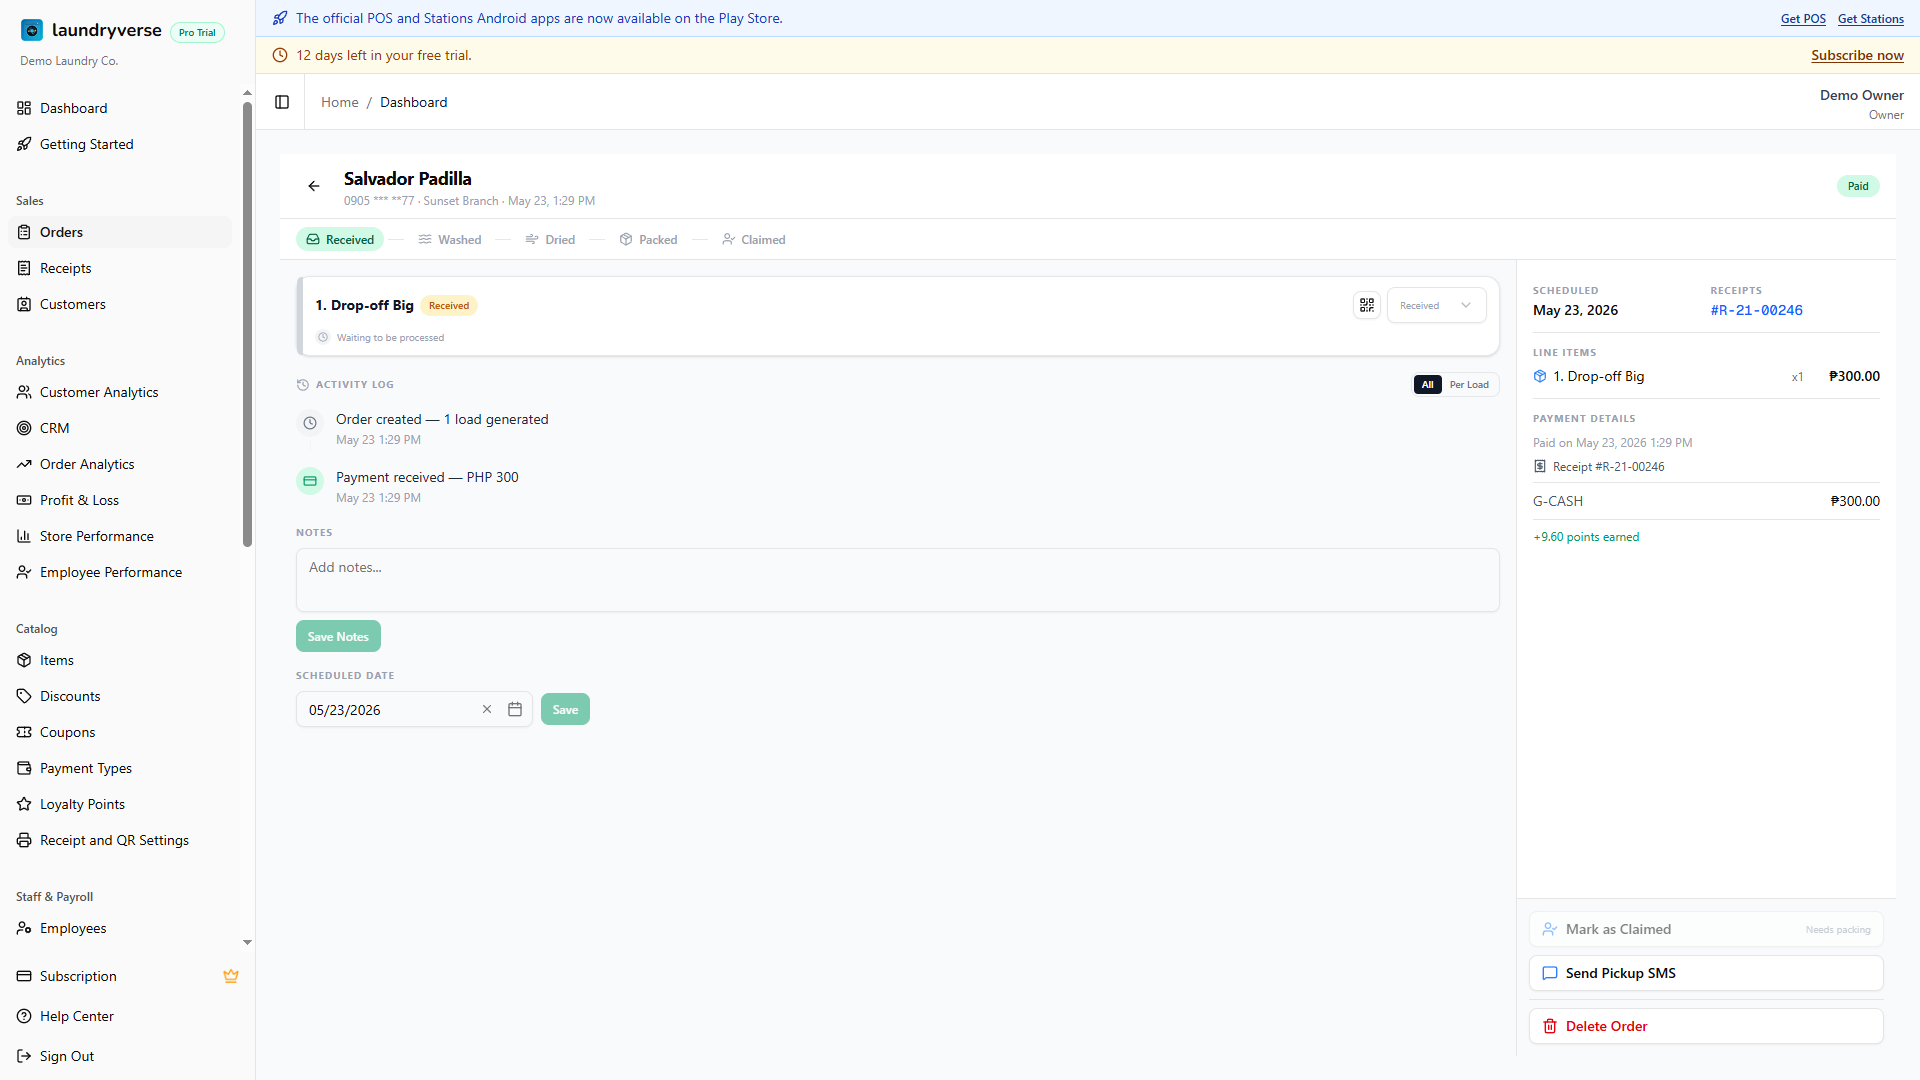
The detail page has a header with the customer's name, phone, store, and creation timestamp, a payment and claimed badge pair, a progress stepper that shows the overall status, and then a two-column layout below:
- Loads, one card per load. Each card shows the load type (e.g. Wash & Fold), the current stage (Received, Washed, Dried, or Packed), the employee and timestamp of the last action, a QR-print button to reprint the bag label, and an override picker to manually move the load to any stage, see section 6.
- Activity timeline, every load progression and load override in reverse-chronological order. Switch between All (one merged timeline) and Per load (a separate timeline per load).
- Notes, an editable text area. Internal-only, never shows on receipts or to customers. Tap Save to commit.
- Scheduled date, an editable date input. Tap Save to commit, this is the same value the board uses to place the card.
- Line items, every item on the ticket with quantity, price, and a drop-off flag.
- Payment breakdown, one row per payment recorded against the order (cash, GCash, card, deposit, etc.) with the change amount where it applies. Points redeemed and points earned for the order surface above the breakdown.
- Receipts, the linked SALE receipt and any DEPOSIT receipts. Click one to open its detail dialog.
- Customer tracking, a panel with the order's live customer tracking link and a scannable QR. Scan it or tap Copy link to send a customer their status page without reprinting.
- SMS state banner, when every load on the order is packed, a banner at the top of the detail page reports the SMS state (
will send,sent,no phone,credits low, ormaster switch off). See SMS Notifications.
6. Manual actions on the detail page
The detail page is also where an owner steps in when the normal POS flow needs a manual nudge. None of these are the everyday path, they're for corrections.
| Action | When you'd use it |
|---|---|
| Mark Paid | Record full payment for an unpaid order that was settled outside the register (e.g. GCash transfer, manual reconciliation). One-way, unpaid to paid only, not for reversing a payment. Retail-only tickets (no drop-off items) auto-archive on mark-paid since the Receipt is the canonical record. |
| Mark Claimed | Mark a Packed and Paid order as picked up. Requires both conditions, the button stays disabled until they're met. Also cancels any pending ready-for-pickup SMS. |
| Send SMS | Manually fire the ready-for-pickup SMS to the customer. Re-sends are allowed, the sent-at marker is cleared first so the message goes out fresh. Only useful when the automatic SMS was missed, blocked by a stale credits balance, or you want to re-notify a customer who didn't see the first message. |
| Override Load Status | Per-load picker to set a load to Received, Washed, Dried, or Packed. Recorded as Admin in the activity timeline so it's traceable. Use when a station got skipped, a barcode misread, or a load was advanced too early. |
| Edit Notes | Free-text internal notes about the order. Visible on the dashboard and POS detail pages, never on customer-facing receipts. |
| Edit Scheduled Date | Change the pickup or delivery date. Same field the board reads when placing the card. |
| Print bag label QR | Reprint a single load's bag label and QR code from the load card. |
Every override and mark-paid hits the same atomic-write guards the POS uses, you can't double-claim, can't pay an already-paid order, and can't claim an order whose loads aren't all packed.
7. Delete an order
Soft-delete is available to anyone with the Delete orders permission. Open the order's detail page and tap the trash icon in the header to open the delete dialog.
The dialog requires a reason from a fixed list, Duplicate, Data entry error, Customer cancelled, or Other, plus an optional free-text note. Reason is required, the Confirm button stays disabled until you pick one.
The server refuses to delete the order if any payment has been recorded against it, the payment status has to be Unpaid, the paid amount has to be zero, and the payments list has to be empty. If you try to delete a paid or partially-paid order, the dialog shows the message This order has a payment recorded. Refund or void it from the receipt instead of deleting. Process the refund from Receipts and the order's payments first, then come back and delete.
A successful soft delete stamps the deletion time, the deleter's name, the chosen reason, and the optional note on the order. The row stays in the database forever, it's just hidden from default queries:
- The Orders list still shows it (the list opts in to deleted rows so the page works as an audit trail), but the status column shows a red Deleted badge.
- The POS Order Board, dashboard Board view, and the Stations load queue hide it so the workflow surfaces stay clean.
- The order's QR code is invalidated, scans from a station return an order-not-found state.
- Any pending ready-for-pickup SMS is cancelled.
- A row lands in Activity Log under the Deleted order action with the reason, the note, the ticket number, the customer name, the amount, and the deleter's name, so a soft delete is fully attributable.
There is no Restore button in the UI. To recover a soft-deleted order, email support with the ticket number or order id.
Common issues
"I can't find an order I rang up an hour ago"
Three usual causes. First, the order wasn't a drop-off, pure retail tickets without drop-off line items are auto-archived the moment they're paid, see the retail-only-paid auto-archive behavior on Mark Paid. They still appear in the Orders list with the Archived badge, switch the workflow filter to All Workflow and search by customer name. Second, you're on a multi-store tenant and the dashboard header's store selector is scoped to a different branch, switch it to All Stores. Third, the order was soft-deleted, ask whoever owns the dashboard if it was intentional, and check Activity Log for a Deleted order entry.
"The status on the dashboard says Washed but POS shows Dried"
Both surfaces compute status the same way, MIN-stage labelling, so an order with one Washed load and one Dried load shows as Washed on both. The most common cause of a real mismatch is a stale tab, hit refresh. If the mismatch persists, open the order detail page and check the per-load status, one load was likely re-advanced from a station while the other tab was idle.
"The Delete button is greyed out"
Either you don't hold the Delete orders permission (the default Cashier role doesn't, see Roles & Permissions), or the order has at least one payment recorded against it. The server-side guard is atomic, the UI mirrors it. To delete a paid order, void or refund the underlying payments from Receipts first, then come back.
"Mark Paid doesn't show the change to the customer's points balance"
Mark Paid on the dashboard records the payment against the order but doesn't run the points-earning math the POS does, that fires from the register's checkout flow. If a customer paid by transfer and you want them to earn the points, open the customer's profile in Customers and use Adjust Points to credit them manually. Document the amount in the order's notes so the trail is clean.
"Export downloads an empty CSV"
Two causes. First, your current filter has zero matches, scroll the table or clear filters and try again. Second, you're on the Starter plan and every matching order falls outside the last 30 days. Starter exports are floored to that window by creation date, so a filter set entirely to older dates comes back empty. Widen the range to include recent orders, or upgrade from Subscription & Billing for full-history exports.
"Dragging a card on the Board view didn't reschedule"
The dashboard board's drag uses optimistic state, the card moves immediately but the server write happens after. If the server rejected the write (permission gone stale, order soft-deleted while you were dragging, network blip), the dashboard rolls back and shows a Failed to reschedule order toast. Refresh the page and try again.
What's next?
- Customer Order Tracking: the QR customers scan to follow their order's status, and where to copy an order's tracking link from the detail page.
- POS Order Board: the cashier-facing board your staff actually works orders on, where loads are advanced and where most orders are opened from. The dashboard's Orders page is the read-mostly mirror of that surface.
- Order Detail (POS): the POS version of the order detail screen, with the load-advance buttons and the cashier-side actions.
- Receipts: every sale receipt, every deposit, every refund and void. When a payment needs reversing, start there.
- Order Analytics: aggregate metrics on top of the same order data, throughput by day, lead time by load type, top customers by spend. Business plan and above.
- Customers: filter the customer list by name or phone to see one customer's full order history.
- SMS Notifications: ready-for-pickup messages, sender configuration, and the SMS state banners that appear on the order detail page.
- Activity Log: every delete, override, and admin mark-paid lands here with the actor's name and timestamp.
Stuck? Email [email protected]. The founder reads every message.