Attaching Customers
Attaching a customer to an order links it to their profile, which is what drives loyalty points, order history, and SMS notifications. This guide covers searching for a customer, creating one on the spot, editing details, and attaching or detaching at the register. About 2 to 3 minutes.

Searching and attaching an existing customer needs Search customers (customers:view). Creating a new customer or editing one from the register needs Manage customers (customers:manage). Both are held by the default Owner, Admin, Manager, and Cashier roles, because attaching a customer is part of the everyday counter flow.
The dialog adapts to your role. If you lack Search customers, the dialog still opens but shows a "no permission to view customers" panel instead of the search list. If you lack Manage customers, the Add New Customer button and the edit pencil are hidden, so you can still attach an existing customer but cannot create or change one.
To change any of this, edit the role in Roles & Permissions.
Before you start
The customer dialog reads the store's customer list and links the chosen customer to the cart. You'll need:
- A device activated and an employee logged in. See POS Setup.
- An active shift open for the current employee. See Shifts.
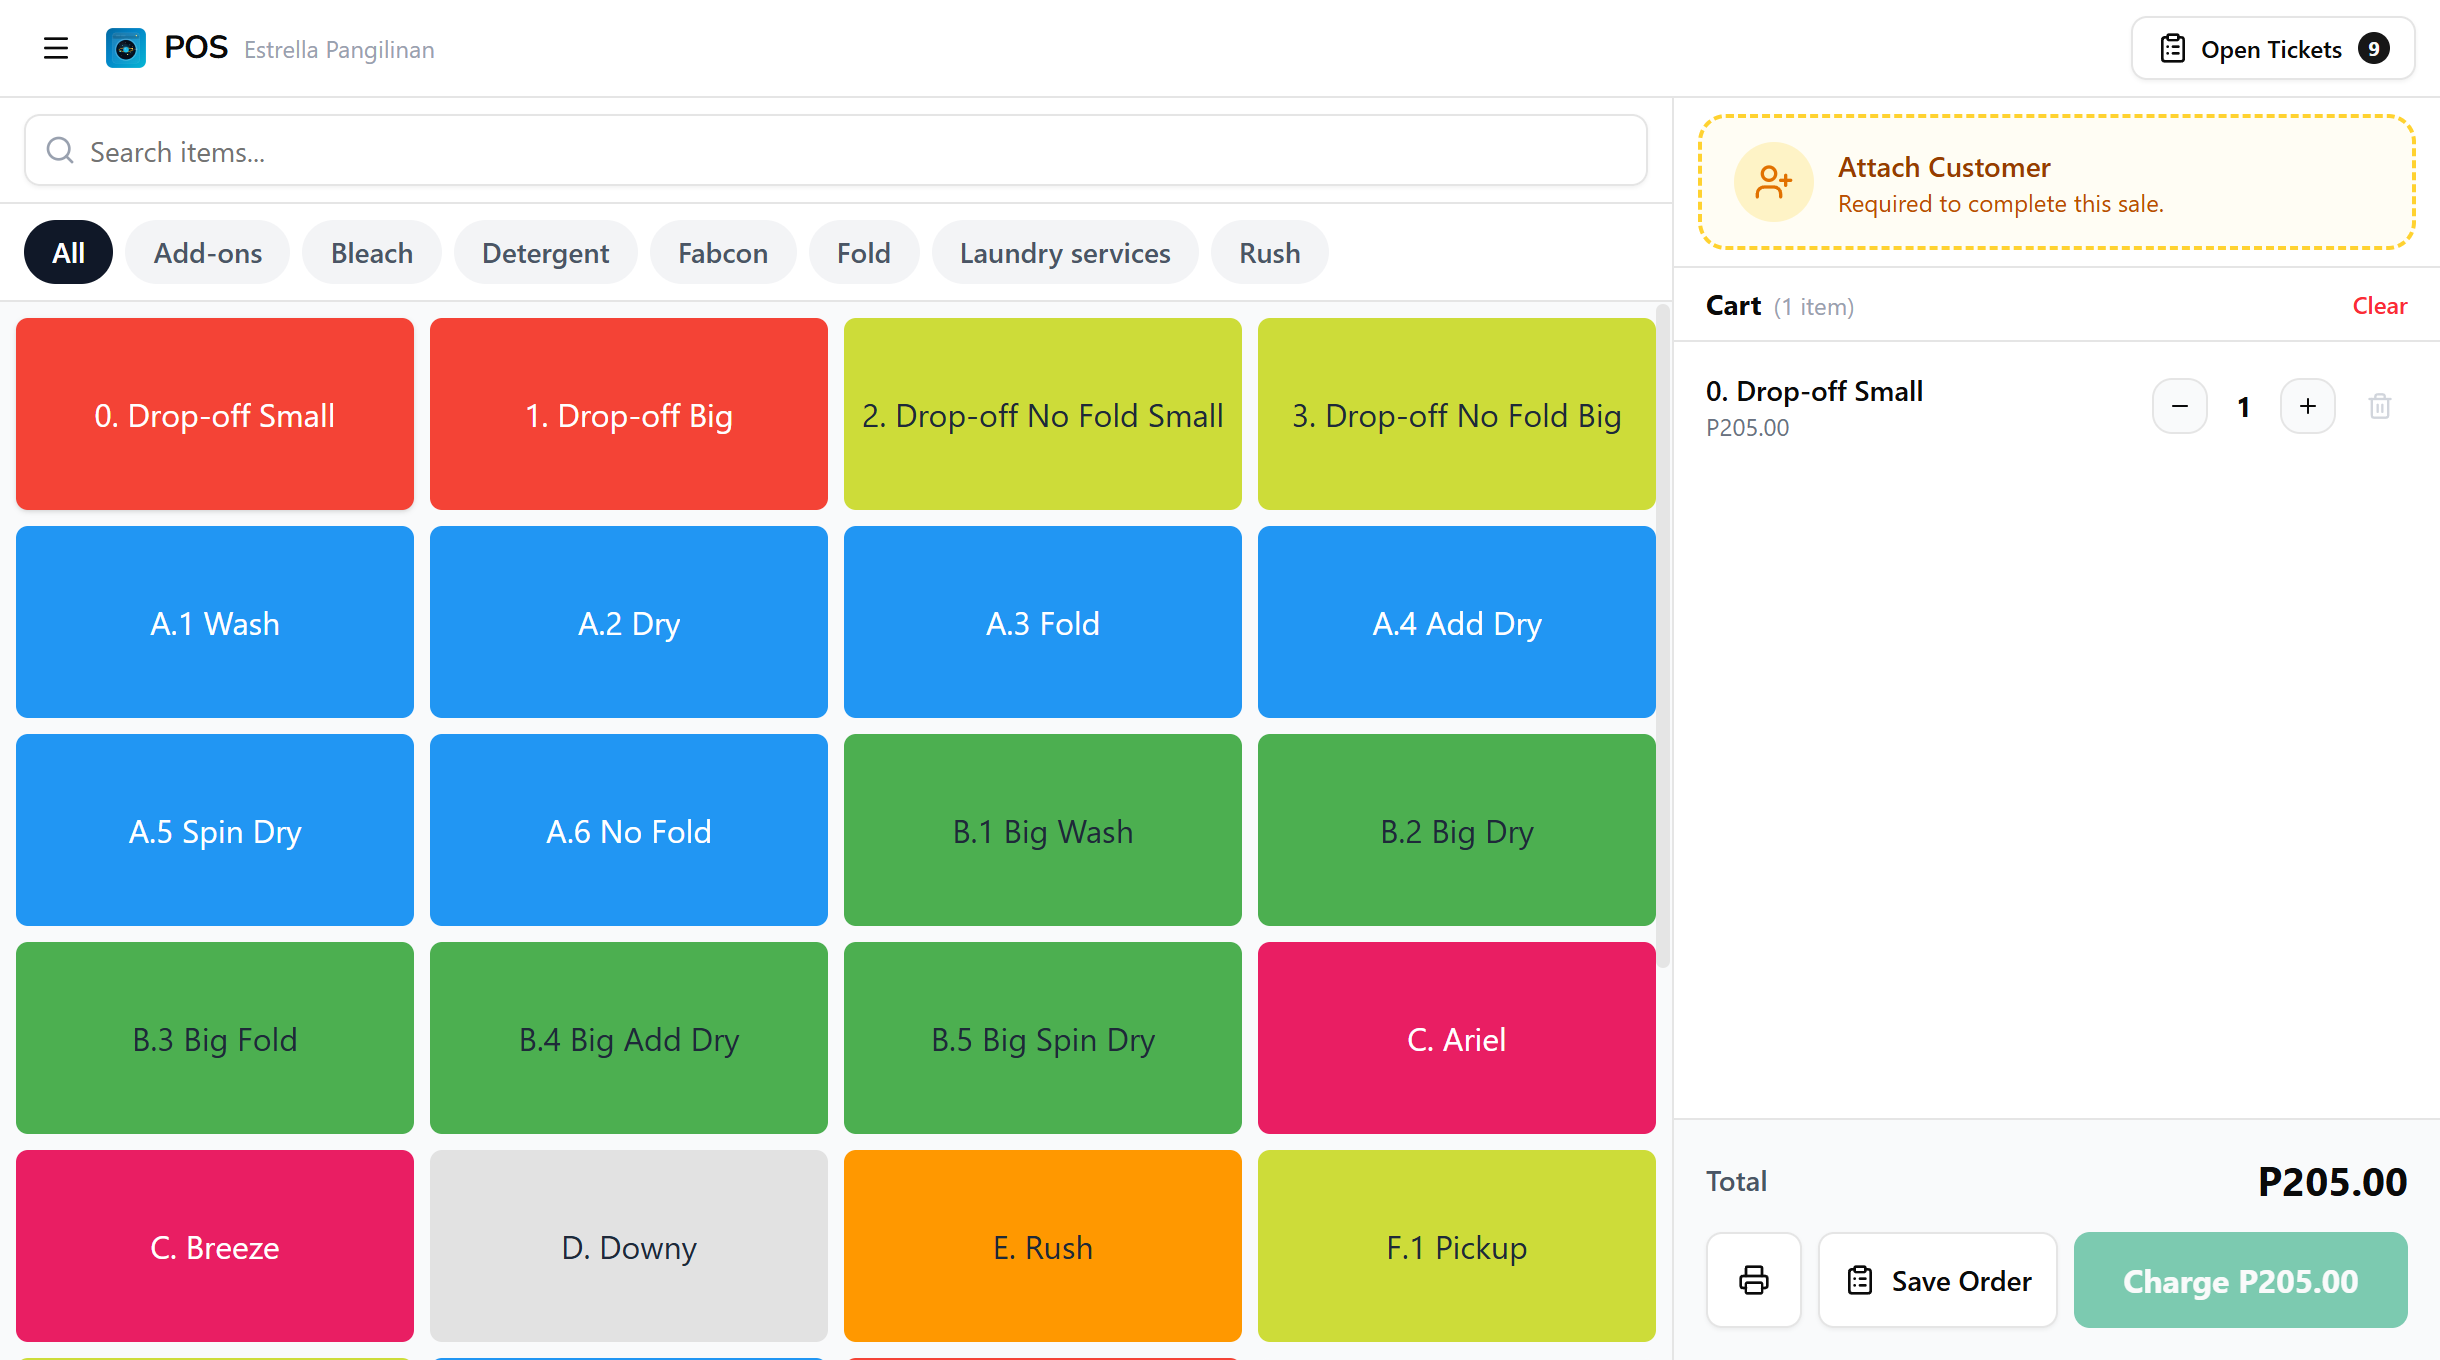
- A cart with at least one item, if you want the attachment to stick. Attaching to an empty cart is fine, but the link is only saved when you save the ticket or charge.
Attaching a customer is optional for walk-in orders, but required for orders with drop-off items, since the customer collects those later. The Charge button stays disabled until a customer is attached when your shop requires one.
1. Opening the customer dialog
In the register, the Attach Customer button sits at the top of the cart panel on the right. It shows as a dashed-border area with a person icon and the text "Attach Customer". Tap it to open the customer dialog.
2. Searching for a customer
When the dialog opens it shows your most recent customers, which is handy for regulars. To find someone specific, type a name or phone number in the search field. Results update as you type. Each row shows the customer's name, phone number, any tags they carry (as small green chips), and a points badge when they have loyalty points. When a customer has more tags than fit, the row shows the first few with a +N count for the rest so the list stays tidy.
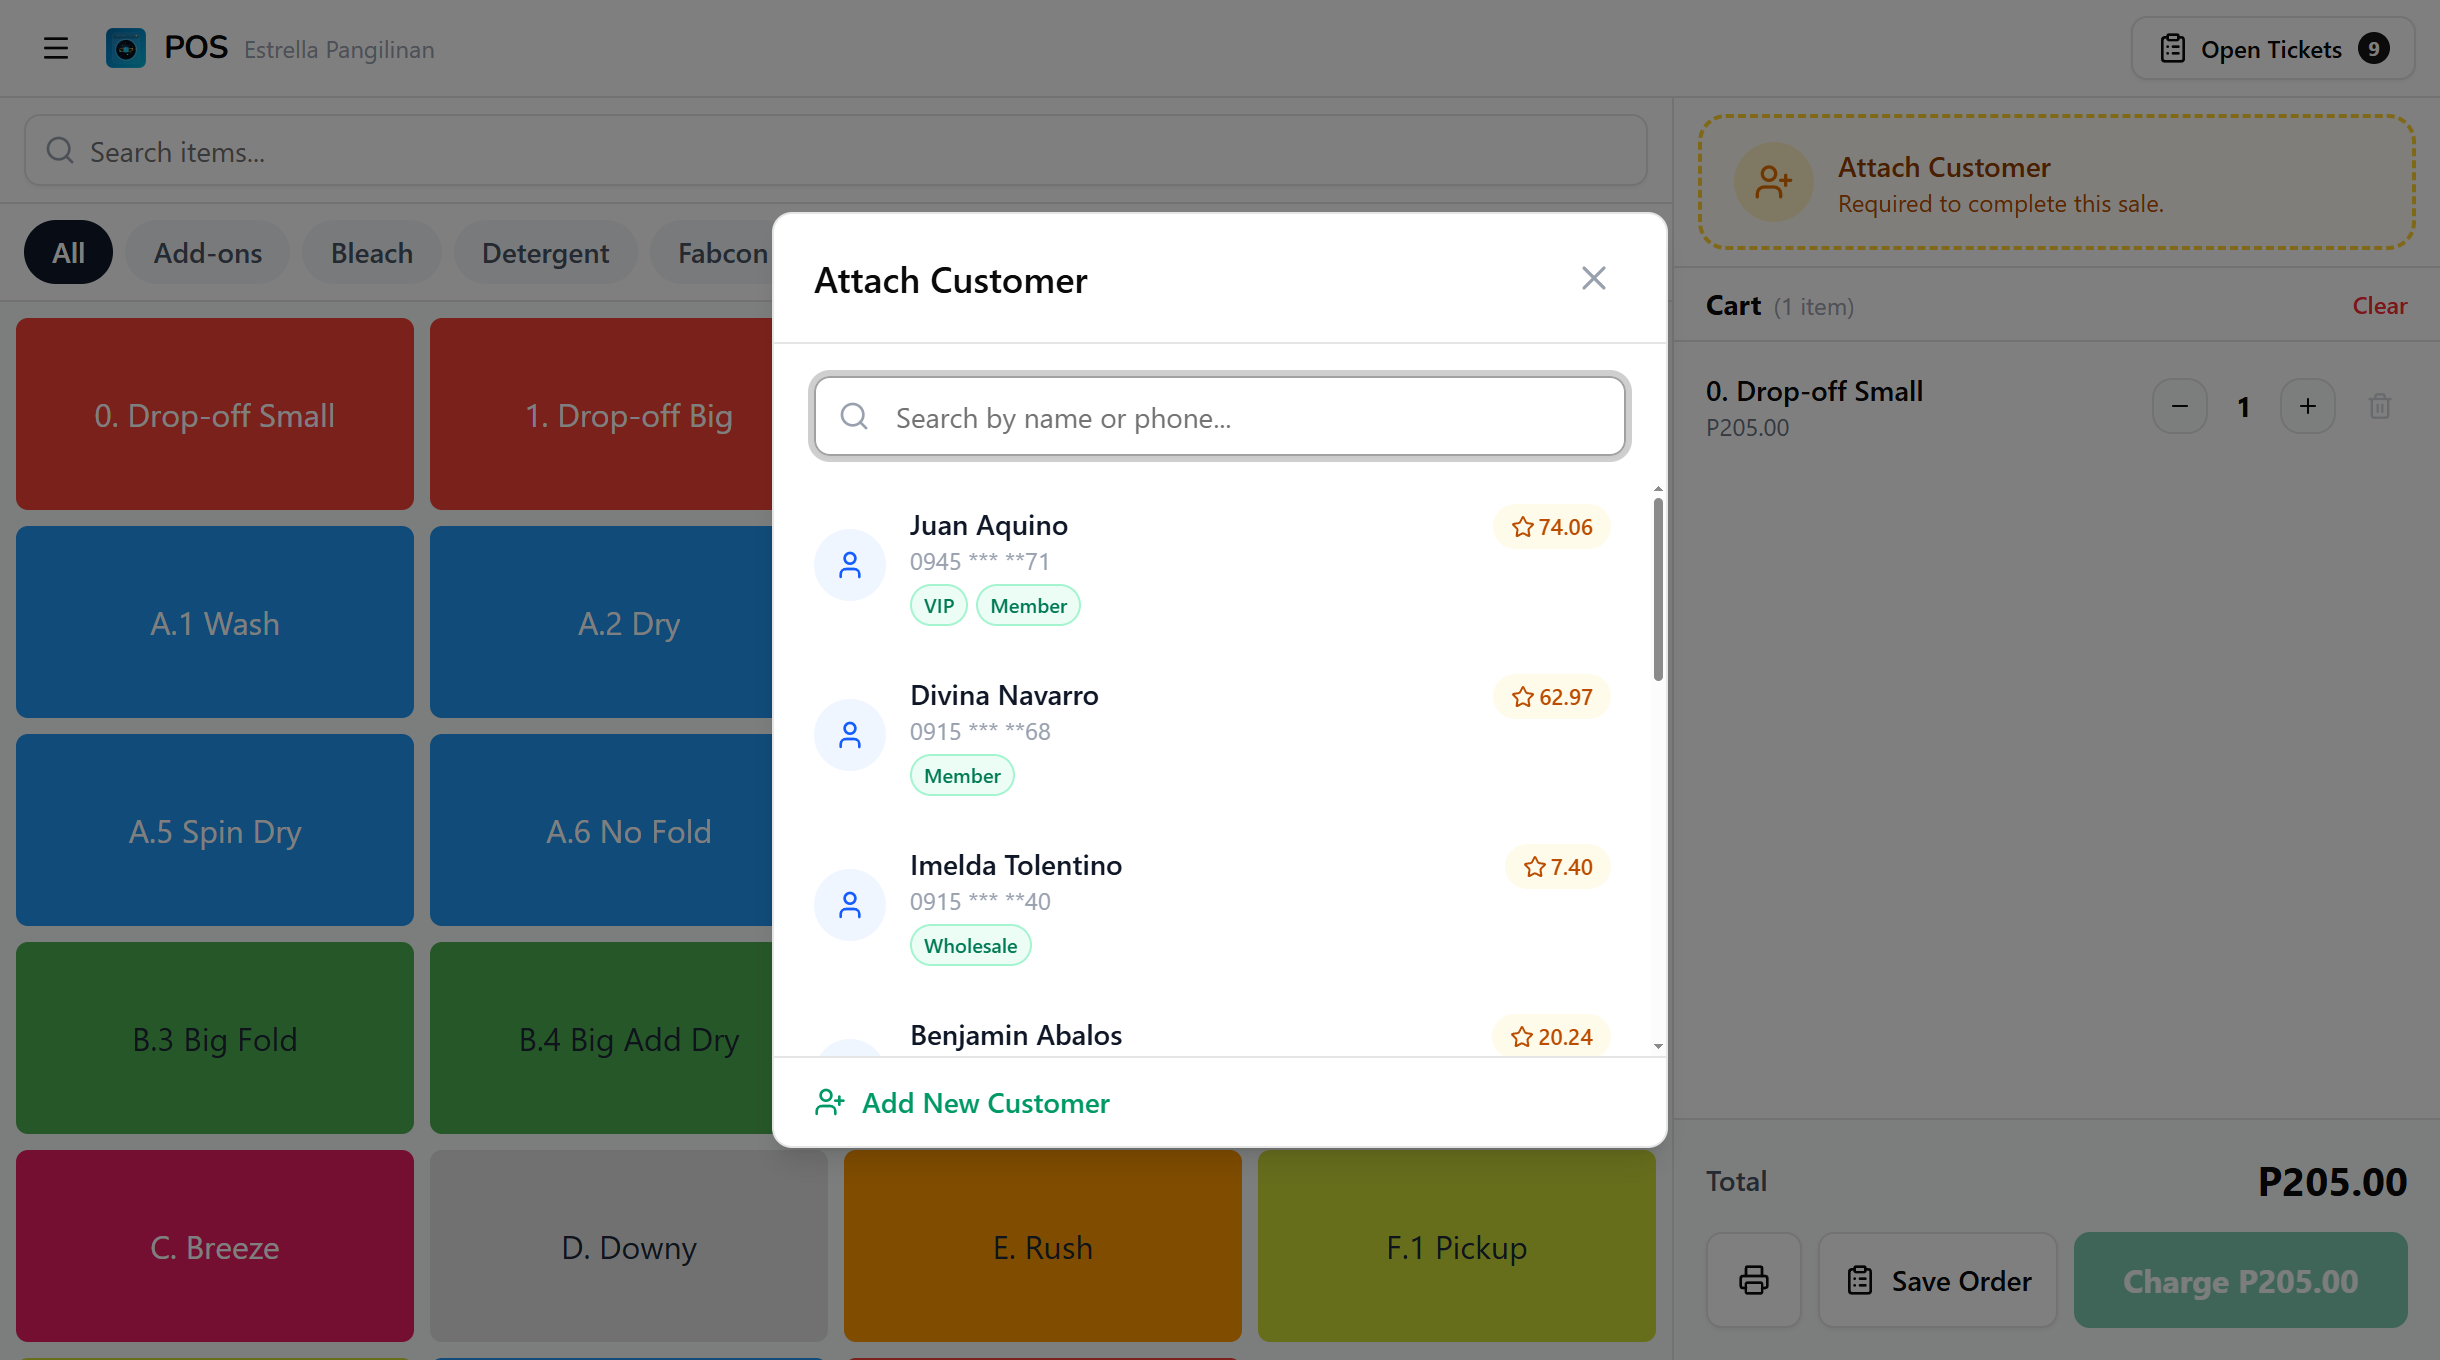
Leave the search field empty to keep the recent-customers list in view. For a shop with a steady set of regulars, the person you want is usually right there without typing.
3. Viewing customer details
Tap a customer from the list to open their detail card.
| Field | What it shows |
|---|---|
| Name | Customer's full name, with an edit pencil beside it |
| Phone | Phone number, or "No phone number" if none is set |
| Visits | Total number of orders for this customer |
| Points | Current loyalty points balance, highlighted in amber |
| First Visit | Month and year of their first order |
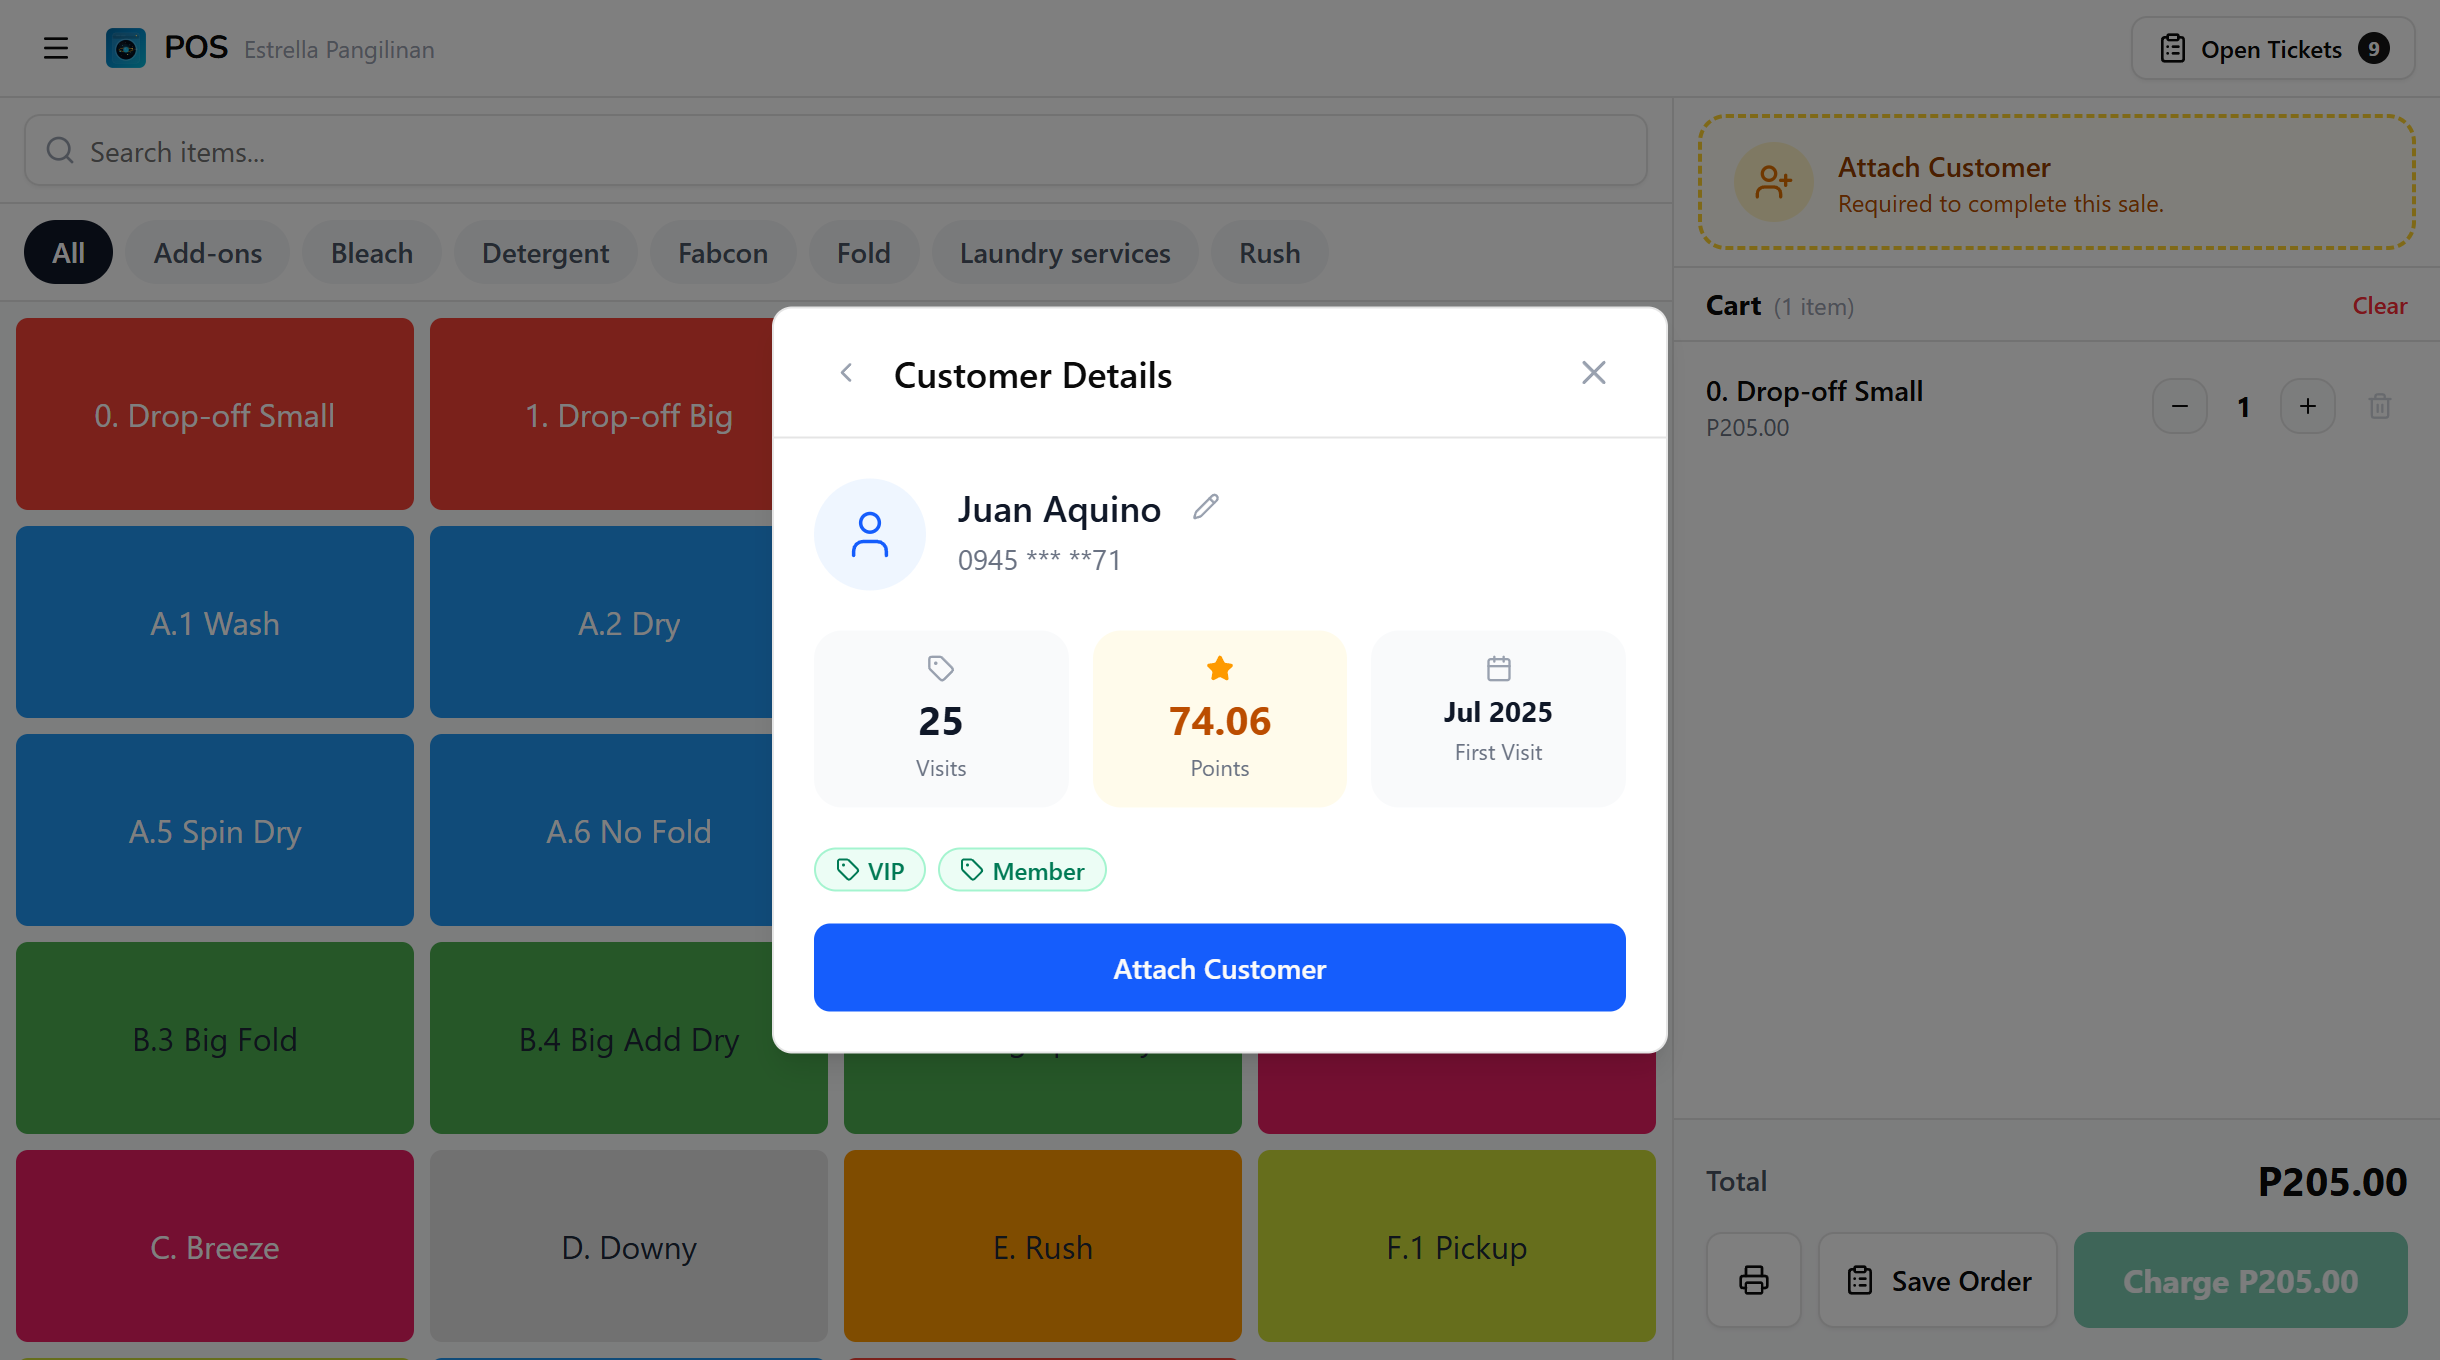
Any tags the customer carries appear as green chips below the stats. If your shop restricts loyalty earning to a specific tag (see Loyalty Program), a customer who lacks that tag shows a small amber "Won't earn points" note here, so you know this sale won't accrue points before you attach them.
From this card you can:
- Tap Attach Customer to link them to the current order.
- Tap the pencil icon next to the name to edit their details.
- Tap the back arrow to return to the search list.
4. Creating a new customer
If the customer isn't in the system yet, tap Add New Customer at the bottom of the search list. If you had typed a name in the search field, the form pre-fills the name for you.
Fill in:
- Name (required)
- Phone Number (optional, but needed for SMS notifications)
Tap Create & Attach to save the new customer and link them to the order in one step.
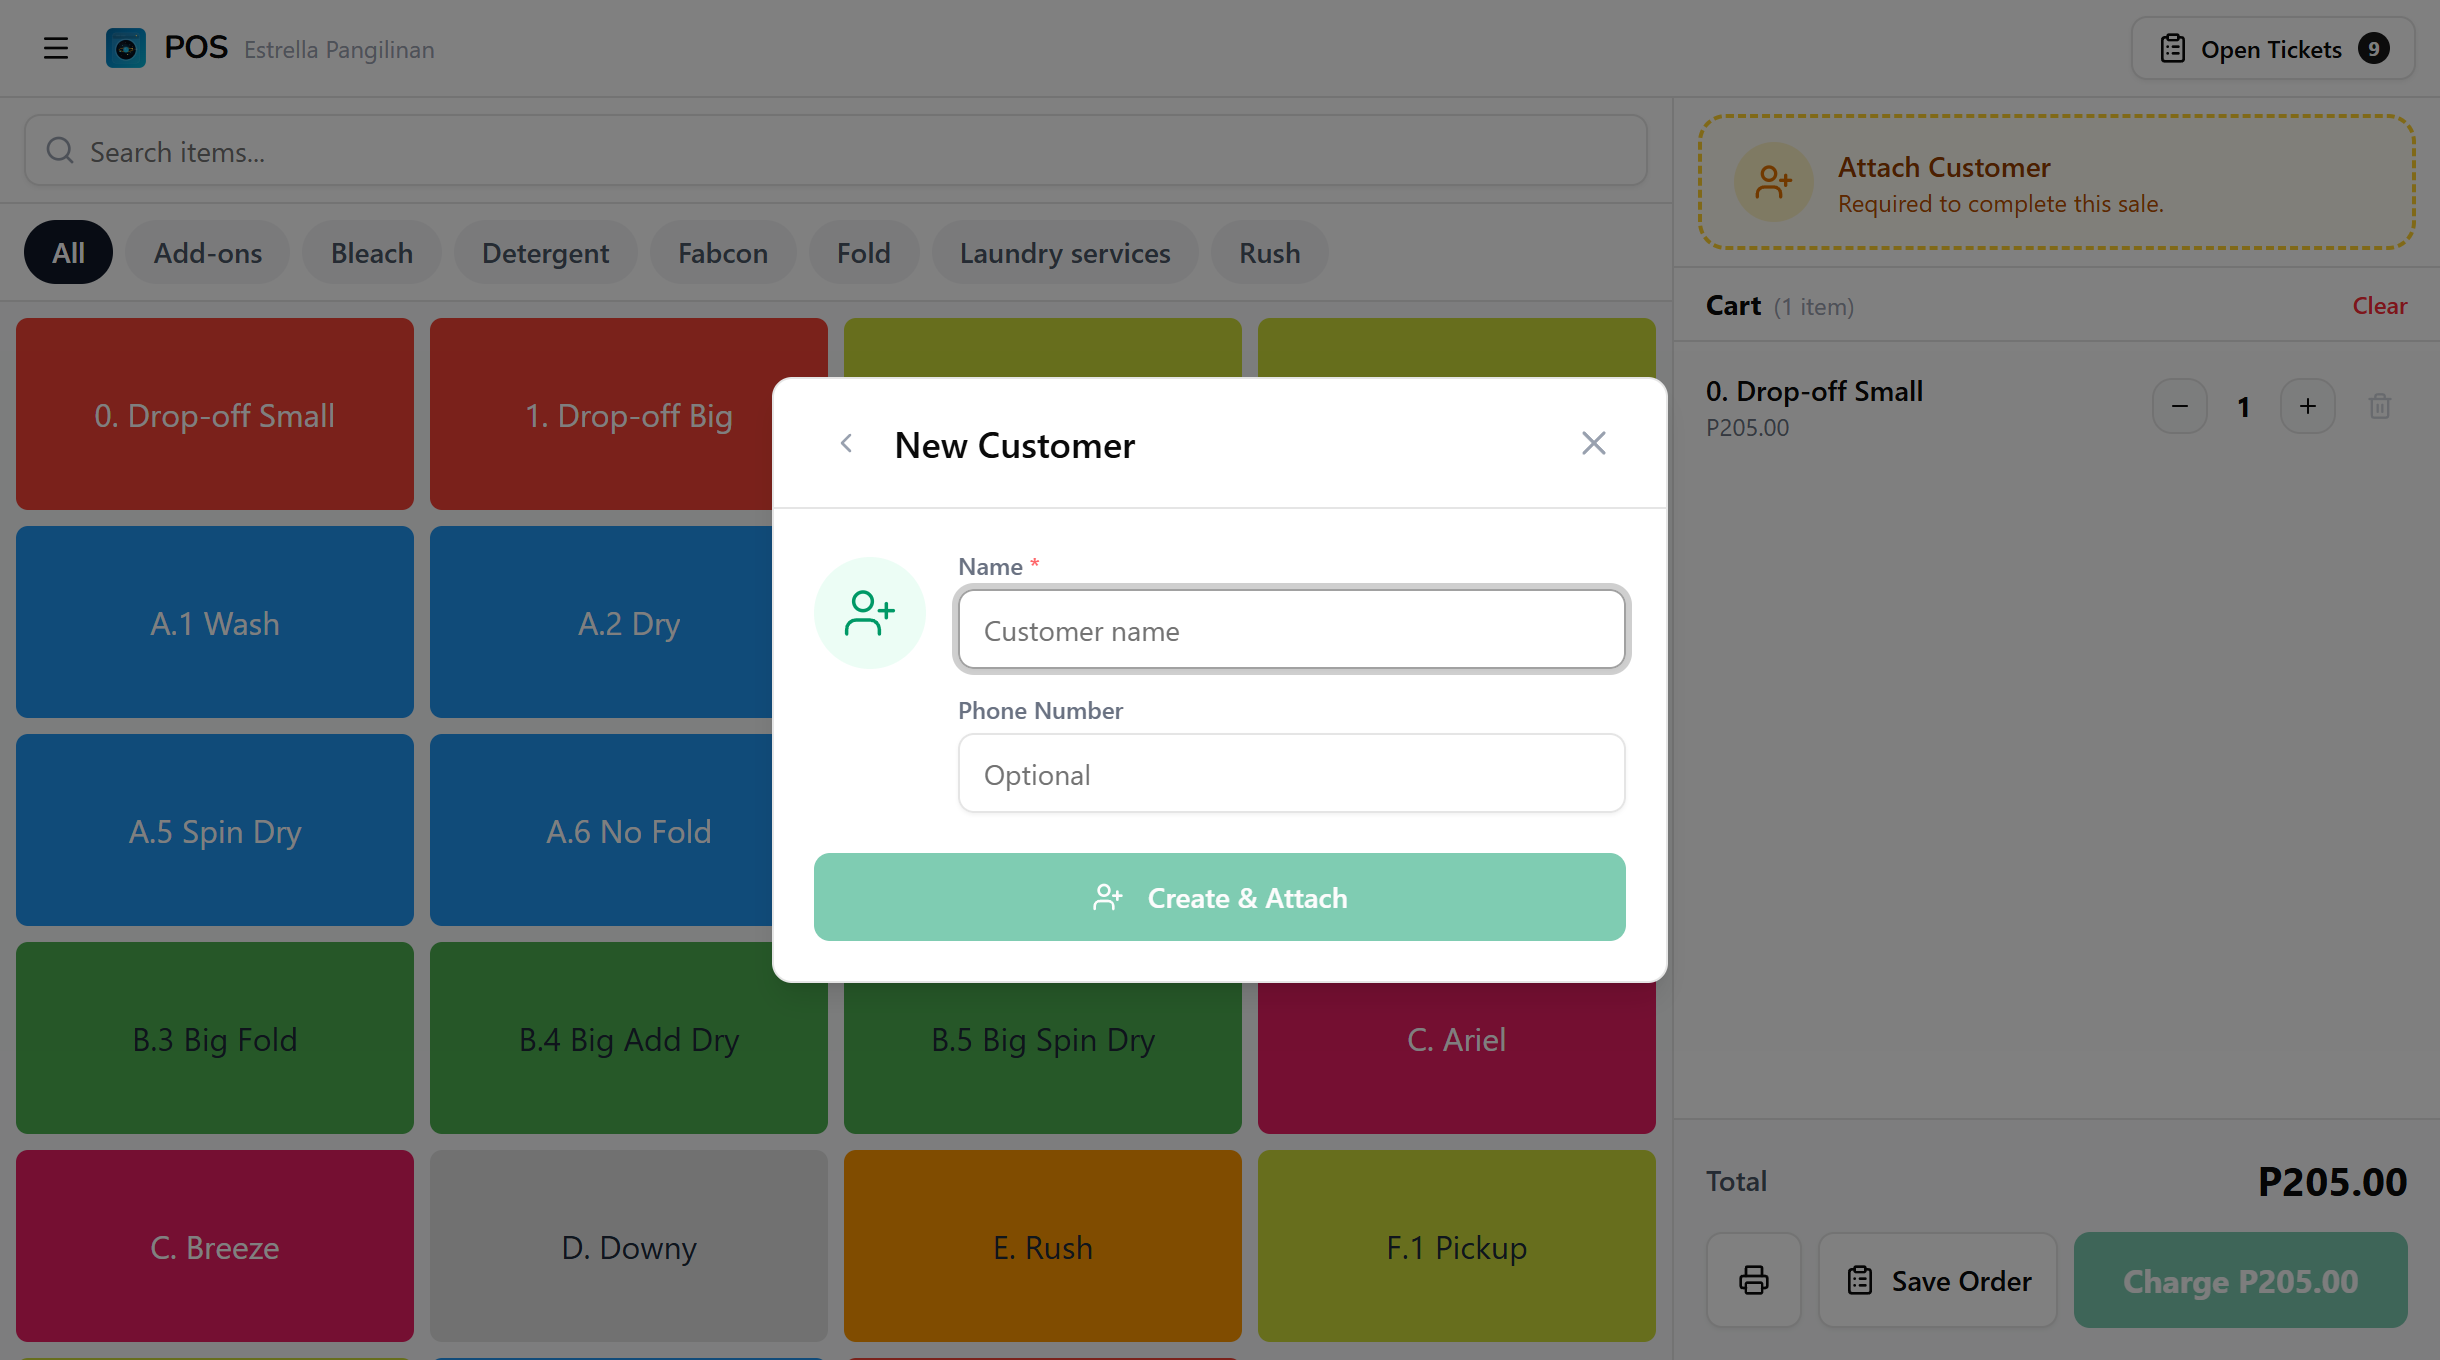
A phone number is optional, but a customer with no phone number cannot receive SMS notifications. See SMS Notifications for how the order detail page reports each SMS state.
5. Editing a customer
From the detail card, tap the pencil icon next to the customer's name. The edit form lets you update the Name and Phone Number. The stats (visits, points, first visit) show below the form but are read-only.
If your shop uses customer tags, the edit form also shows them as toggle chips under the fields. Tap a chip to add or remove that tag from this customer. Cashiers can apply the tags your shop has already created but can't create, rename, or delete them, that's done on the dashboard Customers page. The toggles only appear once your shop has at least one tag.
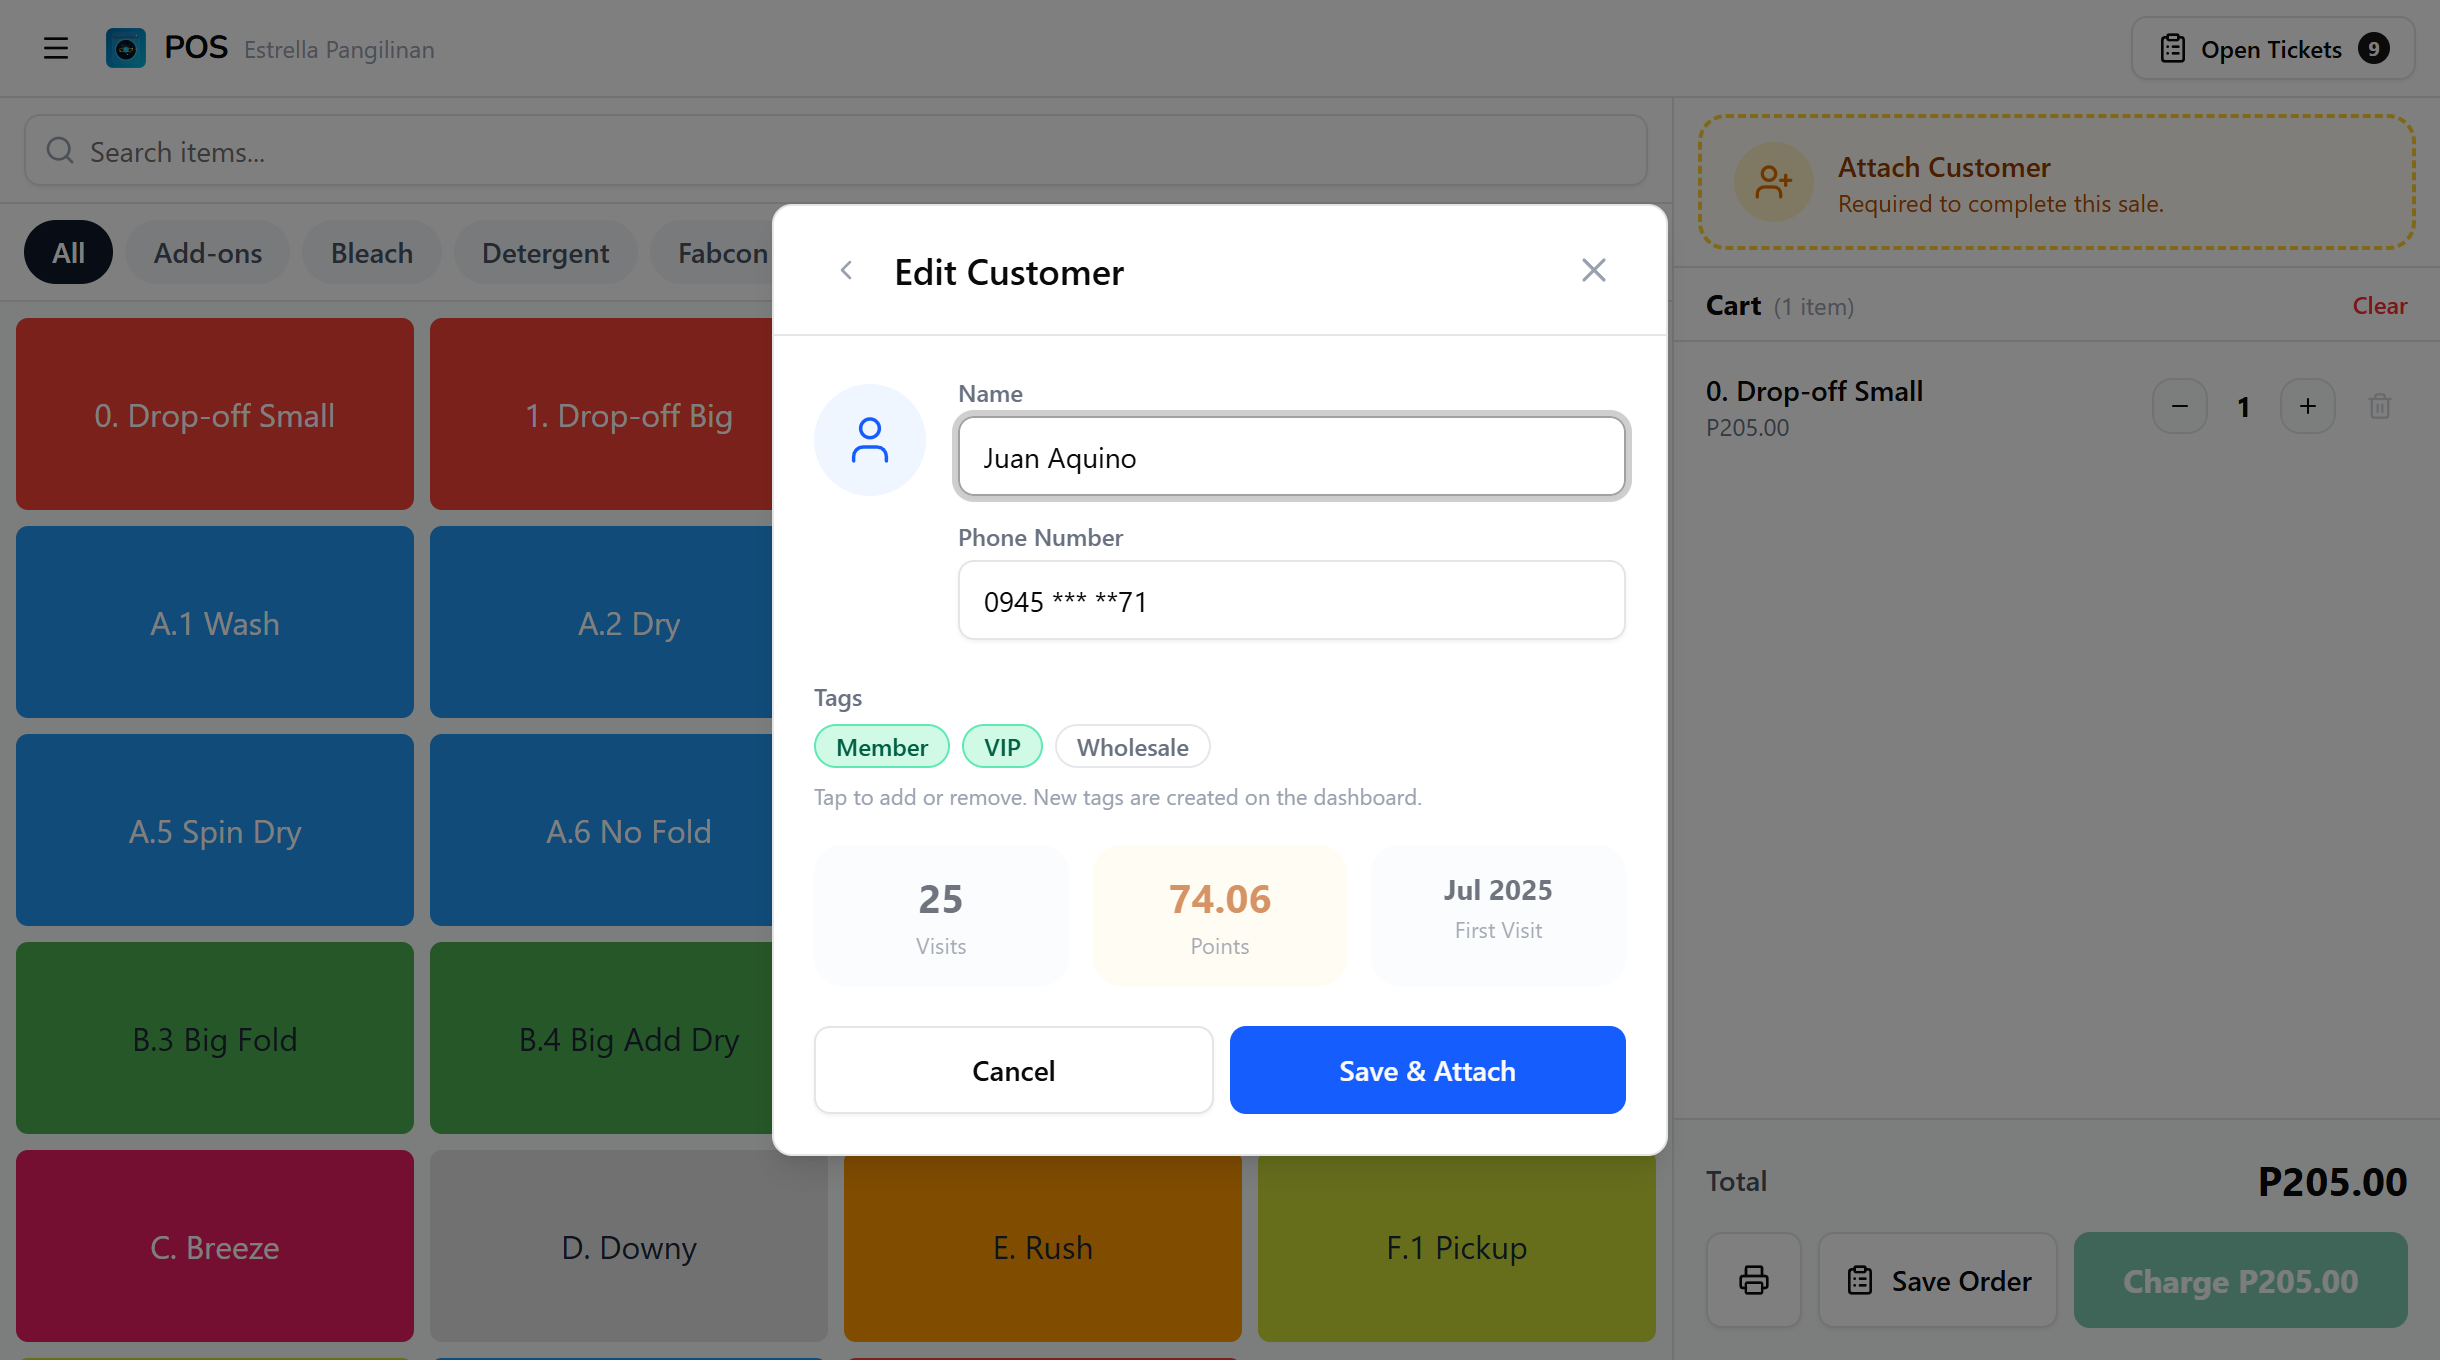
Tap Save & Attach to save the changes and attach the customer in one step. Tap Cancel to go back without saving.
6. The attached customer
Once attached, the customer card replaces the Attach Customer button in the cart panel. It shows the customer's name and phone number, a points badge when they have loyalty points, and an X button to detach. Any tags the customer carries show as chips on the card, and the amber "Won't earn points" note appears here too when loyalty is restricted to a tag this customer doesn't have.
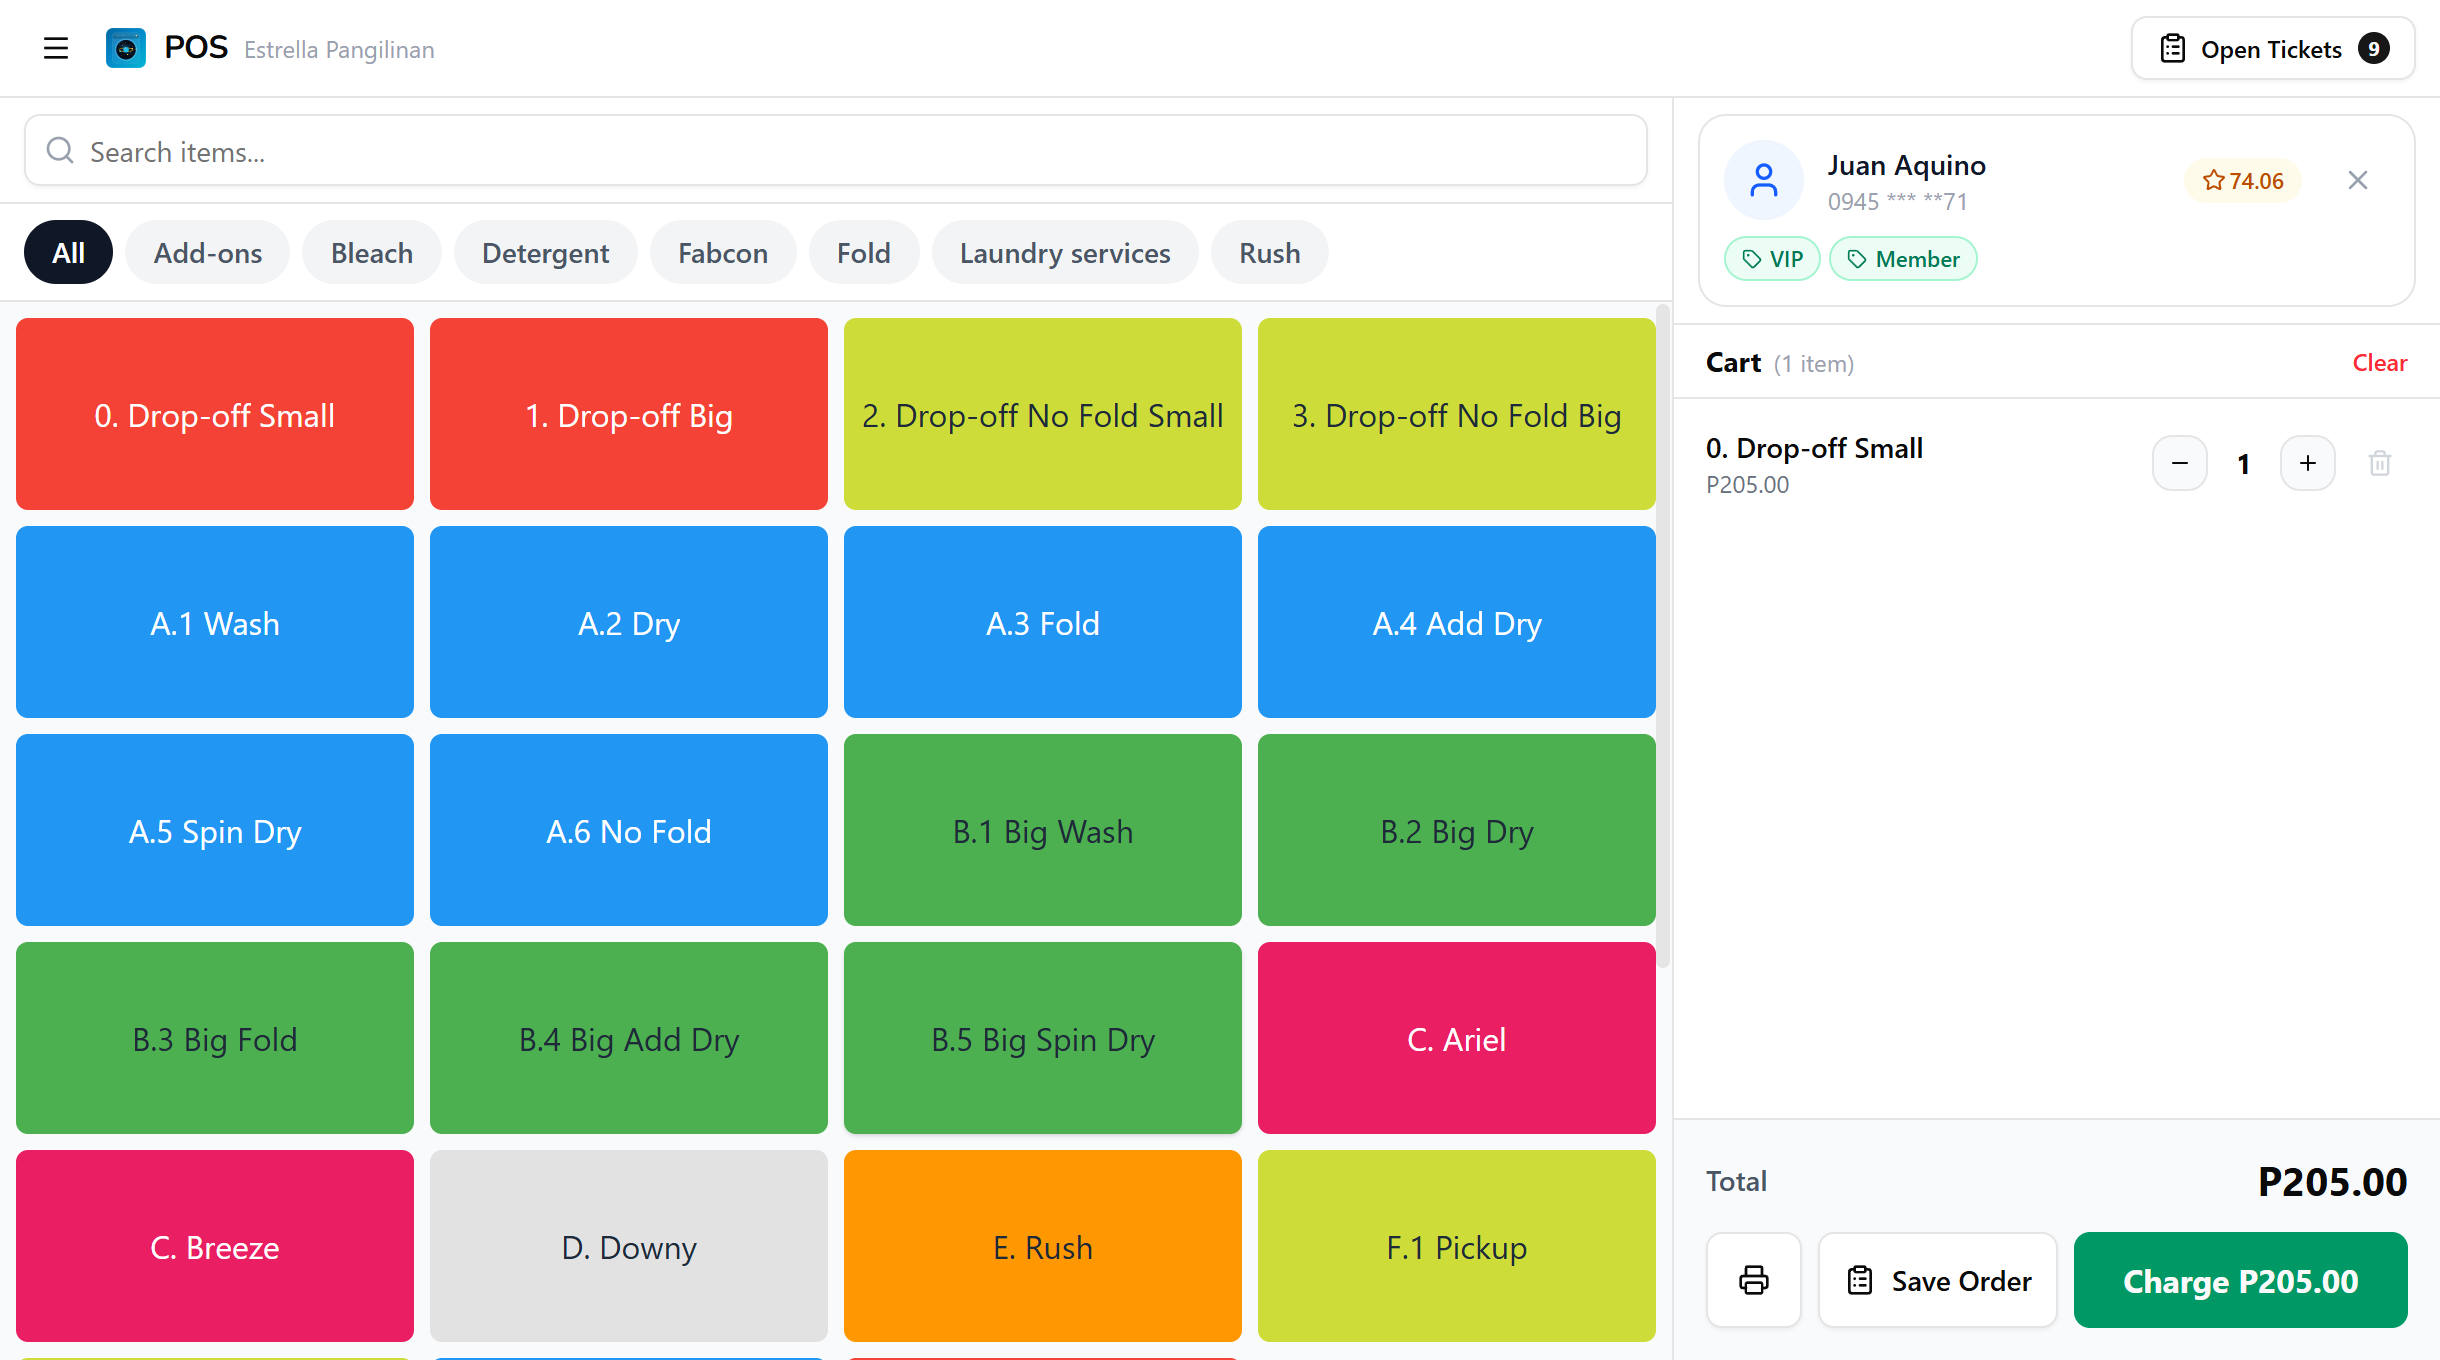
Tap the customer card to reopen the dialog and switch to a different customer. The attachment is held with the cart and is written to the order when you save the ticket or charge.
7. Detaching a customer
To remove the attached customer, tap the X button on the right side of the customer card. The Attach Customer button reappears and the order is no longer linked to anyone. If your shop requires a customer to charge, the Charge button disables again until you attach someone.
8. Why attach a customer?
| Benefit | What it does |
|---|---|
| Loyalty points | Customers earn points on every purchase and redeem them for discounts. If your shop limits earning to a tag, only customers with that tag earn, see Loyalty Program |
| Order history | Every order linked to the customer shows up in their profile in the dashboard |
| SMS notifications | Order status updates go to the customer's phone. See SMS Notifications for sender setup and the per-state reference |
| Required for drop-off | Orders with drop-off items need a customer attached before you can charge |
Common issues
"The dialog opens but shows no customers"
If you see a "no permission to view customers" panel instead of the search list, your role lacks Search customers. Ask an Owner or Admin to grant it in Roles & Permissions.
"I don't see Add New Customer or the edit pencil"
Creating and editing customers needs Manage customers. Without it you can still attach an existing customer, but the Add New Customer button and the edit pencil stay hidden. Ask an Owner or Admin to grant the permission.
"I attached a customer but it didn't save"
Attaching links the customer to the cart in front of you. The link is only written to the order when you Save Order or Charge. If you clear the cart or leave the register first, the attachment goes with it.
"The Charge button is still greyed out after attaching"
Charge needs at least one item in the cart as well as a customer when your shop requires one. Add an item, confirm a customer is attached, and Charge enables.
What's next?
- Register: the full guide to building a cart and saving the ticket.
- Processing Payments: open the checkout from Charge and take payment.
- Open Tickets: find and charge orders you saved earlier.
Stuck? Email [email protected]. The founder reads every message.