Vault Management
Track every peso your shop holds outside the active cash drawer: shift payouts waiting to be verified, manual deposits, owner withdrawals, and adjustments. The vault is the single source of truth for cash on hand across all your stores. When a cashier closes a shift, the cash they hand off creates a vault record automatically. You then verify it, withdraw it, or adjust it. About 3 minutes.
Navigate to Cash Control > Vault in the dashboard to open it.
Viewing the vault, verifying payouts, withdrawing, and adding or editing records all require the Manage vault permission (vault:manage). Owners, Admins, and Managers have it by default. There is no read-only level today, so anyone with this permission can do everything on the page. Grant it to other roles in Dashboard → Roles & Permissions.
Before you start
The vault fills itself from shift closes, so the day-to-day workflow only kicks in once your cashiers are opening and closing POS shifts. Each shift close hands its cash off to the vault as a new record. If you have never closed a shift, the table will be empty and there is nothing to verify yet. See Shifts for how a close works at the counter.
You can also add records by hand for cash events the system did not create, so you do not have to wait for a shift close to start using the vault.
The vault tracks cash for every store under your shop. If you run more than one branch, use the global store selector in the dashboard header to focus on a single branch before you verify or withdraw. Pick All Stores to see the full picture.
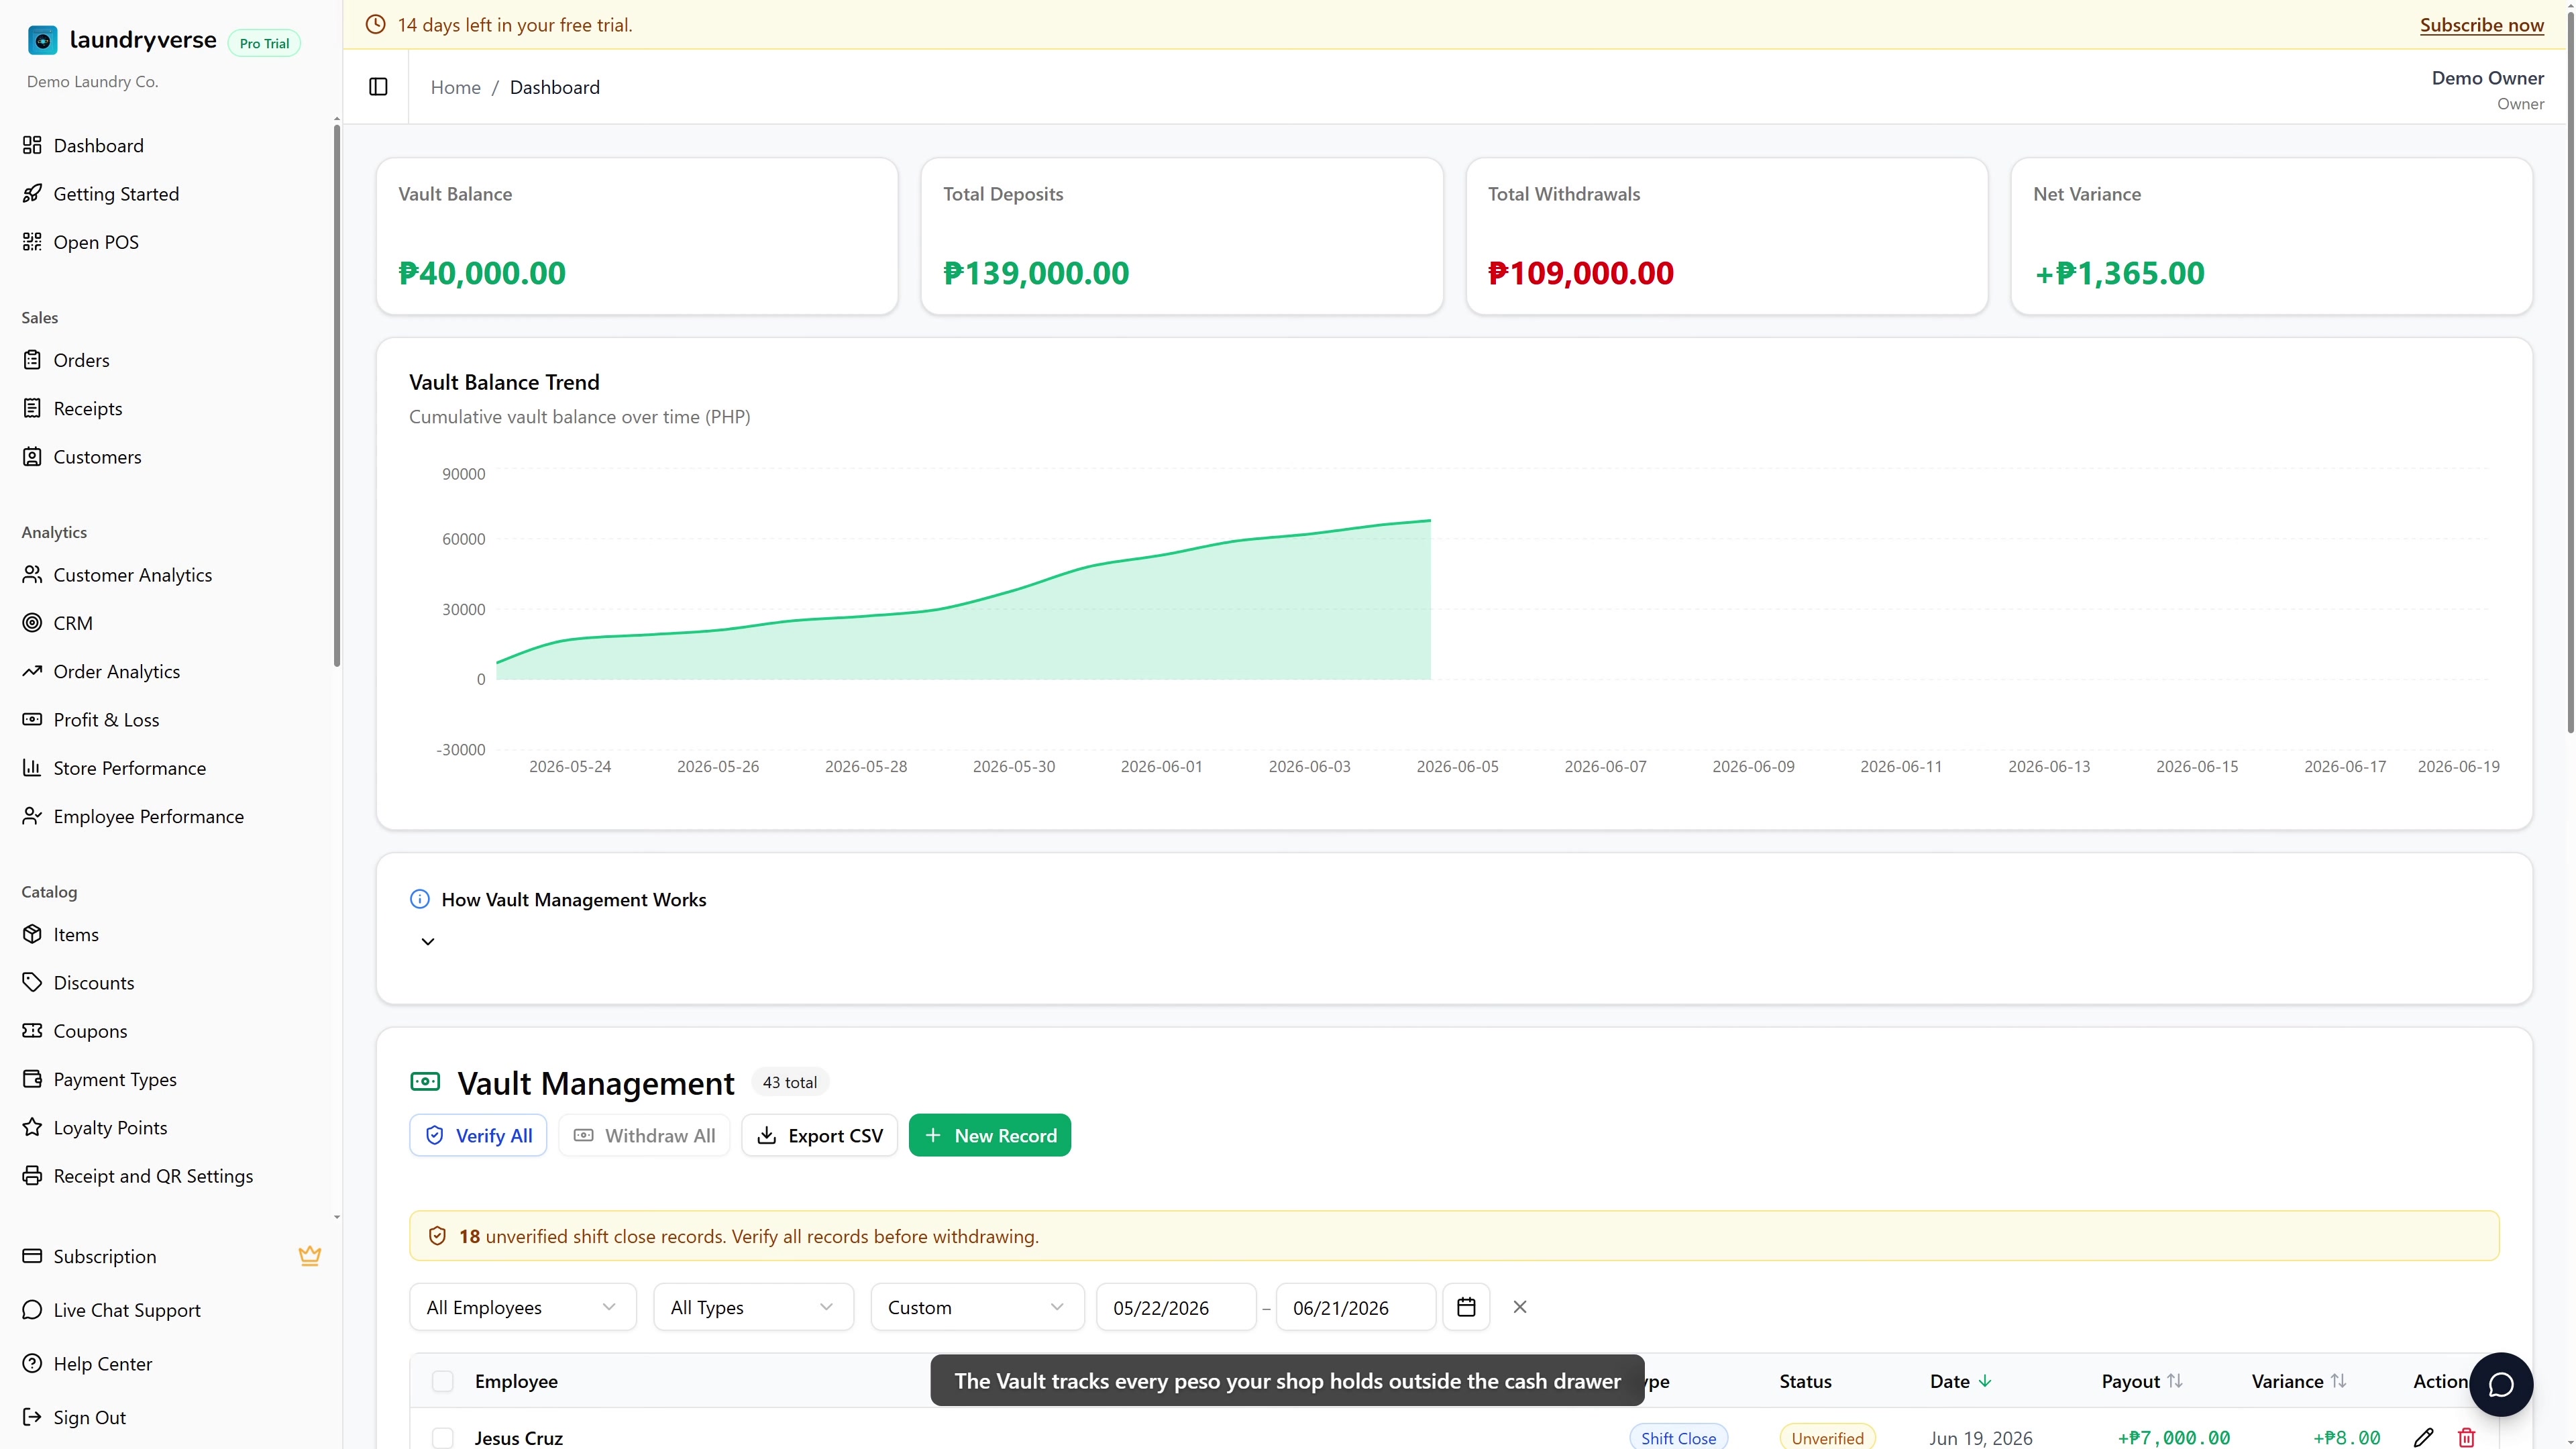
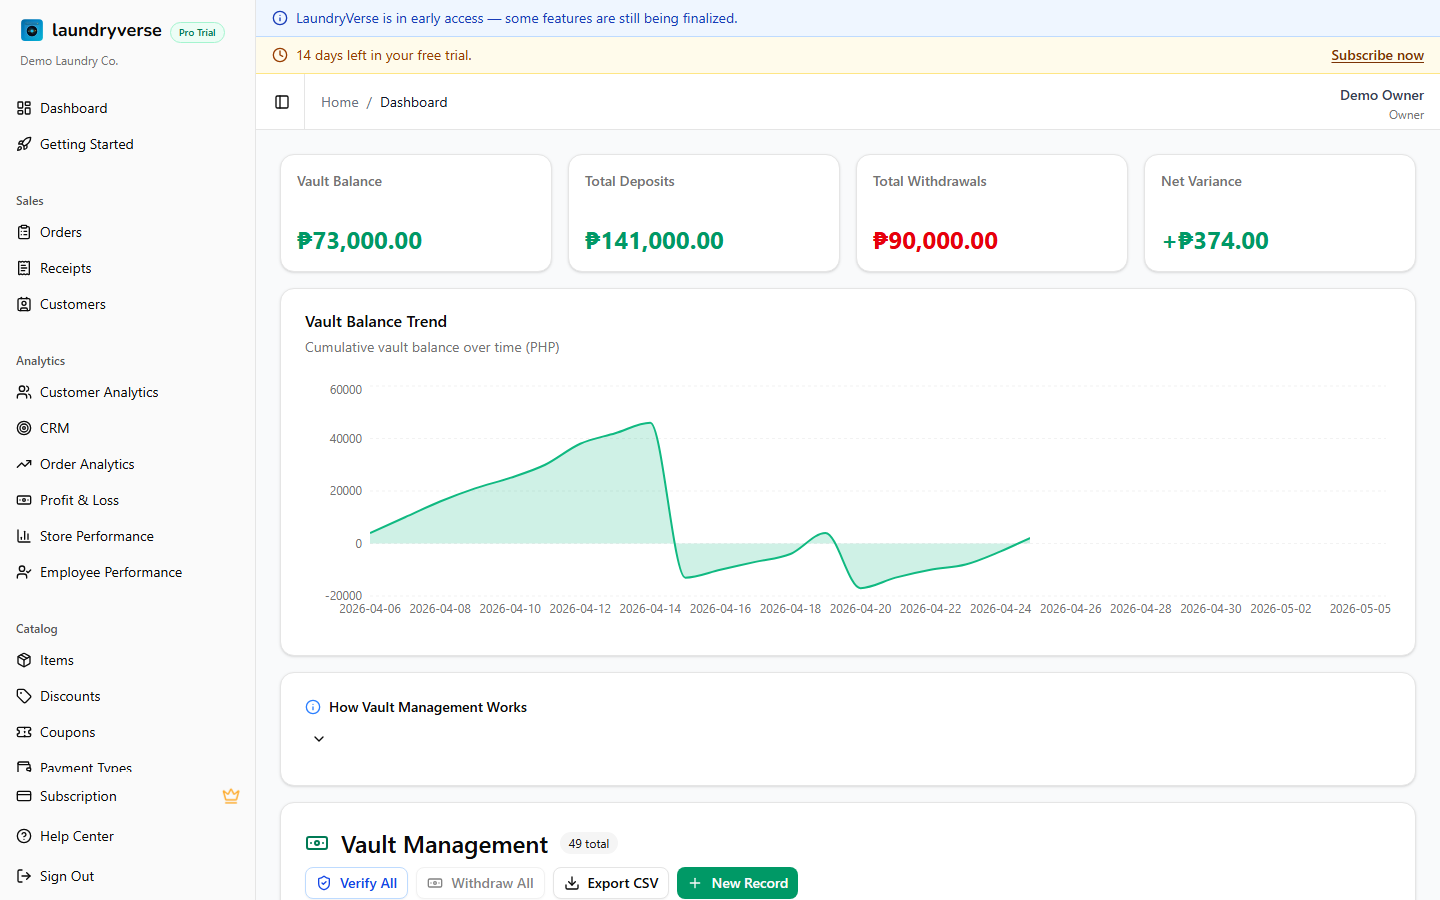
1. Anatomy of the Page
The page has four blocks stacked top-to-bottom:
| Block | What it shows |
|---|---|
| Summary cards | Total deposits, total withdrawals, current balance, unverified count |
| Chart | 30-day cash flow, green bars for deposits, red for withdrawals |
| How Vault Management Works | Collapsible primer (already covered on this page) |
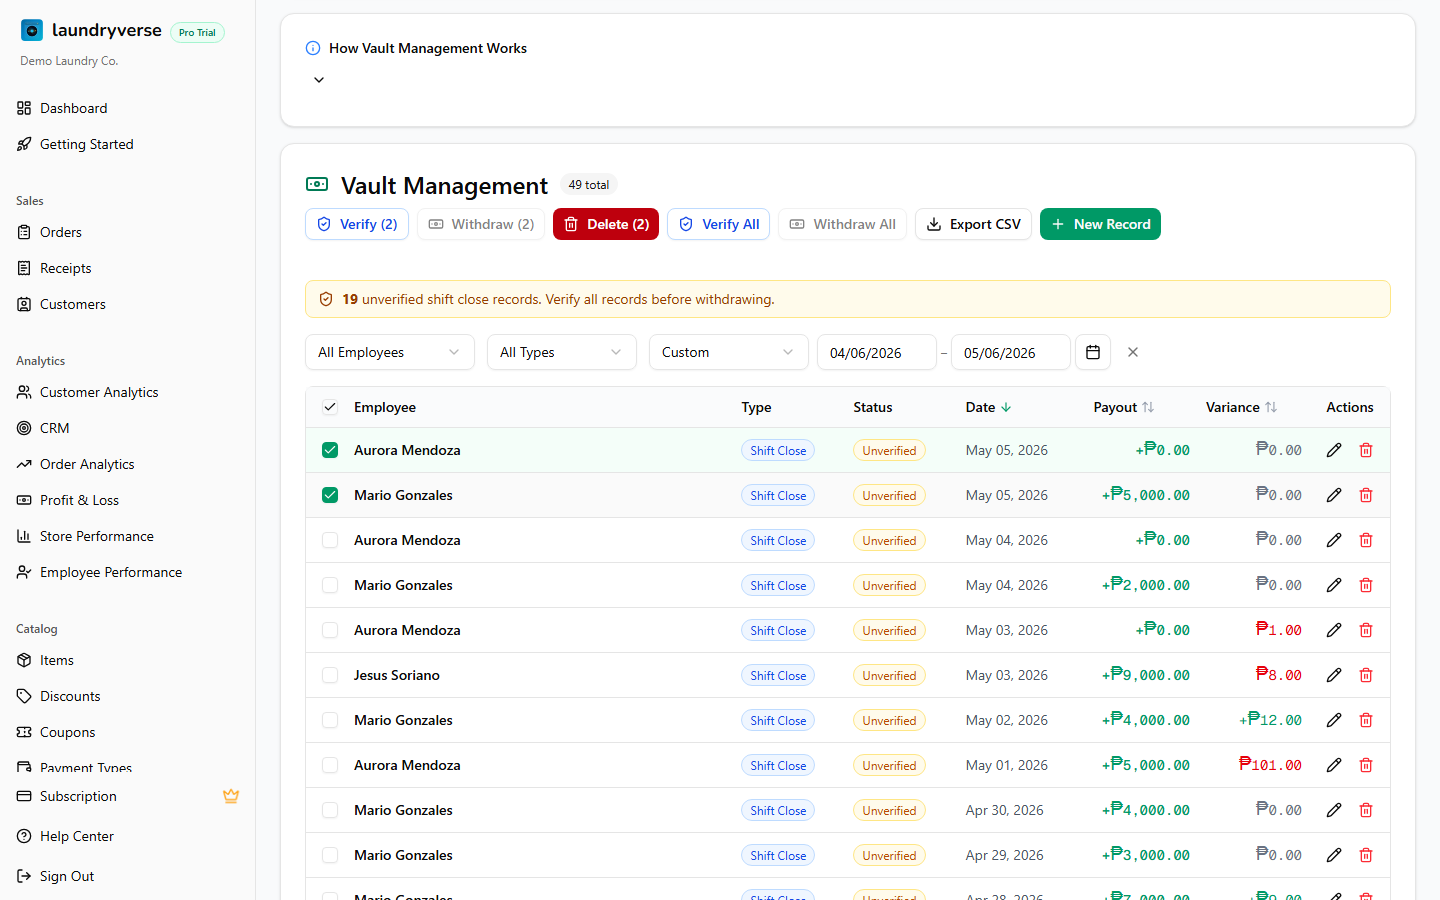
| Records table | Every cash event with type, status, employee, amount, variance |
2. The Four Record Types
| Type | Source | Effect on balance |
|---|---|---|
| Shift Close | Auto-created when an employee closes a POS shift | Adds the payout amount |
| Deposit | Manual entry (e.g. recording cash you found in storage) | Adds the amount |
| Withdrawal | Owner takes cash out (personal use, supplier, bank deposit) | Subtracts the amount |
| Adjustment | Manual correction (e.g. tagging a counting error) | Adds or subtracts |
Shift Close records carry a Variance column, which is the actual cash counted minus the expected cash from the shift. A red minus means the cashier was short. A green plus means there was extra.
3. The Verify then Withdraw Workflow
This is the day-to-day routine and the reason the vault exists.
Step 1: Verify
When a shift closes, its record lands in the vault as Unverified. The amber banner at the top of the table tells you how many.
- Pick the rows you want to check (or skip selection).
- Cross-check actual cash and variance against the physical envelope or deposit slip.
- Tap Verify (N) to mark the selected rows checked, or
- Tap Verify All to mark every unverified shift-close record across the current filter.
Once a record is verified, the Status badge turns green. Verified records can be withdrawn. Unverified ones cannot.
Step 2: Withdraw
Verified payouts represent cash that is still physically in your hand (or in a safe). Withdrawing clears them out of the running balance and creates a single Withdrawal record.
- Withdraw (N) removes selected verified rows only.
- Withdraw All removes every verified record matching the current filter.
Both ask for confirmation before creating the withdrawal record. The new Withdrawal row appears at the top of the table with a red minus amount.
Withdraw at the same cadence you bank-deposit, daily, weekly, whichever fits. The withdrawal date on the record is the date you press the button, so it lines up with your deposit slip.
4. Adding Records Manually
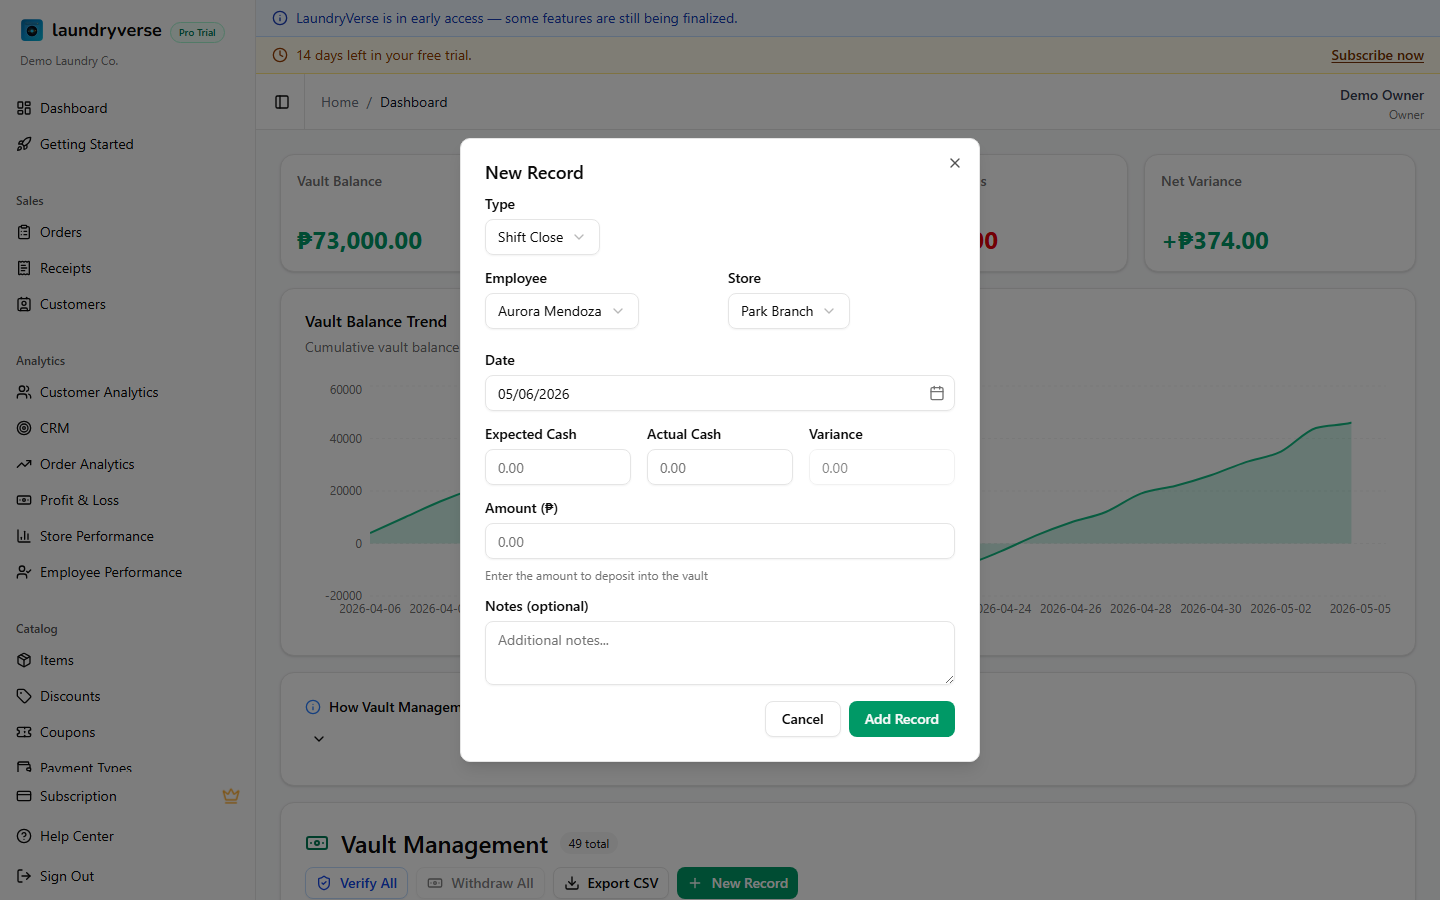
Tap + New Record for any cash event the system did not auto-create.
| Field | When to use |
|---|---|
| Type | Pick Manual Deposit (cash entering vault), Manual Withdrawal (owner takeout), Adjustment (correction), or Shift Close (back-fill a missed close) |
| Employee | Who handled the cash |
| Store | Which branch the cash came from or went to |
| Date | When the cash event happened (defaults to today) |
| Expected / Actual / Variance | Only for Shift Close, the same fields as the POS close screen |
| Amount | The peso amount that hits the vault (positive number, the type controls the sign) |
| Notes | Free text, shows up under the employee name in the table |
5. Filtering & Reporting
Three filters above the table:
- Employee narrows to one cashier (e.g. before a payroll review).
- Type shows only Withdrawals, only Adjustments, and so on.
- Date range defaults to the last 30 days.
If you have multiple stores, the global store selector in the header also filters every block. Summary cards, chart, table, and any Withdraw All or Verify All action only see the selected store. Pick All Stores to view the entire vault.
Export to CSV from the toolbar (visible if your plan includes data export).
6. Editing & Deleting
Each row has a pencil and trash icon:
- Edit opens the same form pre-filled. Useful for fixing typos or correcting an Adjustment.
- Delete removes the record permanently and updates the running balance.
Editing an already-withdrawn shift close record will not reopen the withdrawal. Withdrawals stand on their own. Adjustments are a cleaner way to record corrections after the fact.
Common issues
"The vault table is empty"
The vault fills from shift closes, so it stays empty until a cashier closes their first POS shift. If you want cash in there before then, tap + New Record and add a Manual Deposit by hand.
"The Withdraw button is greyed out"
You can only withdraw verified records. Verify the shift-close rows first (their Status badge turns green), then the Withdraw action becomes available.
"Verify All or Withdraw All did fewer rows than I expected"
Both actions only touch records that match the current filter. Check the Employee, Type, Date range, and the store selector in the header. Switch to All Stores and widen the date range if you meant to cover everything.
"Withdraw says my payouts belong to different stores"
A withdrawal is created per store. If your selection mixes branches, filter to one store using the header store selector, withdraw it, then repeat for the next store.
"A withdrawal still shows after I edited the shift close"
That is expected. A withdrawal is its own record and editing the original shift close does not reverse it. Use an Adjustment to record the correction instead.
"I can't see the Export to CSV button"
CSV export is part of a higher plan. If the button is missing, your current plan does not include data export. The rest of the vault still works without it.
What's next?
- Shifts: how a shift close hands cash off to the vault and how pay-ins and pay-outs affect expected cash.
- Shift Reports: review the cash counted at each close that feeds the vault.
- Expenses: track money going out of the shop alongside your vault withdrawals.
- Roles & Permissions: lock vault access to the right people.
Stuck? Email [email protected]. The founder reads every message.