Register
The Register is where every sale starts. Browse the item catalog on the left, tap items into the cart on the right, attach a customer, then either save the order as an open ticket or charge it now. This guide covers building the cart and saving the ticket. Taking payment is its own guide. About 3 to 4 minutes.
Using the register at all requires the Use POS register permission (pos:register). The default Owner, Admin, Manager, and Cashier roles all hold it, because a cashier needs to ring up sales.
Editing an item that came from a saved open ticket is split into two permissions:
- Add items to open tickets (
orders:items_add) covers adding a line or increasing a quantity. All four default roles hold it, so a cashier can always extend a saved ticket with another wash. - Remove items from open tickets (
orders:items_remove) covers removing a line, lowering a quantity, or dropping a price on a saved ticket. Only Owner and Admin hold it by default. Cashier and Manager do not. This is deliberate. Reducing a saved ticket is the edit-down skim surface, so it stays behind an explicit owner grant.
This split only applies to rows that are already on a saved ticket. Items a cashier just tapped into a fresh cart can always be removed before saving, because nothing has been written yet.
Applying discounts and coupons at the register is gated by a third permission, Apply discounts (pos:discounts), also held by all four default roles. Discounts live in the checkout, covered in Processing Payments.
To change any of this, edit the role in Roles & Permissions.
Before you start
The register reads the device's catalog and records the sale against the active shift. You'll need:
- A device activated and an employee logged in. See POS Setup.
- An active shift open for the current employee. See Shifts.
- At least one item in your catalog. Items and categories are set up in the dashboard under Items.
The register works on every plan, including Trial. No subscription gate.
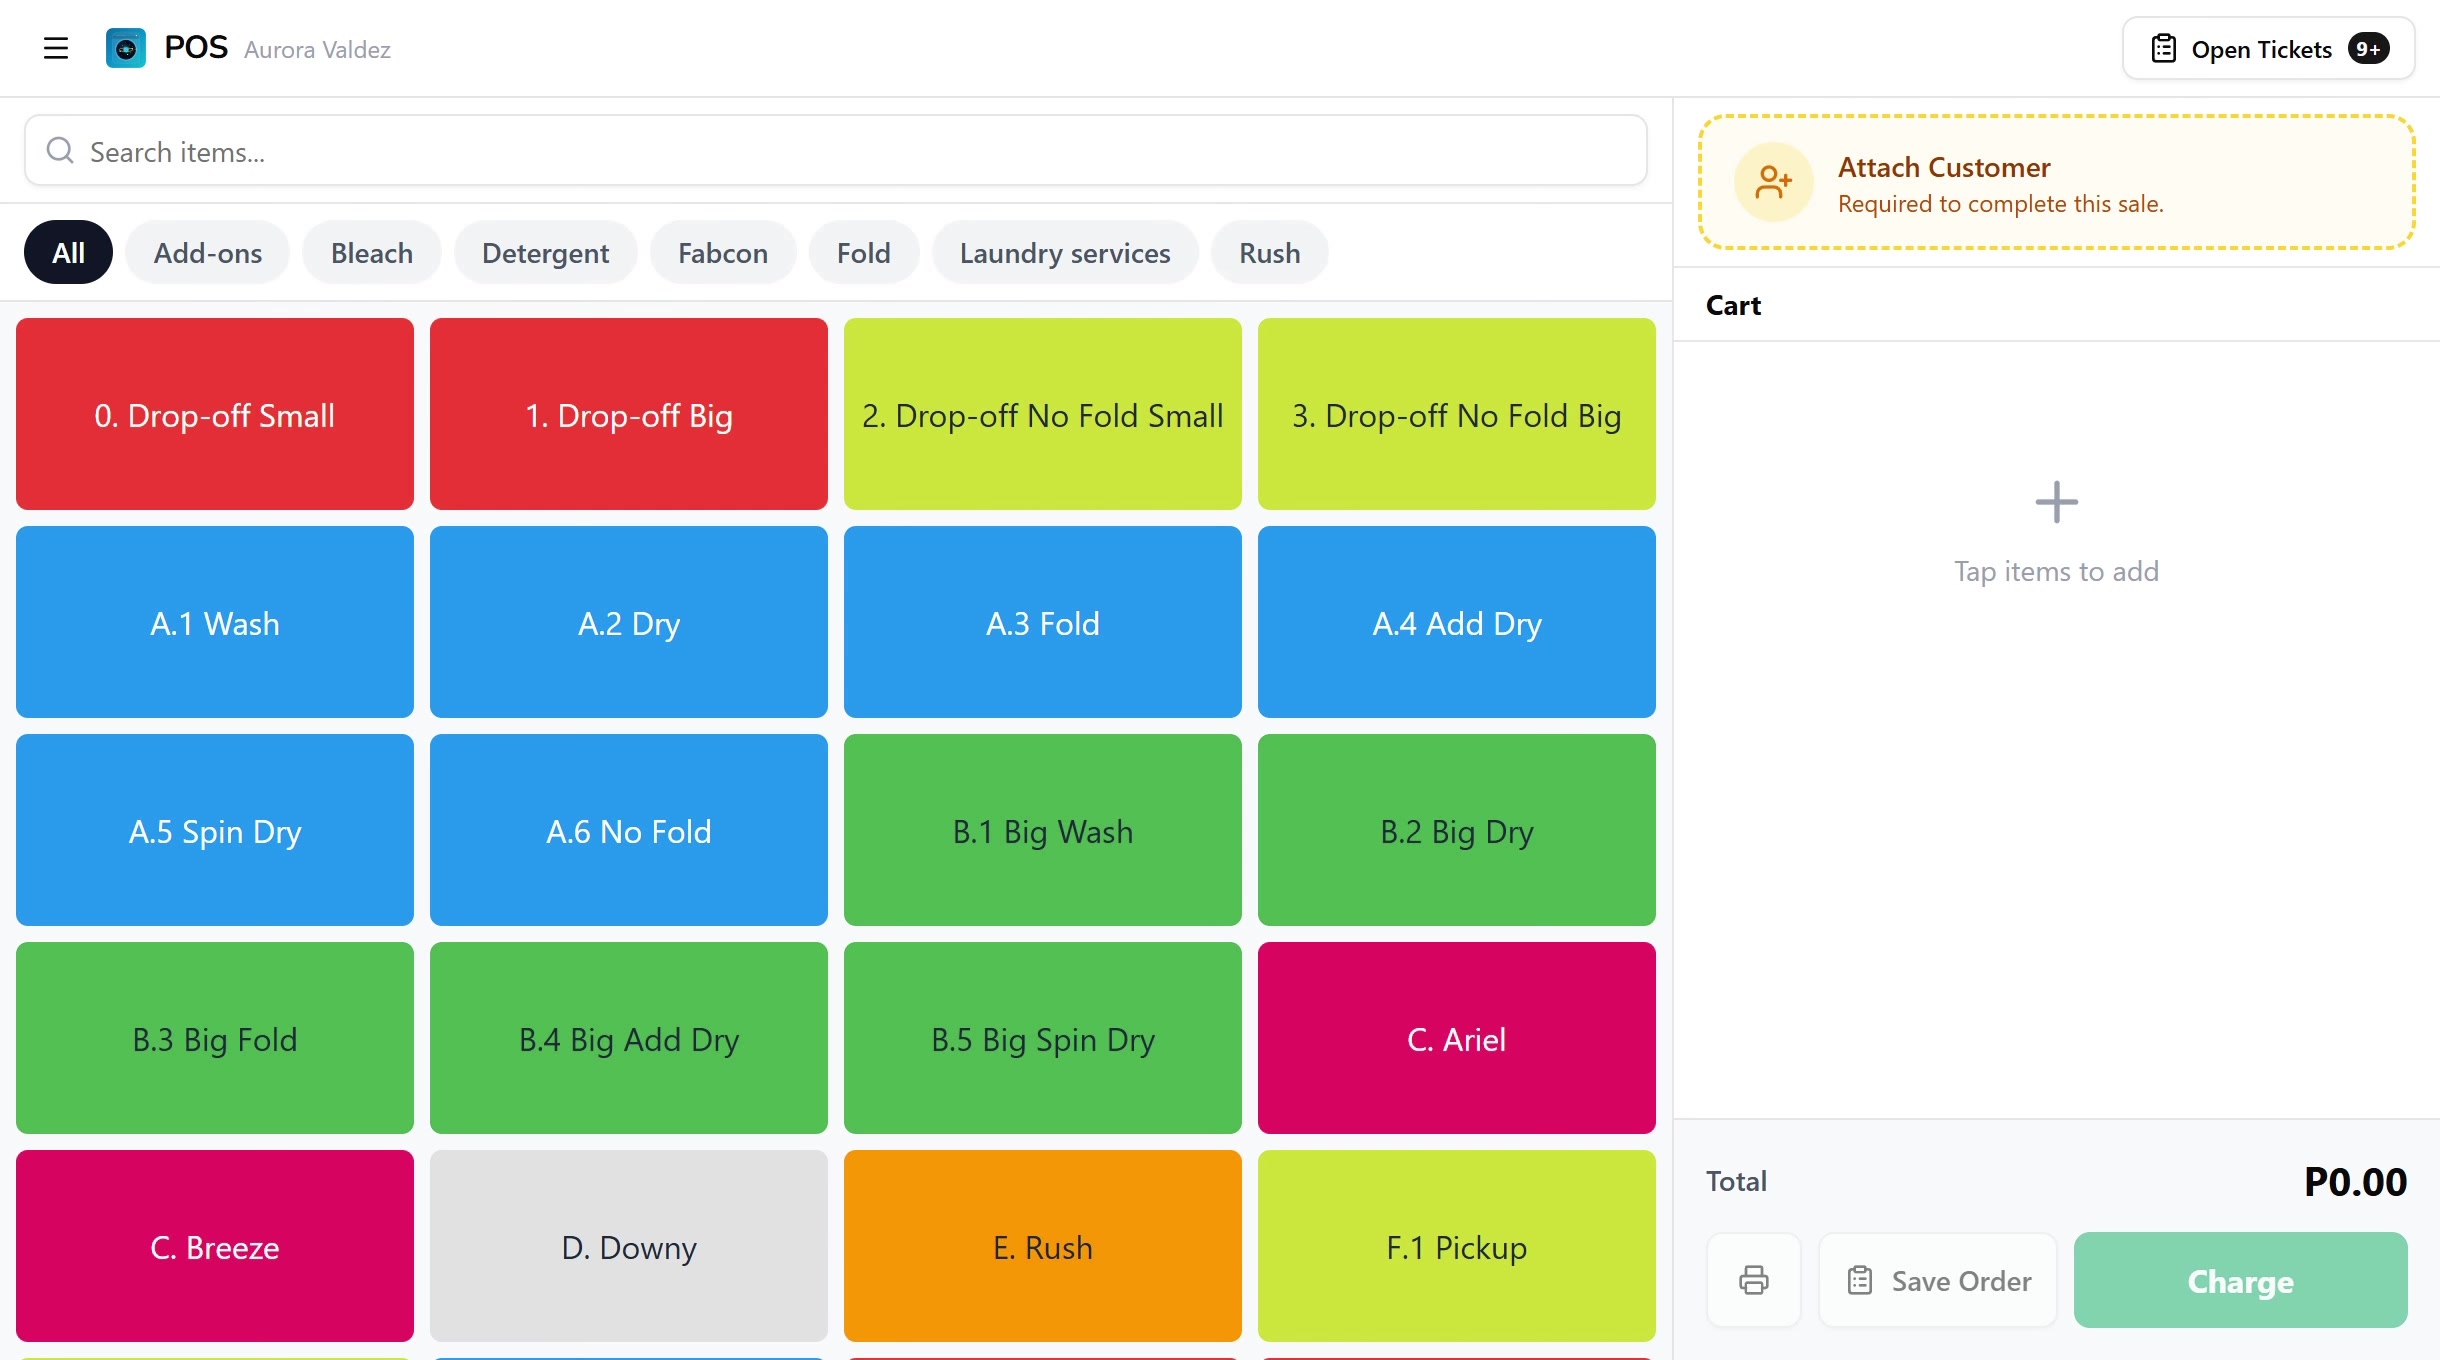
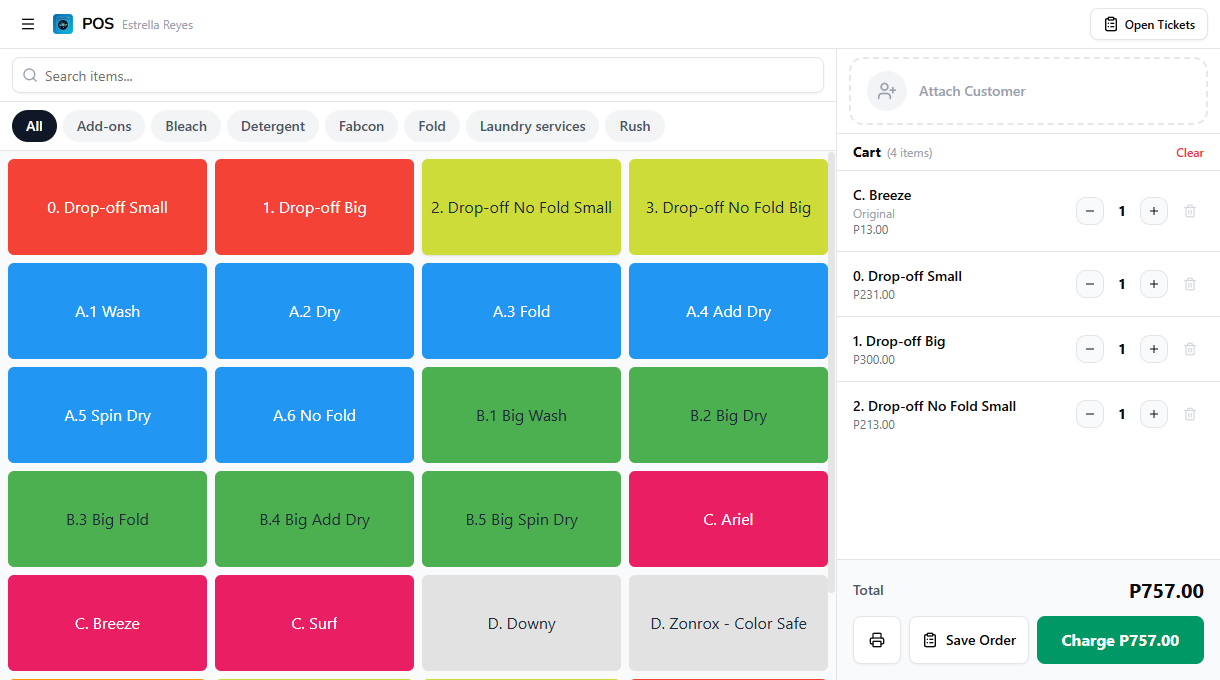
1. The register layout
The register splits into two areas. The left side is the item catalog with a search bar and category tabs. The right side is the cart, with the customer attachment at the top and the Total, Print Bill, Save Order, and Charge actions at the bottom.
| Area | Where | What it shows |
|---|---|---|
| Top bar | Top | Menu, POS logo, employee name, and the Open Tickets button |
| Search bar | Top of the left panel | Filters items by name as you type |
| Category tabs | Below the search bar | Pill buttons that filter the grid by category |
| Item grid | Left panel | Color-coded tiles, one per item, tap to add to the cart |
| Cart panel | Right panel | Attached customer, line items, the running total, and the action buttons |
On phones the right-side cart panel is hidden and a sticky bottom bar takes over with the running total and the Charge button. See Mobile cart below.
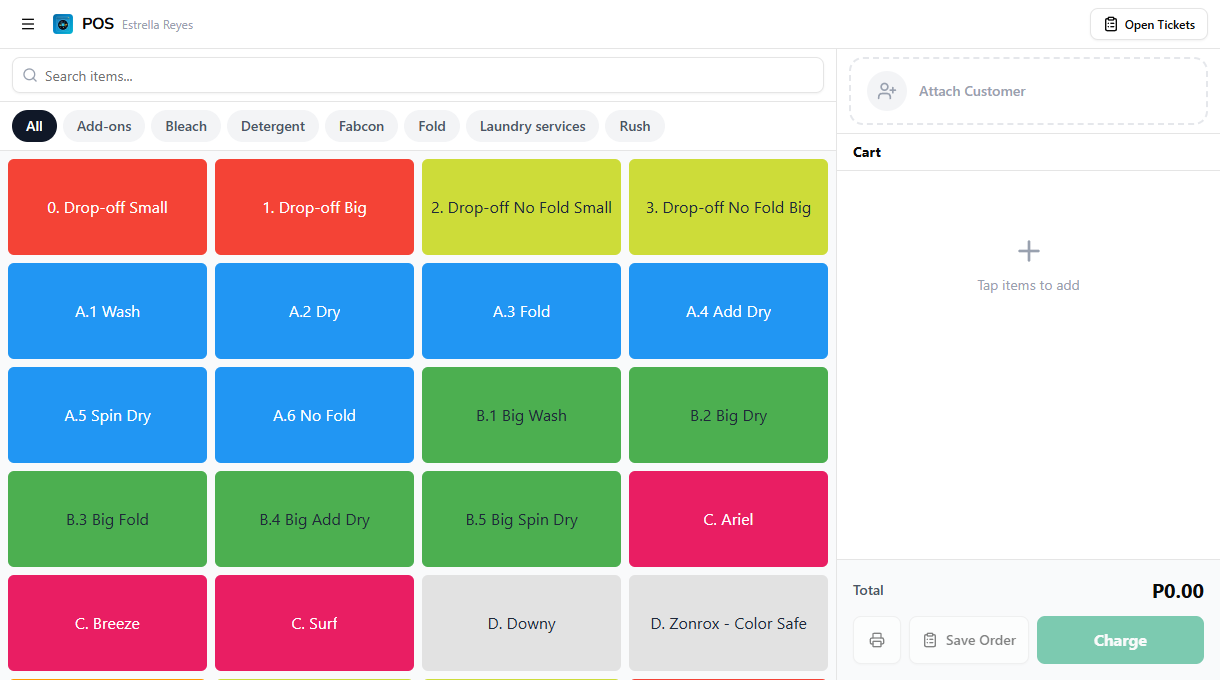
2. Browsing and searching items
Tap a category tab to filter the grid to one group of items. The All tab is selected by default and shows every item. The selected tab turns dark. Tap All again to clear the filter.

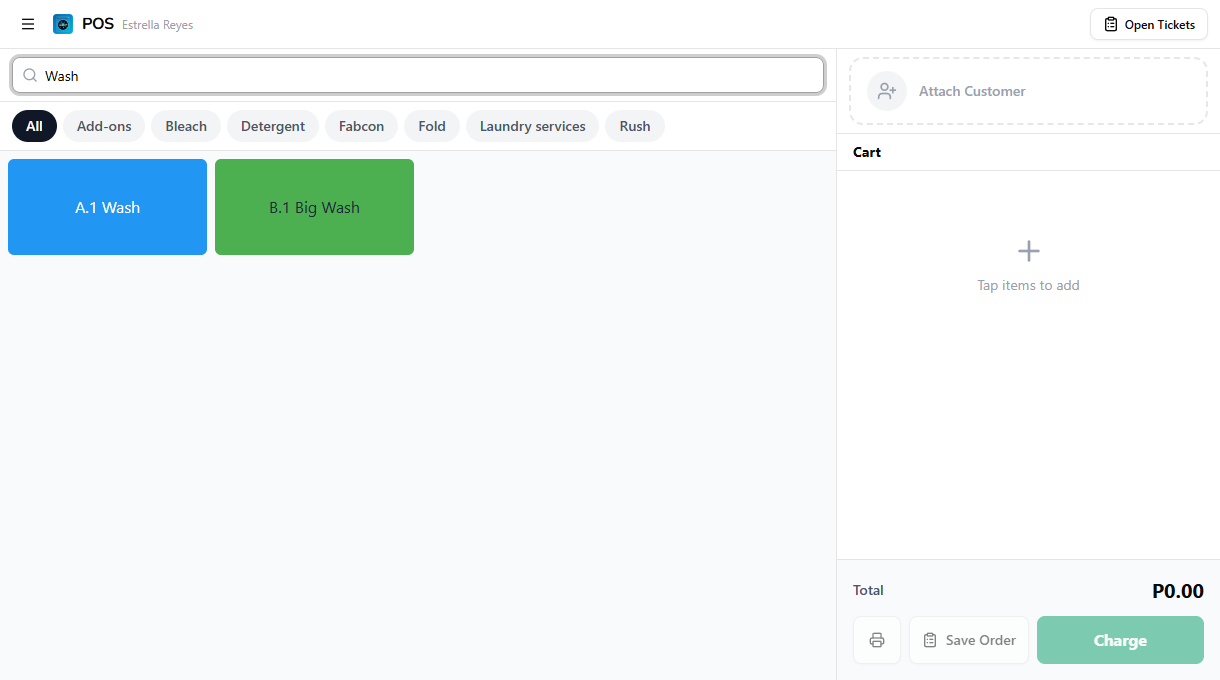
Type in the search bar to filter items by name. The grid updates as you type. Search works alongside the category filter, so if a category is selected, search narrows within that category. Clear the search field to bring the full list back.
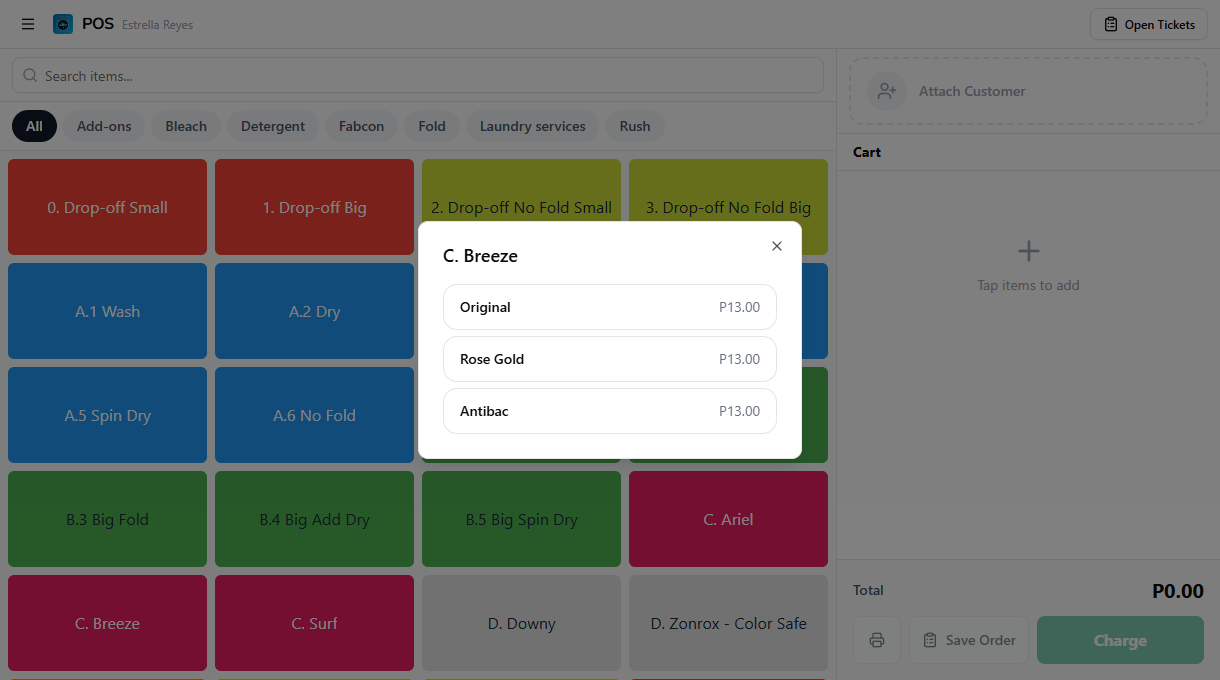
3. Picking a variant
Some items have more than one variant. A comforter wash might come in two sizes, each at a different price.
When you tap an item that has variants, a picker dialog opens instead of adding the item straight to the cart. Each row shows the variant name and price, plus a green count badge if that variant is already in the cart. Tap a variant to add one unit. Tap it again to add another.
Items priced by weight, or items with a variable price, open a small editor instead of adding directly. Enter the weight or the price, then tap Add to cart.
4. The cart
Every item you tap lands in the cart on the right. Tap a line to open its editor, or use the controls on the row.
| Action | How |
|---|---|
| Add an item | Tap a tile in the catalog |
| Increase quantity | Tap + on the cart row |
| Decrease quantity | Tap the minus button. At zero the line drops off |
| Edit quantity or price | Tap the item name to open the editor (price is only editable for variable-priced items) |
| Remove a line | Tap the trash icon on the row |
| Clear the whole cart | Tap Clear at the top of the cart |
For a variant item, the variant label shows under the item name in the cart. The Total at the bottom of the cart updates automatically as you add, adjust, or remove rows.
If you opened a saved open ticket and your role can add but not remove, the minus and trash buttons on the already-saved rows are greyed out and a short banner explains it. You can still add new rows freely. See the Who can do this note above for the permission split.
5. Attaching a customer
Tap Attach Customer at the top of the cart to link the order to a customer. This drives loyalty points, order history, and SMS notifications. By default a customer is required before you can charge, so the Charge button stays disabled until one is attached.
The full walkthrough for searching, creating, and attaching customers lives in Attaching Customers. For why a customer with no phone number won't get an SMS, see SMS Notifications.
6. Save as open ticket, or charge now
The cart footer has three actions. The two that finish the order are Save Order and Charge, and they do different things.
- Save Order writes the cart as an unpaid open ticket. No payment is taken. The order shows up in Open Tickets at the top of the register and on the Order Board right away, ready to charge when the customer comes back to collect. This is the normal flow for drop-off laundry that's paid on pickup.
- Charge opens the full-screen checkout to take payment now. The button shows the amount due. It stays disabled until the cart has at least one item and, if your shop requires it, a customer is attached.
Tap Save Order to hold the ticket without taking money:
To charge instead, tap the green Charge button. The checkout takes over from there, and the rest of that flow, payment types, amounts, split tender, and the receipt, is covered in Processing Payments.
7. Print Bill
The printer icon in the cart footer prints a draft bill, a pre-payment slip showing the current cart and total, so a customer can see the amount before deciding to pay. Printing the bill also saves the cart as an open ticket so the slip carries a ticket number.
Print Bill needs a paired thermal printer. See Printer Setup if you haven't connected one.
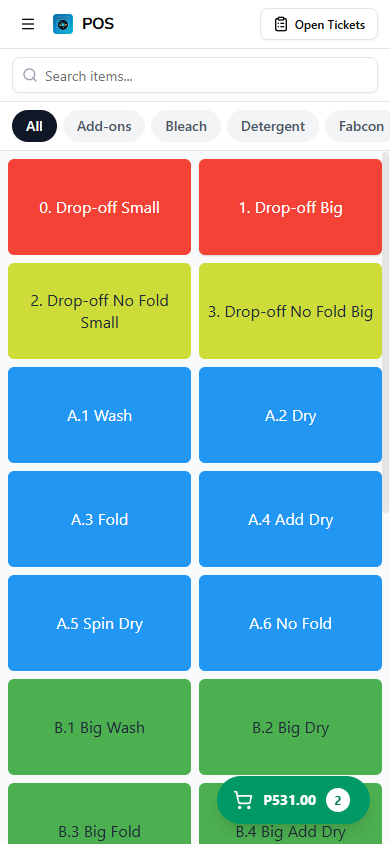
8. Mobile cart
On phones the right-side cart panel is hidden so the catalog fills the screen. In its place, a sticky bottom bar sits across the bottom of the register with:
- The running cart total on the left, so the cashier always sees what the customer owes as items go in.
- A green Charge button on the right. Tap it to open the checkout and take payment, the same flow as on a tablet.
- A subtle bump animation on the bar every time an item is added, so the running total catches your eye even when you're focused on the catalog.
Reviewing or editing the cart still works the same as on a tablet. Open the cart drawer from the bottom bar to adjust quantities, remove lines, attach a customer, or save the order as an open ticket. Charge stays one tap away in the sticky bar the whole time.
Common issues
"An item isn't showing in the grid"
Check the category tab and the search bar first. A selected category hides everything outside it, and a leftover search term filters the list. Tap All and clear the search to see the full catalog. If the item is still missing, it isn't in the catalog for this store yet. Add it in the dashboard under Items.
"I can't remove a line from a saved ticket"
If you opened the order from Open Tickets and the minus and trash buttons on the existing rows are greyed out, your role can add items but not remove them. That's the default for Cashier and Manager. Ask an Owner or Admin to take the item off, or to grant Remove items from open tickets in Roles & Permissions. Rows you added in this session are always removable.
"Tapping an item opened a dialog instead of adding it"
That item has variants, or it's priced by weight or by a variable amount. Pick the variant, or enter the weight or price, then tap Add to cart. The item lands in the cart after you confirm.
"Should I tap Save Order or Charge?"
Use Save Order when the customer is dropping off and will pay on pickup. The ticket waits in Open Tickets until then. Use Charge when the customer is paying now. Saving doesn't take any money, so a saved ticket is never marked paid until you charge it later.
"The Charge button is greyed out"
The cart is empty, or your shop requires a customer and none is attached. Add at least one item and tap Attach Customer, then Charge enables.
What's next?
- Processing Payments: open the checkout from Charge and take payment.
- Attaching Customers: search, create, and link a customer to the order.
- Open Tickets: find and charge orders you saved earlier.
- Order Board: track drop-off loads through wash, dry, and fold.
Stuck? Email [email protected]. The founder reads every message.