SMS Notifications
Send automated text messages to customers when their orders are ready for pickup. The full SMS feature lives in three places:
- Dashboard > SMS — sender name, master switch, message template, credits, test sends
- Dashboard > Orders — order detail page shows the SMS state for each packed order
- POS > Orders — same SMS state badges on the order detail page your cashiers see
This guide covers all three.
SMS notifications are available on all plans. You'll need to purchase SMS credits (₱0.60 per message) to send messages.

1. Setting Up SMS
Before you can send messages, you need an active sender name — this is the name that appears as the sender on your customers' phones (e.g., "MyLaundry" instead of a random number).
Activating SMS
When you first open the SMS page (Operations > SMS), you can choose between two sender options:
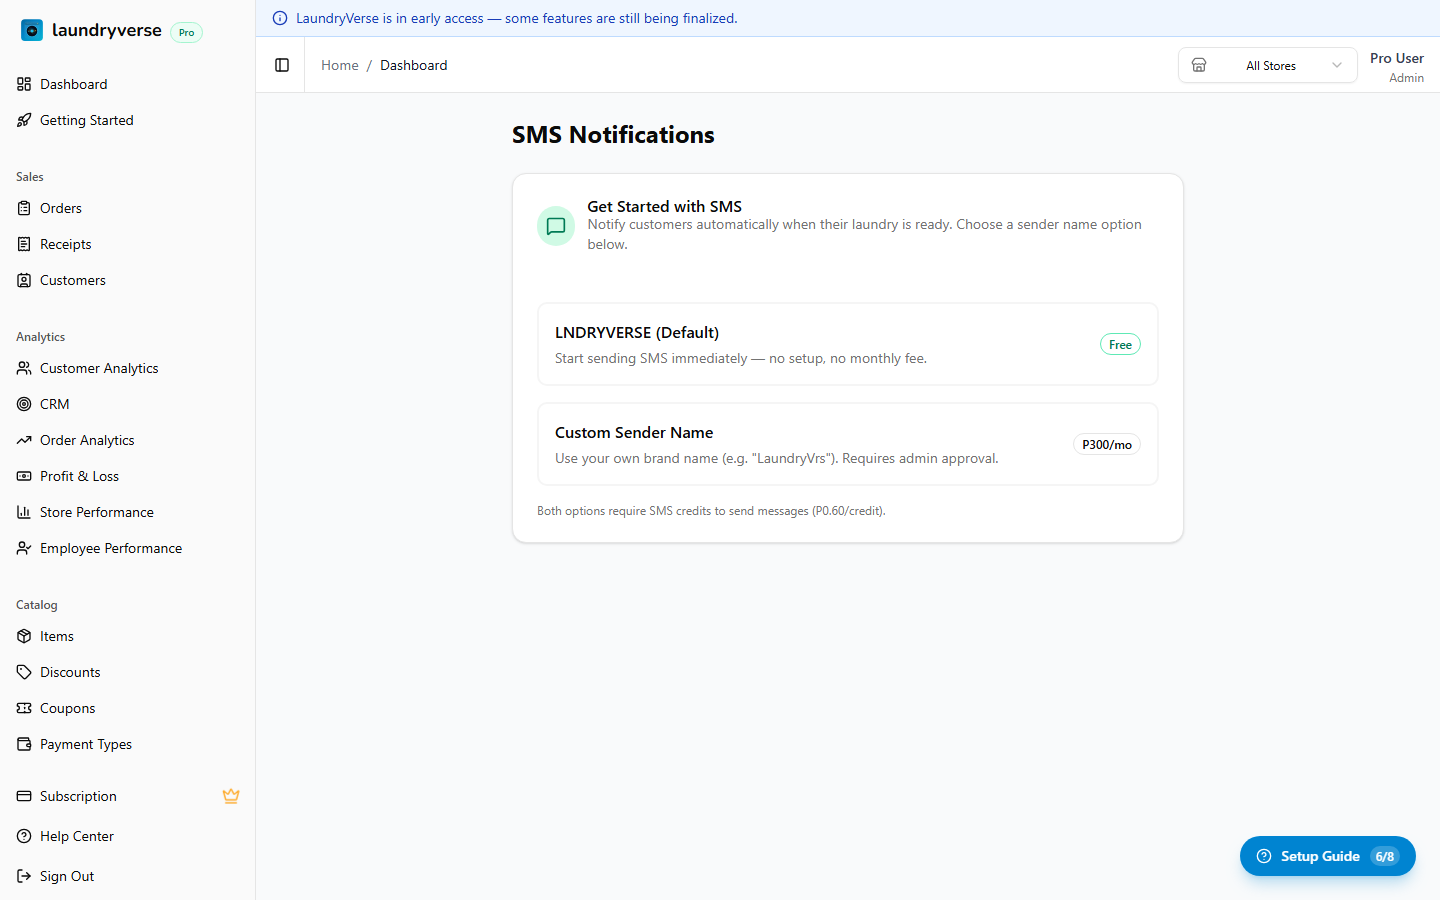
| Option | Description |
|---|---|
| Default Sender (Free) | Start sending SMS immediately using the LaundryVerse shared sender name. No setup fee, no monthly cost. |
| Custom Sender Name | Use your own brand name as the sender (e.g., "MyLaundry"). Costs ₱300/month and requires telco approval. |
Default Sender (Free)
Click the Default option to activate SMS instantly. Messages are sent using the LaundryVerse shared sender name at no extra cost — you only pay for credits.
Custom Sender Name
- Click the Custom Sender Name option
- Enter your desired sender name (up to 11 characters, letters and numbers only)
- Click Subscribe — you'll be redirected to pay ₱300/month
- After payment, the sender name is submitted for telco approval (usually 3–4 business days)
- Once approved, SMS switches to your custom name
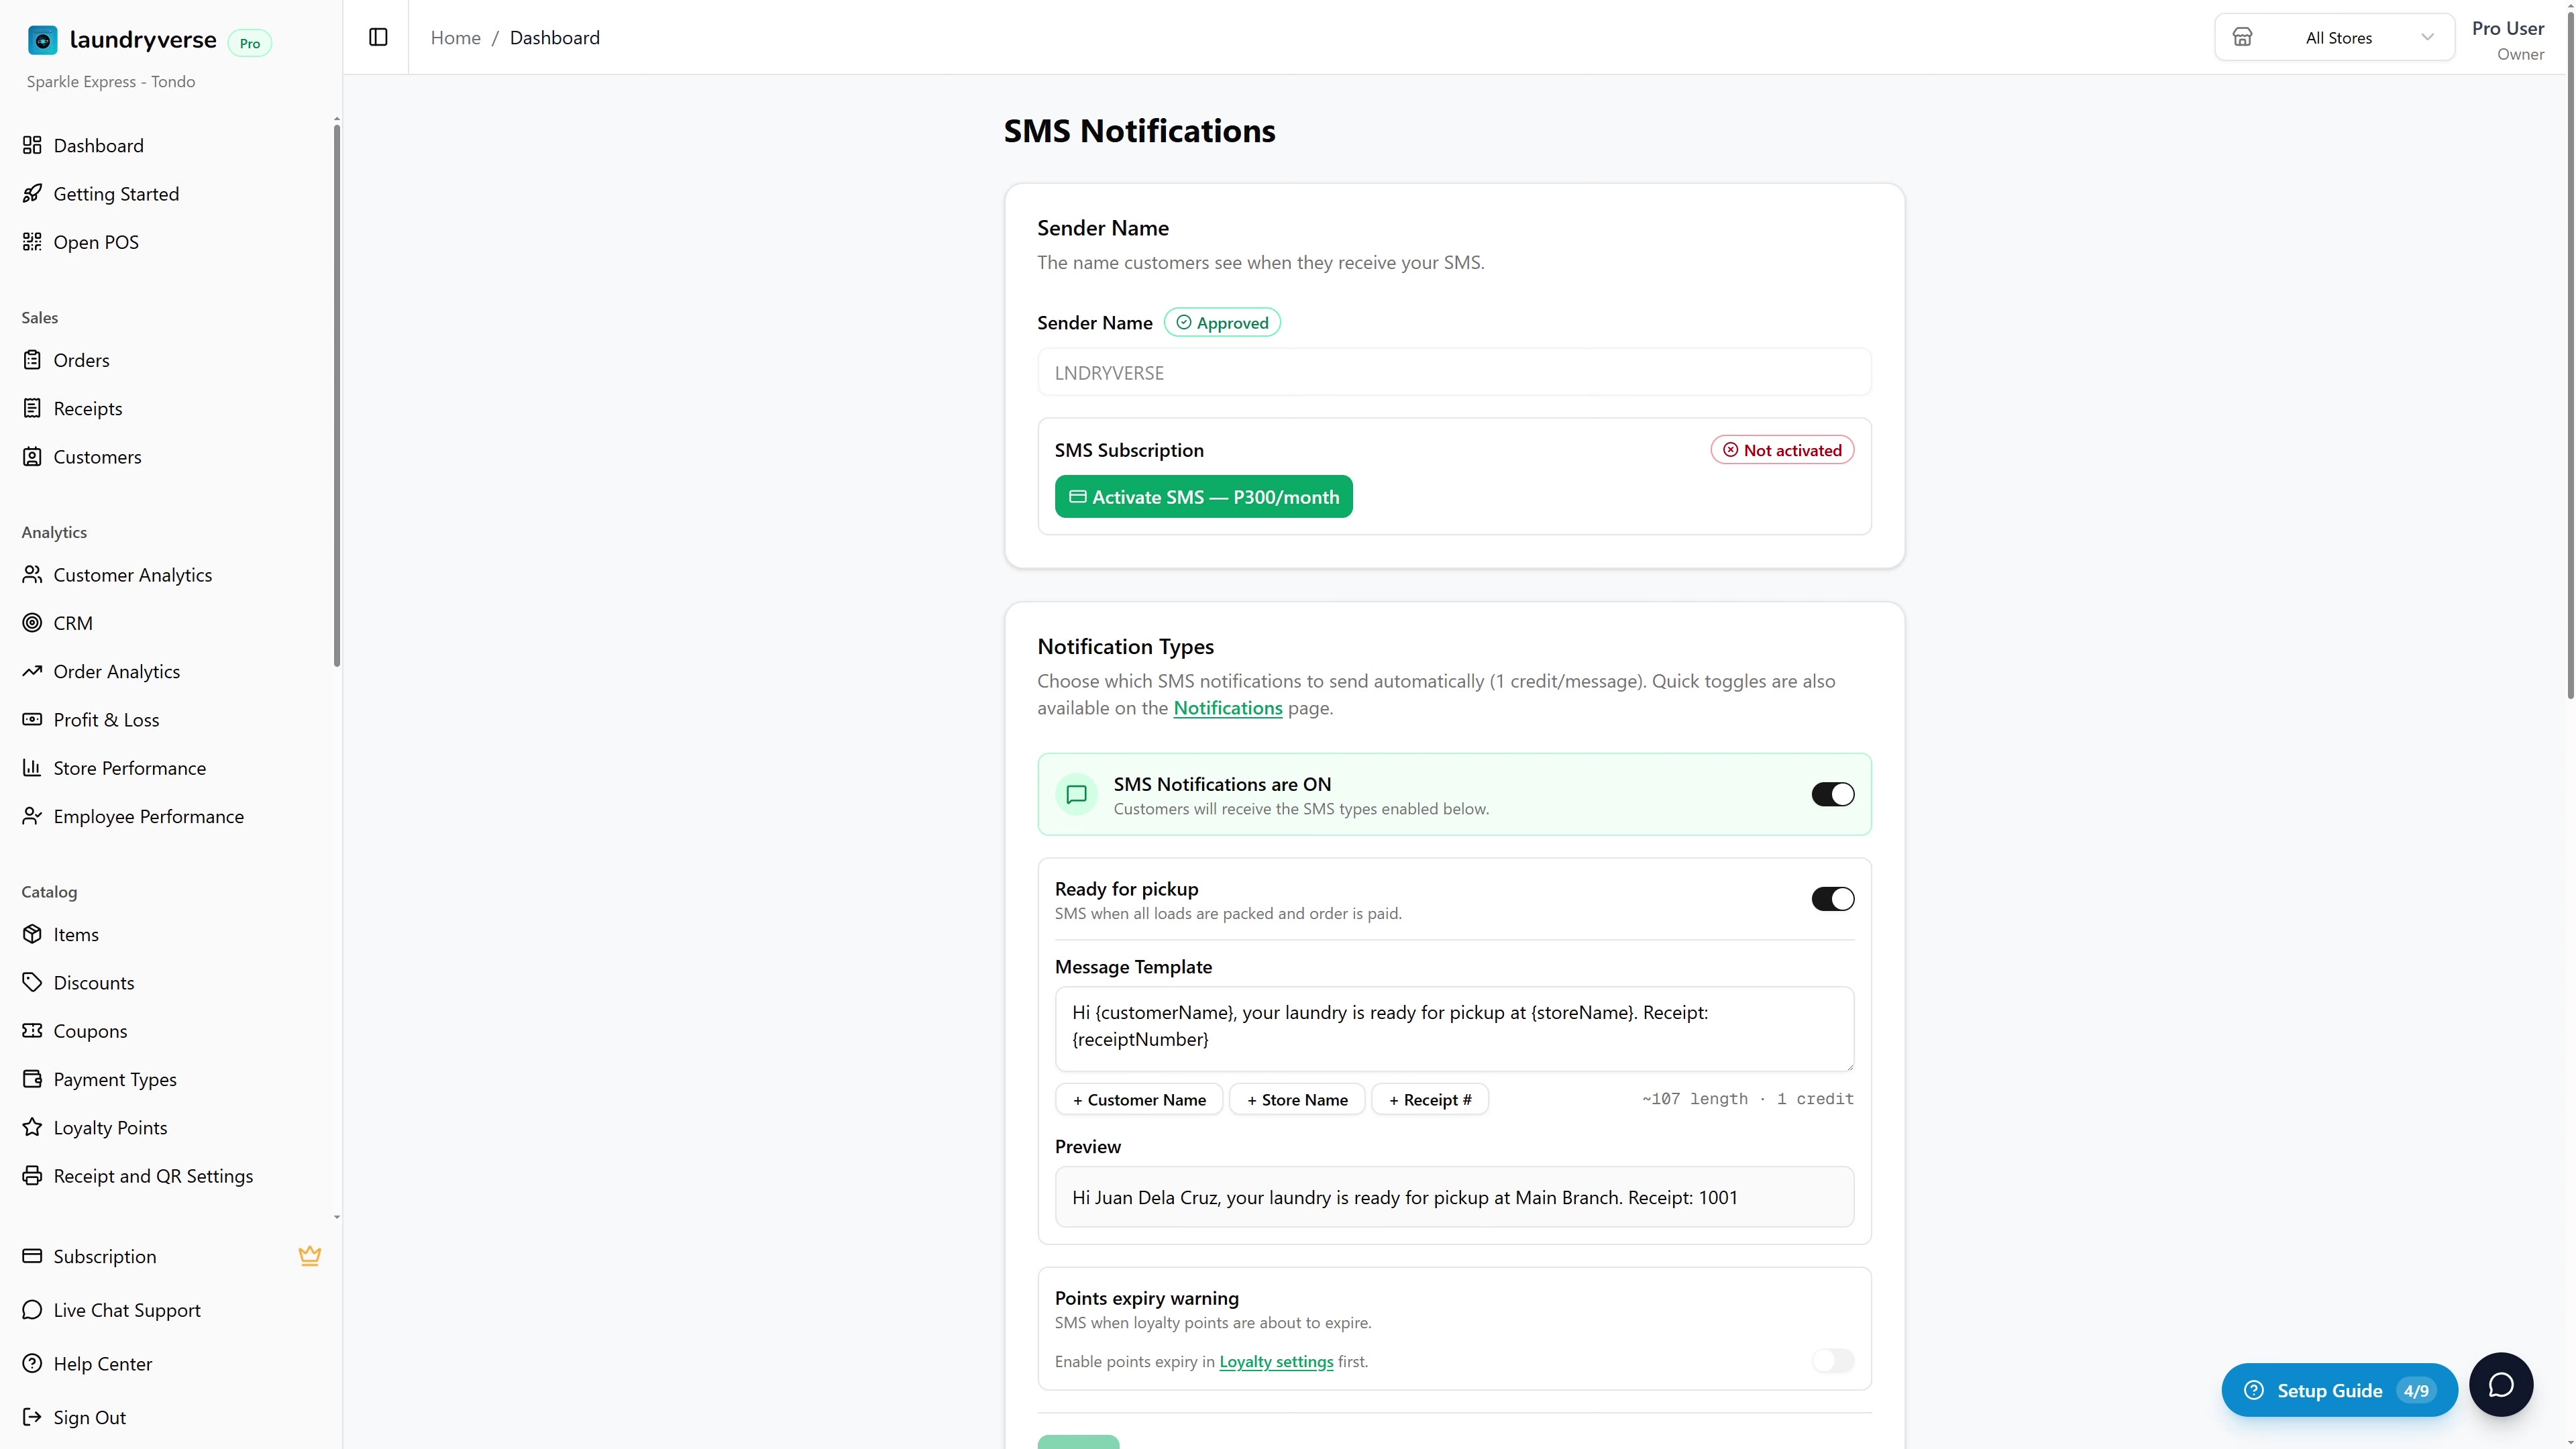
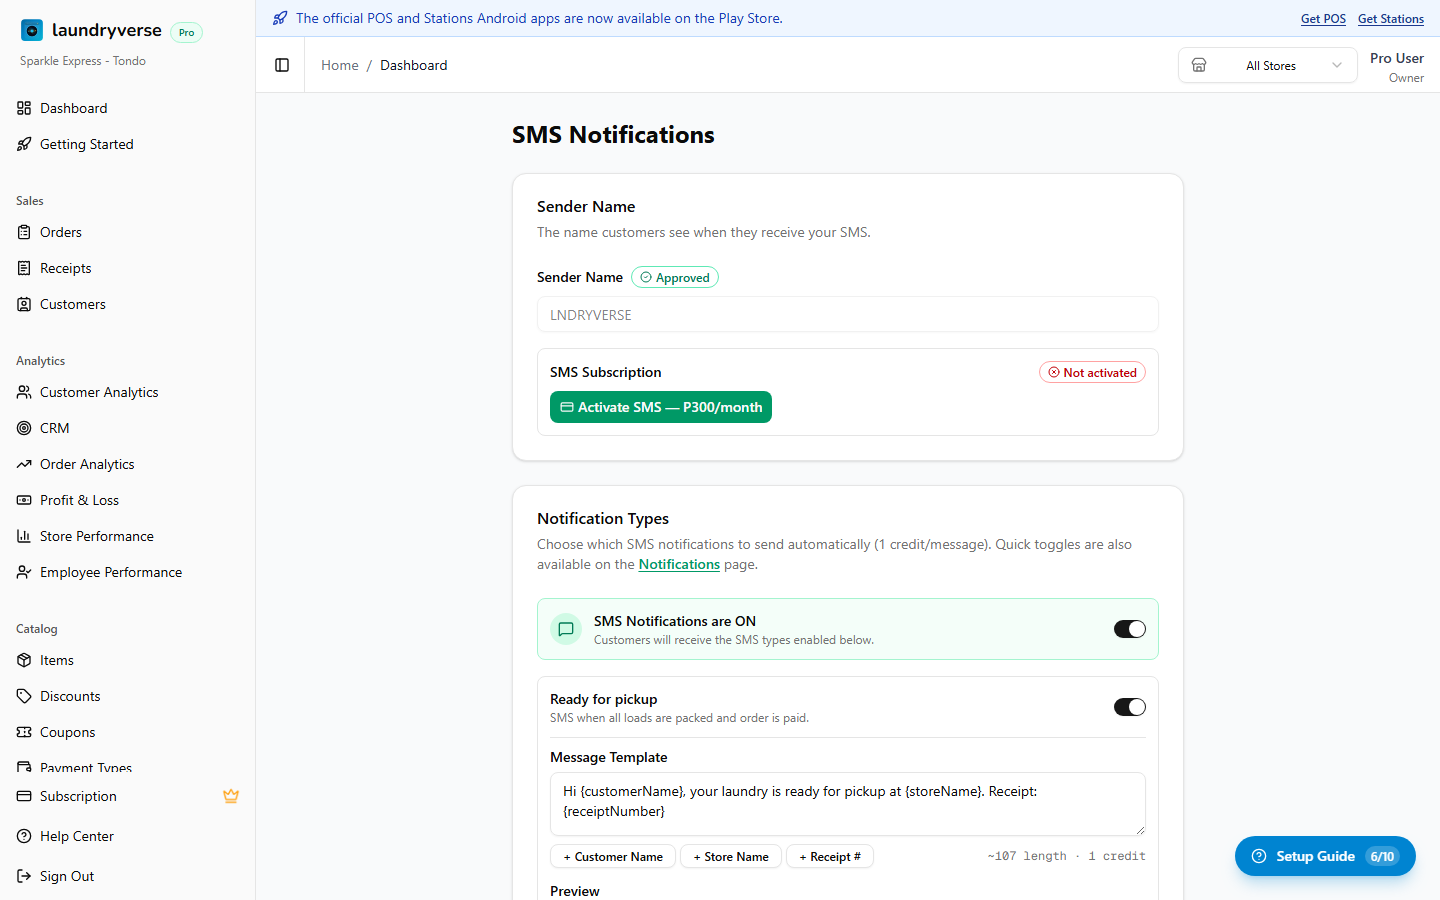
2. SMS Template
Once activated, configure the message your customers receive:
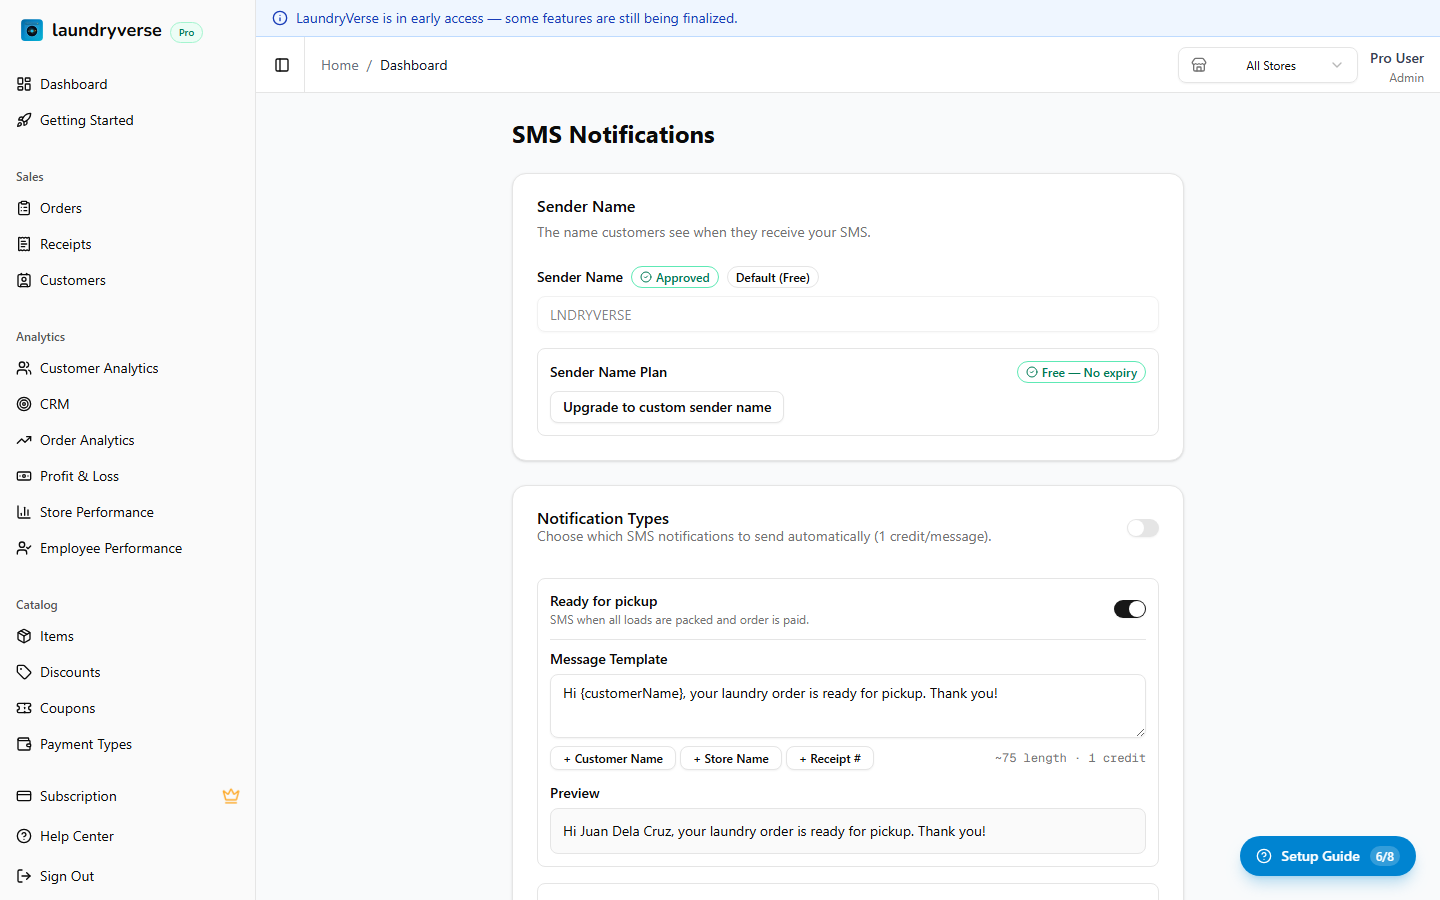
The template editor supports placeholders that get replaced with real values when the message is sent:
| Placeholder | Replaced with |
|---|---|
{customerName} | The customer's name |
{storeName} | Your store's name |
{receiptNumber} | The order's receipt number |
{amount} | The order total the customer owes, e.g. 150.00 |
{paymentStatus} | Whether the order is Unpaid, Partially Paid, or Paid |
{points} | The customer's current loyalty points balance |
Click a placeholder button to insert it into your template. The segment counter below the editor shows how many SMS segments your message will use — keep it to 1 segment to minimize cost.
{amount} and {points} are shown as plain numbers (like 150.00) with no peso sign, so your message stays a single SMS segment. Add "PHP" before the placeholder in your template if you want a currency label.
Keep messages under 160 characters (1 segment). Messages over 160 characters are split into multiple segments, each costing 1 credit.
3. Notification Types — Master Switch
This is the most important setting on the page. The Notification Types card has one master switch at the top that controls whether any SMS is sent at all, plus child toggles for each notification kind.
Master switch ON
When the master switch is on, the banner is green and labelled "SMS Notifications are ON". The child toggles below it are active — flip them individually to choose which kinds of SMS get sent.
Master switch OFF
When the master switch is off, the banner turns amber and reads "SMS Notifications are OFF". The child toggles are visually dimmed and disabled — no SMS will be sent regardless of how the child toggles look.
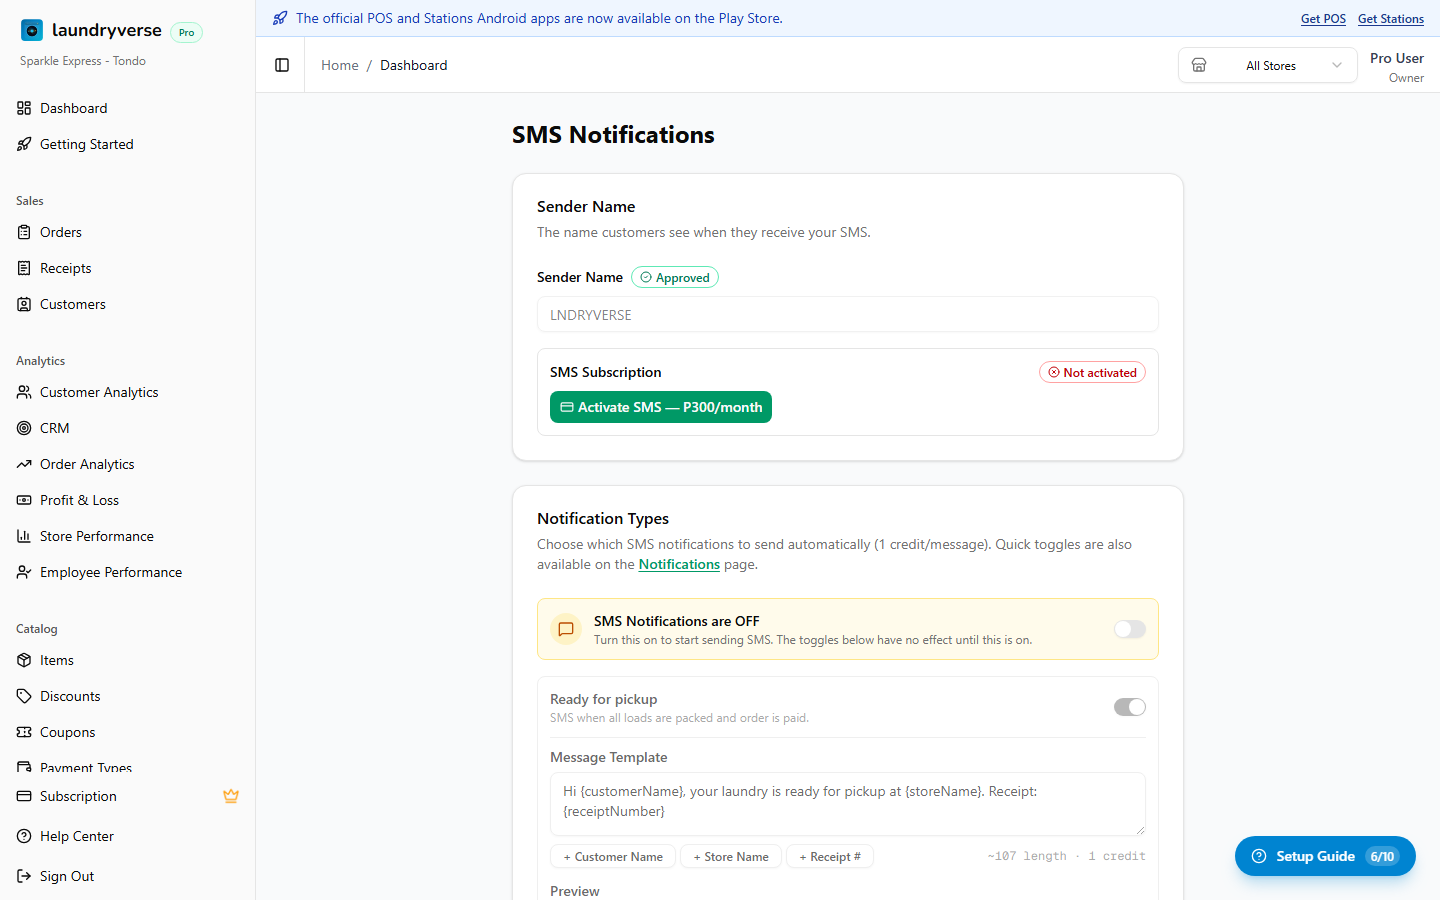
If the master switch is OFF, no SMS will be sent — even if Ready for Pickup below it is on. The order detail page will show a red "SMS notifications off" banner on every packed order until you turn the master switch on.
What each child toggle does
| Toggle | When it fires |
|---|---|
| Ready for pickup | When an order is fully paid and all loads are packed. Sends ~5 minutes after the last load is packed (so the cashier can still tap Undo if they made a mistake). |
| Points expiry warning | A configurable number of days before a customer's loyalty points expire. Requires the Points Expiry feature to be enabled in Loyalty settings. |
After flipping any toggle, click Save at the bottom of the card.
4. SMS Credits
Each SMS sent costs 1 credit. Purchase credits in advance:
- Pre-defined packs: 500 credits (₱300) or 1,000 credits (₱600)
- Custom amount: Enter any amount (minimum 500 credits)
Click Buy Credits to open the purchase dialog, select a pack or enter a custom amount, and complete payment.
The Usage section shows a chart of SMS sent per month and your current credit balance.
5. Test Numbers & Test SMS
Before going live, add test phone numbers and send test messages:
- Enter a Philippine mobile number in the Test Numbers field and click Add
- Click Send Test SMS to send the current template to all test numbers
- Check the Test Logs section to verify delivery
Test messages consume 1 credit each.
6. Sender Name Management
Your sender name subscription renews monthly. From the SMS page you can:
- View status — Pending (awaiting telco approval), Approved (active), or Rejected
- Renew — If your subscription is expiring soon, click Renew to extend
- View expiry date — Shows when the current sender name subscription ends
If your sender name is rejected, you'll see the rejection reason and can submit a new name.
7. SMS State on the Order Detail Page
Once an order is fully paid and all loads are packed, the order detail page shows an "All loads packed" bar. A second line on that bar tells you exactly what's happening with the SMS for that order. The same bar appears in two places — they behave identically:
- Dashboard > Orders > [order] — what you (the owner) see
- POS > Orders > [order] — what your cashier sees
There are five possible SMS states. Knowing which one you're looking at tells you whether the customer is about to be notified, and what to fix if they aren't.
State 1 — SMS will send at HH:MM

Where: Dashboard order detail, POS order detail. Meaning: Everything is configured correctly and the customer will receive an SMS at the listed time (about 5 minutes after the last load was packed). The delay is intentional — it gives cashiers a window to tap Undo if a load was packed by mistake.
State 2 — SMS sent

Where: Dashboard order detail, POS order detail. Meaning: The SMS was successfully delivered to the customer's phone.
State 3 — SMS notifications off

Where: Dashboard order detail, POS order detail. Meaning: The master switch in Dashboard > SMS > Notification Types is OFF, or the sender name hasn't been approved yet, or Ready for Pickup is disabled. Fix: Go to Dashboard > SMS and check (in this order):
- Is the Notification Types master banner green ("SMS Notifications are ON")?
- Is the sender name showing Approved?
- Is the Ready for pickup child toggle on?
The banner links directly to Dashboard > SMS so you can fix it in one click.
State 4 — No customer phone

Where: Dashboard order detail, POS order detail. Meaning: The order is a walk-in (no customer attached), or the attached customer doesn't have a phone number on file. Fix at the POS: Tap Attach Customer on the order and either attach an existing customer with a phone number, or create a new customer with the phone filled in. See Attaching Customers. Fix on the Dashboard: Open Operations > Customers, edit the customer, add a phone number — then re-trigger the SMS from the order detail page.
State 5 — SMS scheduled — not enough credits

Where: Dashboard order detail, POS order detail. Meaning: Everything is configured, but the credit balance is below 1 and the SMS will silently fail when the timer fires. Fix: Tap Buy Credits on Dashboard > SMS.
State 6 — SMS failed (POS only)
Where: POS order detail only. The bar shows a red "SMS failed: {reason}" line with an alert-triangle icon. On the Dashboard, the same failure shows up in the order's Activity Log as a red row instead of a banner — cashiers don't see the activity log, so we surface the error directly in their packed bar. Common causes:
- The customer's phone number is malformed (e.g., missing area code, contains letters)
- The SMS provider rejected the message (rate-limit, bad sender name)
- The provider was unreachable after retries
Fix: Read the reason printed after "SMS failed:". If it's a phone-number complaint, edit the customer's phone and re-trigger from the dashboard.
8. Activity Log
Every SMS attempt — successful or not — is recorded under Tools > Activity Log with category SMS. The log shows the title, recipient, and (for failures) the raw error from the SMS provider.
On the Dashboard order detail page, the order's slice of that log appears inline under All events — a green "SMS Delivered" row on success, or a red "SMS Failed" row with the error reason underneath.
See Activity Log for the full filtering reference.
What's Next?
- Customer Management — Manage the customers who receive your SMS notifications
- Order Management — Orders trigger "ready for pickup" notifications
- Attaching Customers (POS) — How cashiers attach a customer with a phone number at the register