Stores
Stores is where you manage every branch of your laundry shop. Each store carries its own address, contact info, operating hours, and an optional geo-fence that locks employee clock-in to the physical location. Devices and employees bind to stores. About 4 minutes.
Managing stores requires the Manage stores permission (stores:manage). The default Owner and Admin roles both hold it. Manager and Cashier do not, so day-to-day staff can sign in at a store without being able to rename it, change its hours, or delete it. To let a trusted lead handle store administration, grant Manage stores to their role from Roles & Permissions and invite them to the dashboard from the Employees page. Without this permission, every Add Store, Edit, and Delete action returns an error from the server.
Before you start
Your first store was already created for you during signup, using only the shop name you typed on the onboarding form. Open this page and you'll see one row waiting, with the address, contact info, operating hours, and geo-fence still empty. Even single-branch shops come back here to fill those in, especially the geo-fence, which is how station devices lock employee clock-in to the physical store.
You'll need:
- An active LaundryVerse account.
- The branch's address, phone, and weekly operating hours. Optional but recommended, since they show on receipts and filter dashboard reports.
- Latitude and longitude if you plan to geo-fence clock-in. Grab them from Google Maps, see section 3.
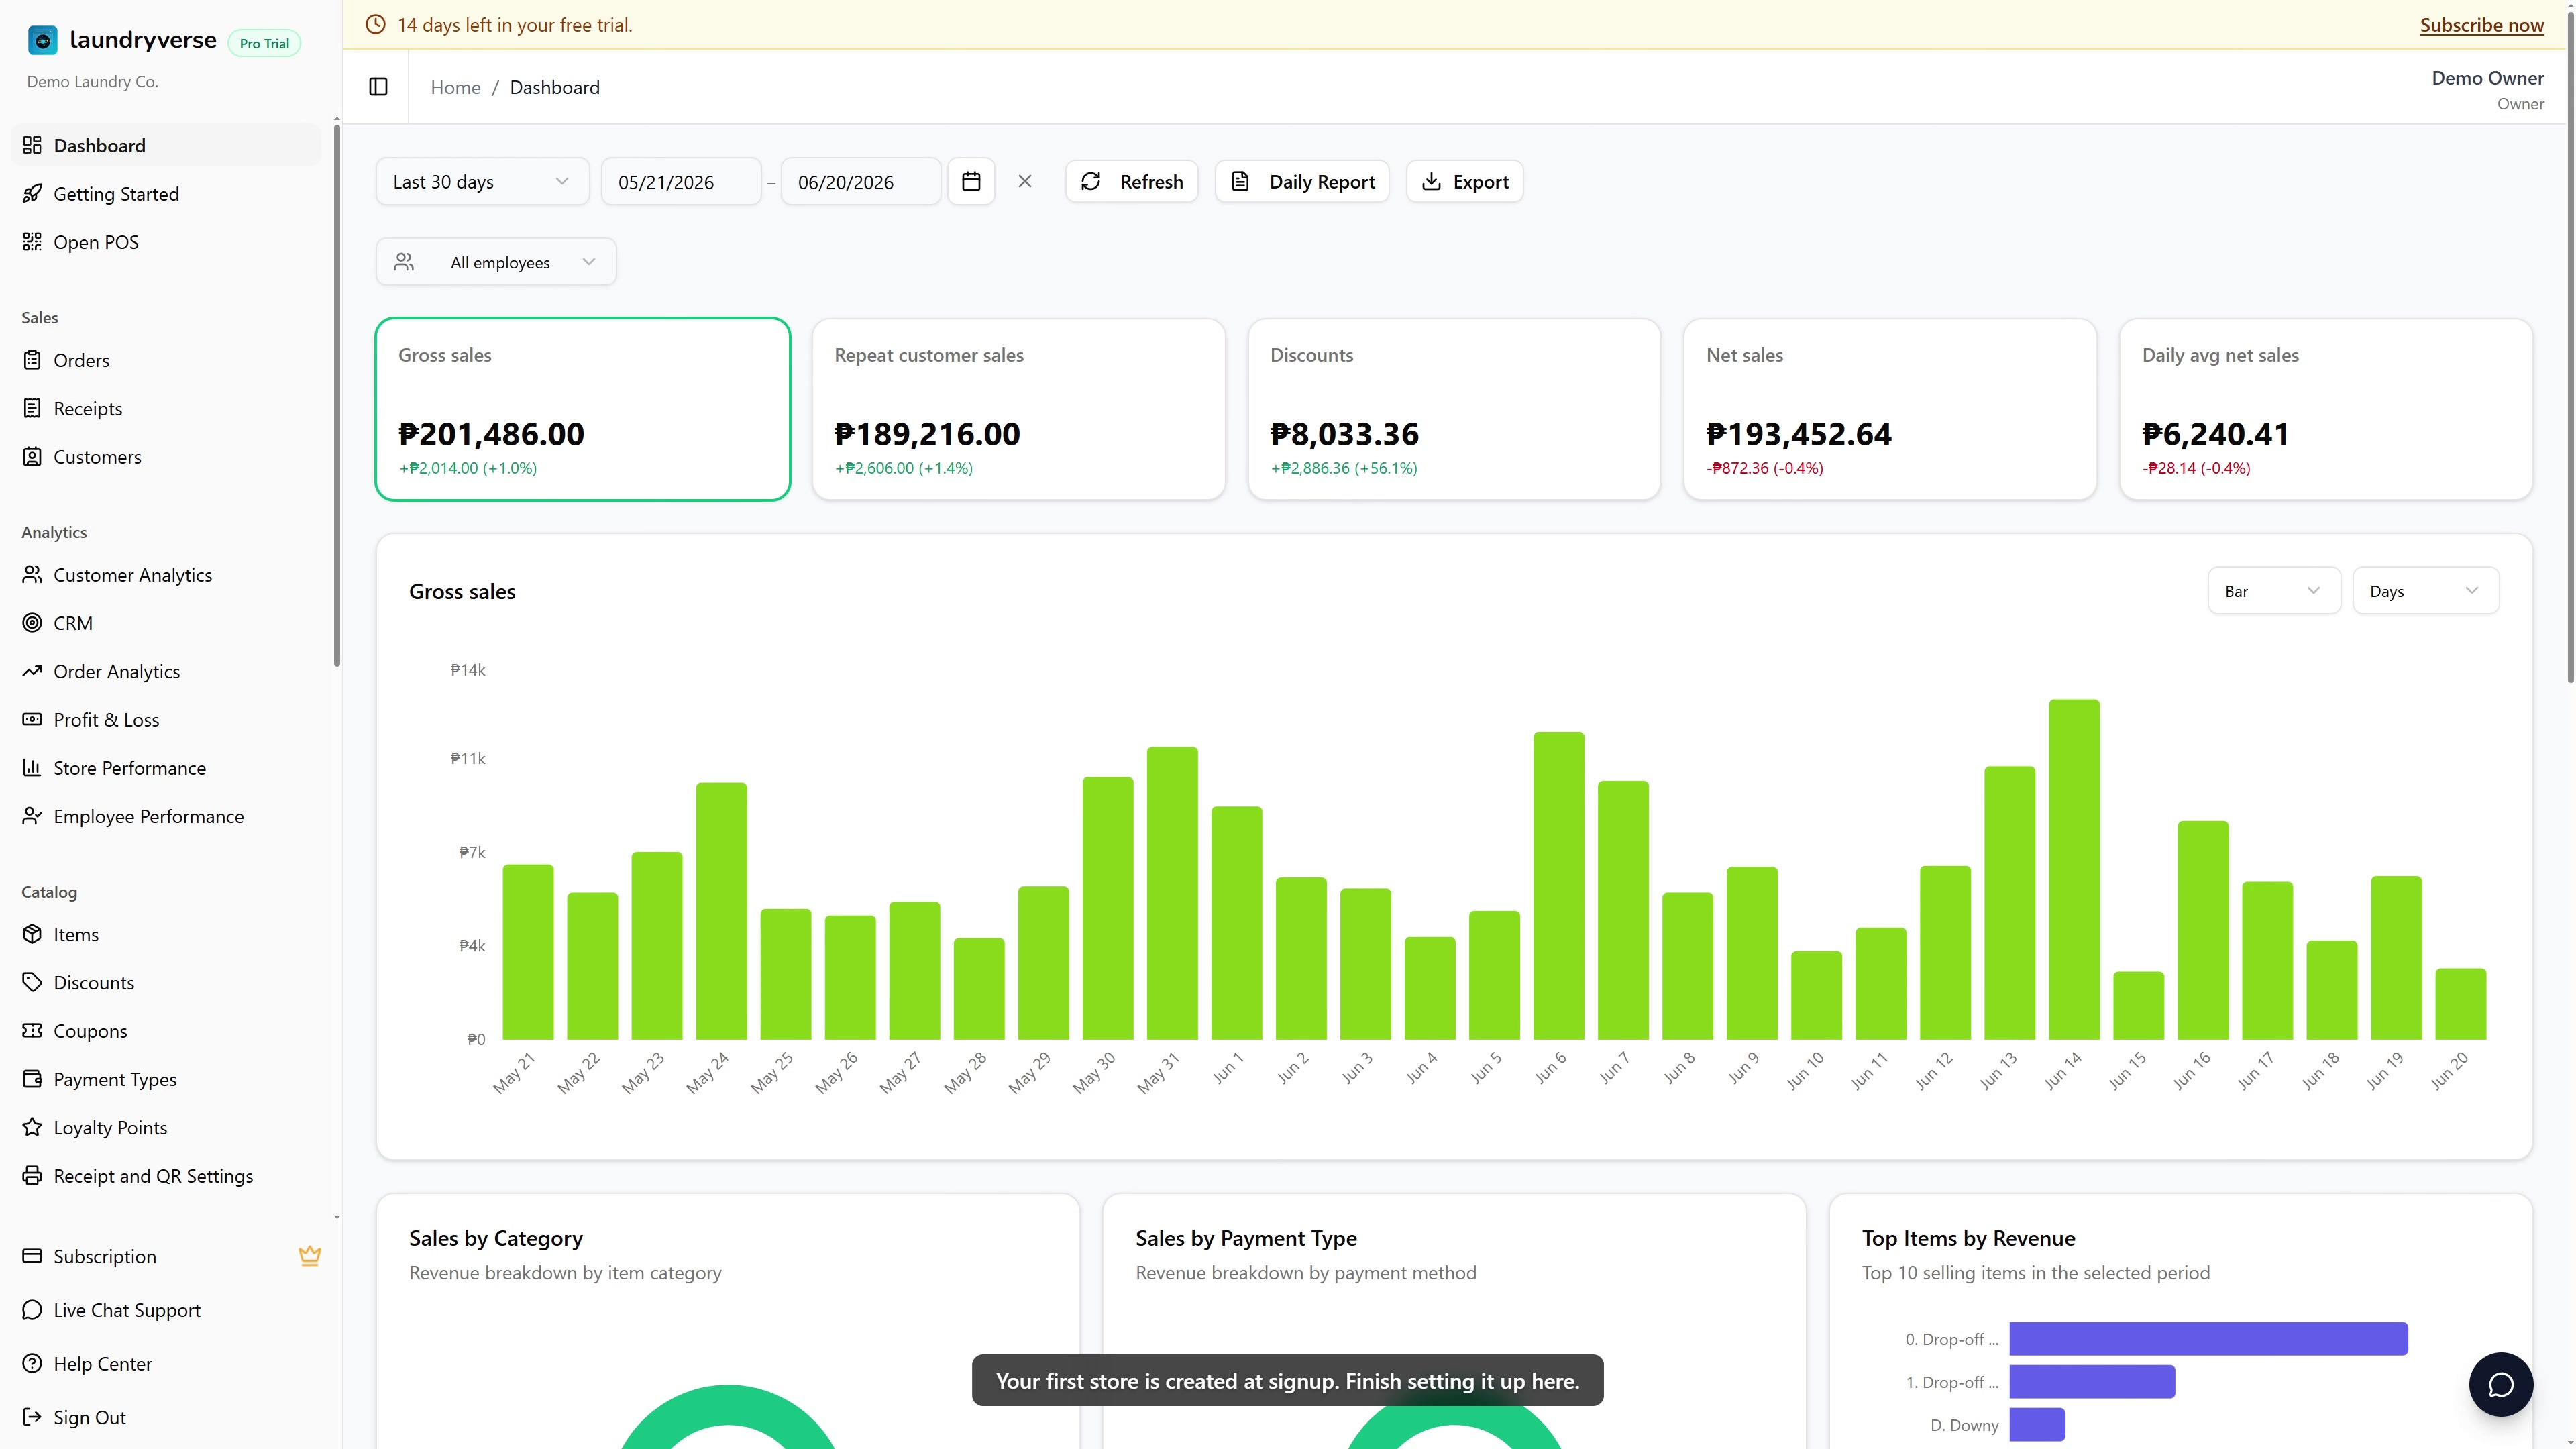
Trial tenants get unlimited stores for the full 14 days, so feel free to mirror your real multi-branch setup before subscribing. The global store selector only appears in the dashboard header once you have two or more stores on the account.
1. Open the Stores page
From the dashboard, navigate to Operations -> Stores in the sidebar.
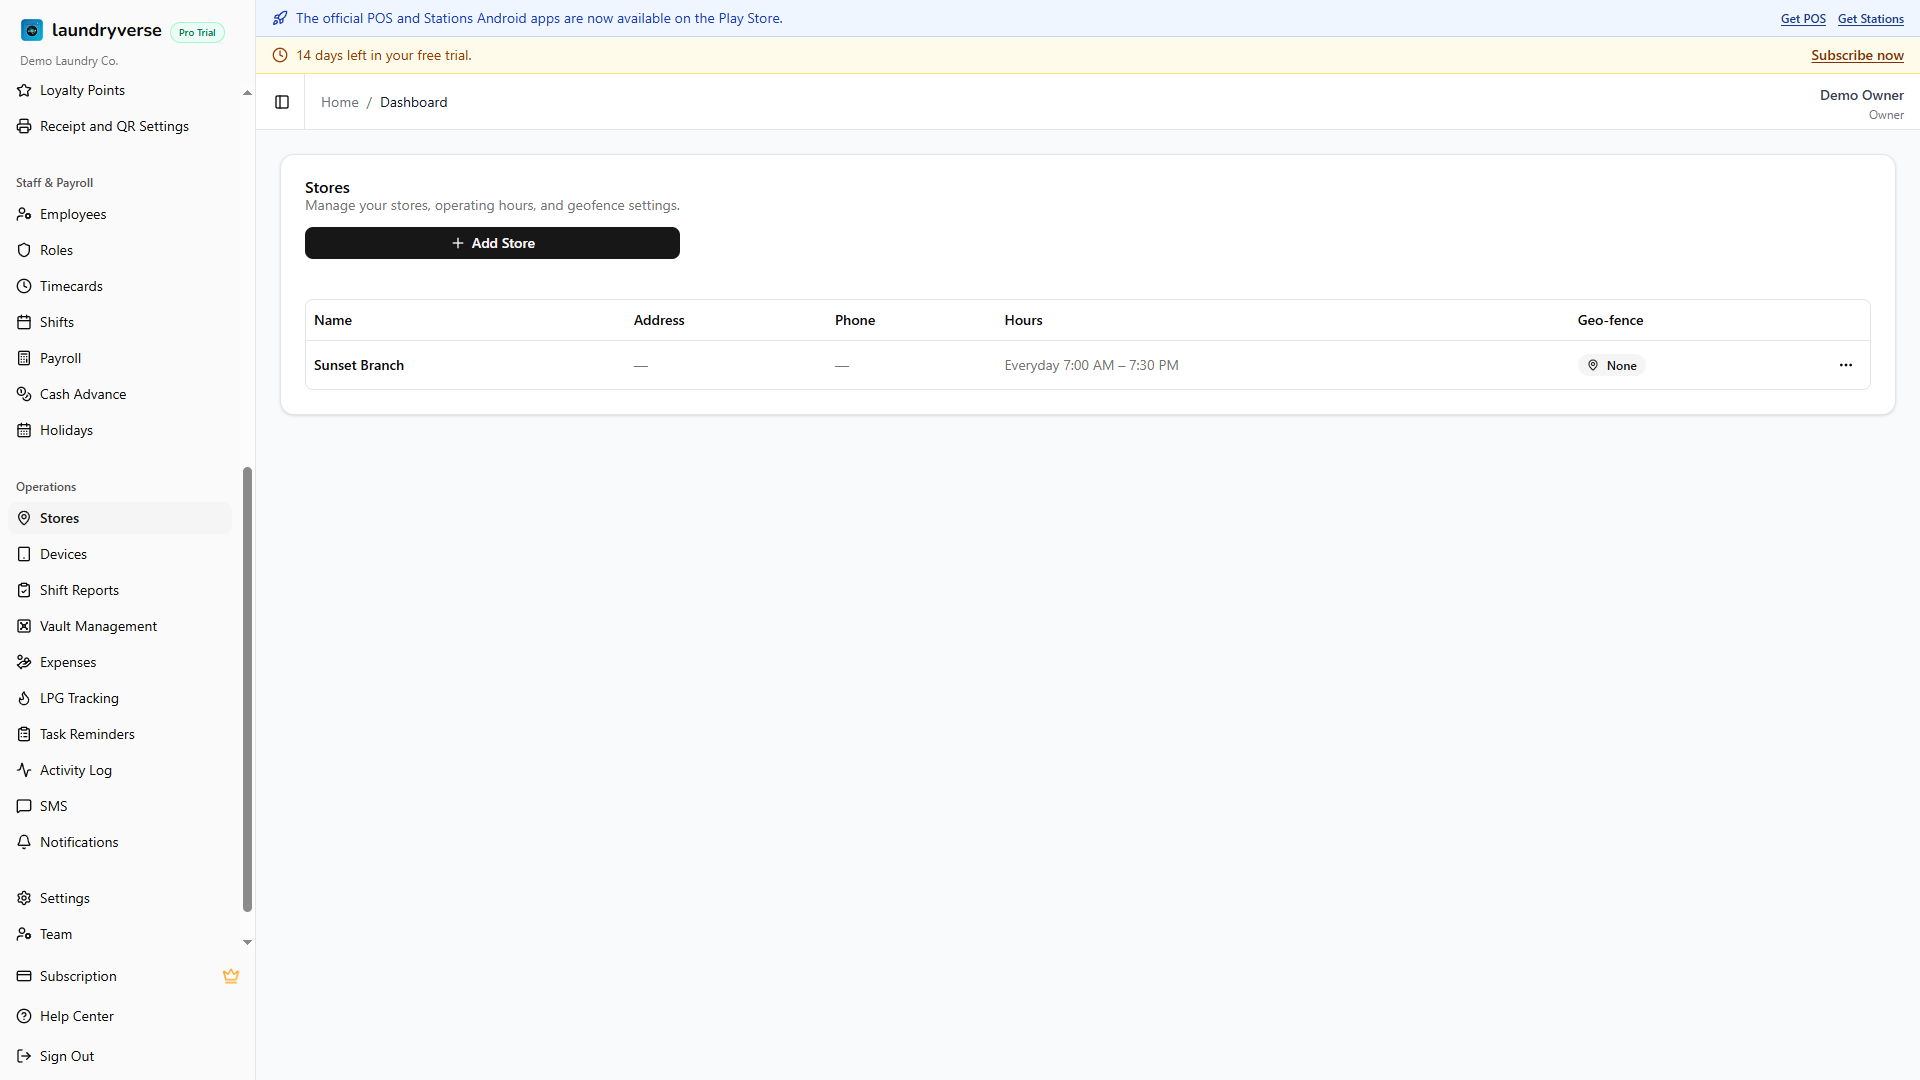
The page shows one card with the full list of stores on your account. A banner above the card appears in amber when you've hit your plan's store cap, with a link to upgrade. Below the banner, the Add Store button sits in the card header. Trial tenants and tiers with headroom see the button enabled; tiers at their cap see it disabled.
2. Read the stores table
Each row in the table is one branch. The columns are:
| Column | What it shows |
|---|---|
| Name | The display name you set when creating the store. This appears in the store selector, on receipts, and in every dashboard filter. |
| Address | Street, city, and state joined together. Mostly informational, used as a label. |
| Phone | Contact phone for the branch. Mostly informational. |
| Hours | A summary of the weekly operating hours, for example Mon, Tue, Wed, Thu, Fri 8:00 AM - 8:00 PM or Everyday 7:00 AM - 9:00 PM. Shows a dash when no days are toggled on. |
| Geo-fence | Active (green) when the store has latitude and longitude saved, None (grey) when it doesn't. |
| Actions | A three-dot menu with Edit and Delete. |
3. Add a store
Tap Add Store in the card header to open the form dialog.
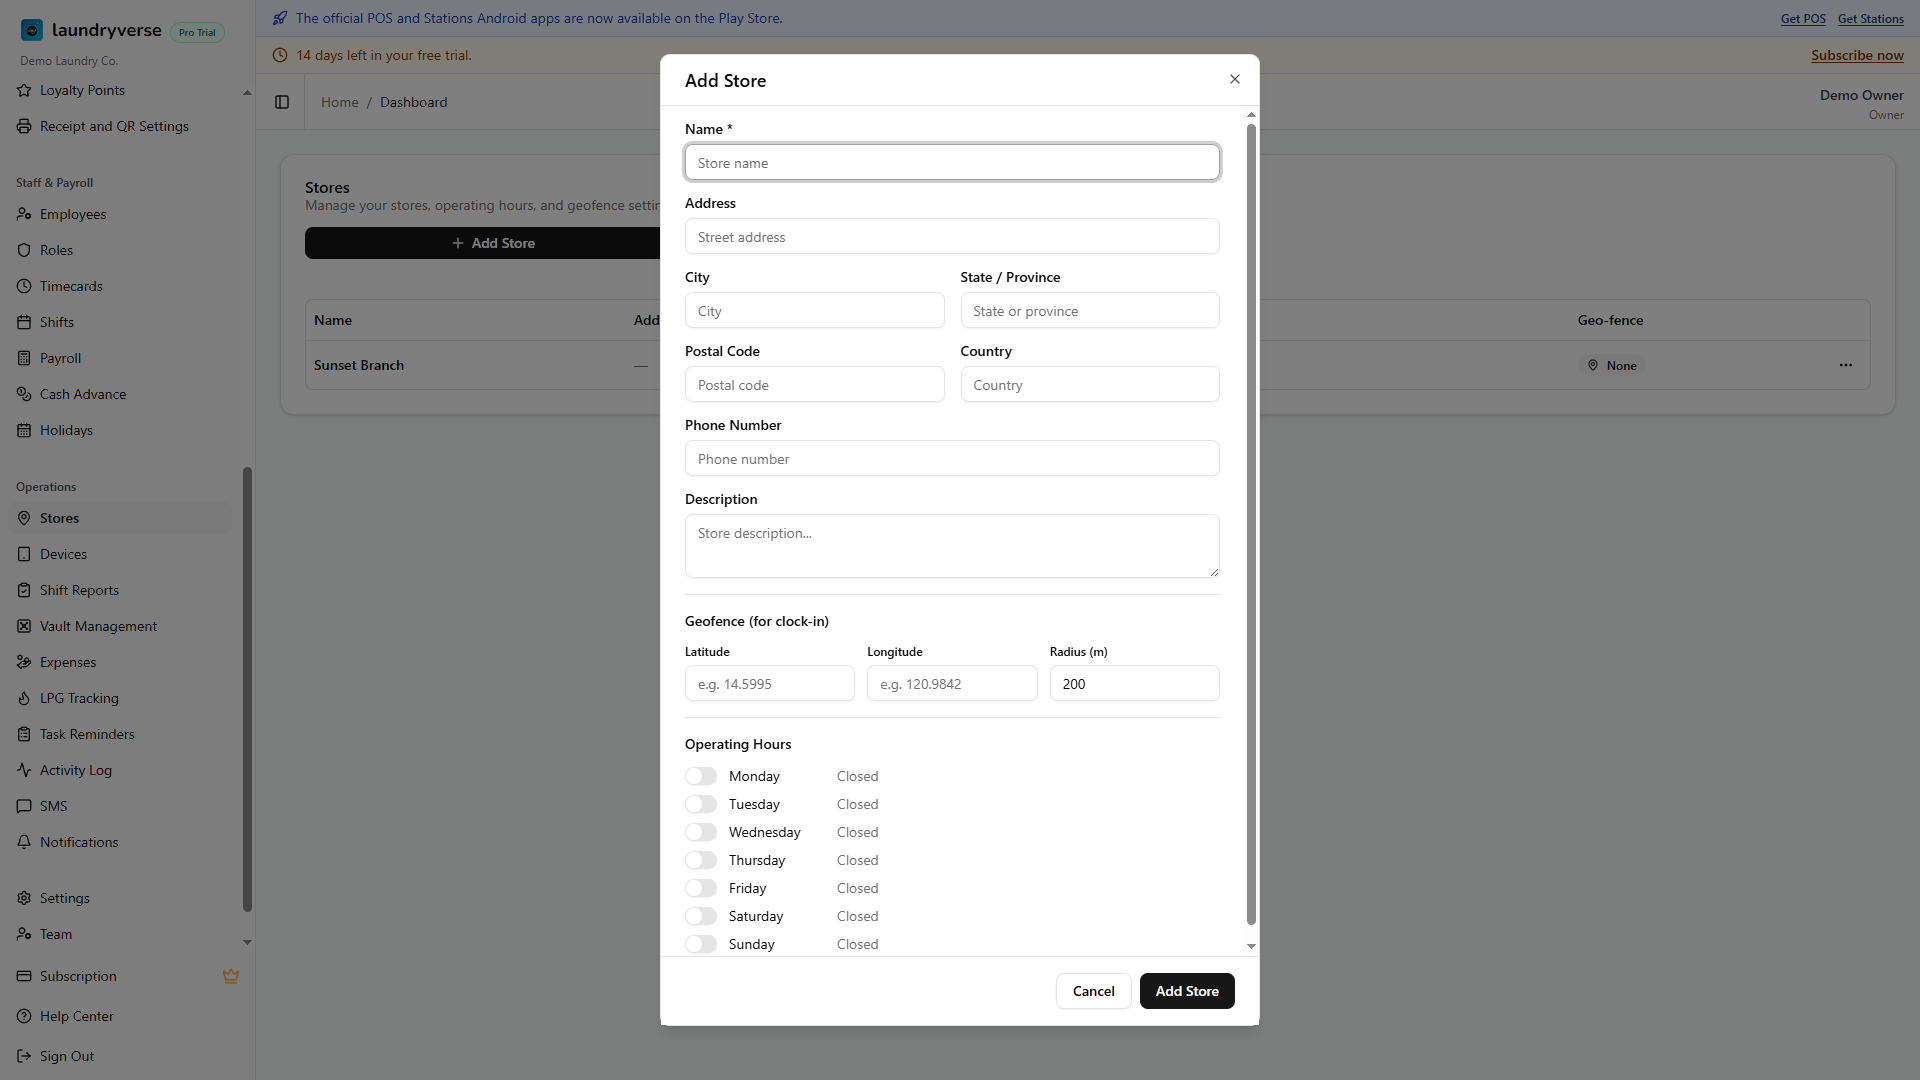
Required field
- Name: the only required field. This is what cashiers, employees, and the store selector show. Keep it short and recognizable, like Main Branch, SM Mall of Asia, or the street name.
Address and contact
- Address, City, State / Province, Postal Code, Country: optional. The table joins Address, City, and State into the Address column. None of these are validated against a map service, so type them however your local mailing system uses them.
- Phone Number: optional. Shown in the Phone column.
- Description: optional, free-form notes for your reference. Not shown to customers.
Geo-fence for clock-in
Three inputs sit below the contact block:
- Latitude and Longitude: decimal coordinates of the store. Open Google Maps, right-click the pin, and the lat / lng pair appears at the top of the menu, ready to copy.
- Radius (m): how far from those coordinates clock-in is allowed, in meters. Defaults to 200 m, accepts 50 m to 5000 m.
Setting all three turns on the geo-fence. The Geo-fence column flips to Active, and station devices using the clock-in flow check the browser's GPS against the radius before letting an employee clock in. Leaving latitude and longitude blank means clock-in is allowed from anywhere on the network.
Latitude and longitude have to come as a pair. Filling only one returns "Enter both latitude and longitude, or clear both". Latitude must be between -90 and 90, longitude between -180 and 180.
Open Google Maps, search for the store, right-click directly on the pin, and the lat / lng pair appears at the top of the context menu. Click them to copy, then paste into the Latitude field. The Longitude field auto-receives the second value if you paste both with a comma.
Operating hours
Toggle each day of the week on or off. For each day that's on, set an Open and Close time using the native time picker. Days toggled off render as Closed in the form and are excluded from the Hours summary on the table.
Hours are display-only for now. They tell you and your staff when the shop is meant to be open, but they don't auto-lock the POS register outside those windows. A cashier can still open a shift at 3 a.m. if they have a key to the building.
Tap Add Store to save. The dialog closes, the table refreshes, and the new branch is immediately available in the store selector and as a binding target for new devices and employees. Tap Cancel or press Escape to discard the form.
4. Edit a store
Open the three-dot menu on any row and tap Edit. The same form dialog opens, pre-filled with the current values. Change anything you need to and tap Update. Changes save immediately. The store selector and every filtered view pick up the new name on the next pull-to-refresh.
Renaming a store does not break devices or employees bound to it, the binding is by store ID, not by name. Clearing latitude and longitude flips the Geo-fence column back to None and removes the clock-in radius for new clock-in attempts.
5. Delete a store
Open the three-dot menu and tap Delete. A confirmation dialog explains what will happen.
| What you keep | What gets cut |
|---|---|
| Past receipts and shift reports for that store stay in the database, scoped to the store ID. Reports continue to show historical totals. | The store itself disappears from the table, the store selector, and every filter dropdown. |
| Inactive employees previously assigned only to this store keep their record. | Every device bound to the store is automatically deactivated, freeing slots against your device cap. |
| Active employees keep their accounts. | The store is pulled from every employee's storeIds list, so the multi-store assignments adjust automatically. |
Two cases block deletion outright, with a server-side error:
- An active employee is assigned only to this store: deleting it would leave them with nowhere to sign in. The error names the affected employees so you can reassign them to a different store first, then come back and delete.
- The store was already deleted in a parallel session: refresh the page to clear the row.
Deletion is a soft delete on the database side, so the store record is preserved for accounting and reports. From your view, it's gone for good, there's no undo button in the dashboard.
6. The global store selector
Once you have two or more stores, a store selector dropdown appears next to your account avatar in the dashboard header. It filters dashboard pages to the selected store:
- Orders, receipts, and customers
- Items, devices, and employees
- Timecards, shifts, and reports
Select All Stores to see combined data across every branch. The selector is sticky per browser session, so the last pick is remembered as you move between pages.
Trial tenants and tiers that haven't yet hit their cap see every store as selectable. If you downgrade to a lower tier that doesn't support your current store count, the over-cap stores show with an amber warning icon and are disabled in the selector until you either upgrade again or delete stores down to the new cap.
7. How stores connect to devices and employees
Stores aren't useful on their own, they're the binding target for the rest of the system.
- Devices bind to a store the first time a cashier or station staff scans the store's QR code or types the 6-character store code at
/pos/loginor/stations/login. Each device belongs to exactly one store. See Devices for the QR sharing flow. - Employees are assigned to one or more stores from the Employees page. They can only sign in to a device that's bound to one of their assigned stores.
- Payment types are configured per tenant, not per store, but the Default Payment Types settings let you control which methods show up by default at any store's register.
When you delete a store, devices auto-deactivate and employees auto-unassign. If a store is the only one a cashier was bound to, deletion is blocked, so the system never silently locks a working employee out.
8. Plan limits and per-store add-ons
Every paid tier comes with a base number of included stores. Pricing for additional stores varies by tier.
| Plan | Included stores | Per extra store |
|---|---|---|
| Trial | Unlimited (full 14 days) | n / a |
| Starter | 1 | Not available, upgrade to Business to add more |
| Business | 5 | PHP 799 / month |
| Pro | 10 | PHP 999 / month |
| Enterprise | Unlimited | Custom, contact us |
When you're at your cap, the Add Store button disables and an amber banner at the top of the page explains the limit. Upgrade your plan from the Subscription page to add headroom, or contact us if you're already on Enterprise.
Trial tenants get unlimited stores for the full 14 days, so you can fully evaluate multi-branch setups before committing to a tier. When you subscribe, the chosen plan's cap applies. If you have more stores than the plan supports, that plan's Subscribe button stays disabled until you delete stores down to its included count, or pick a higher tier.
Common issues
"I can't delete a store, the error mentions employees"
One or more active employees are assigned only to this store. The dashboard refuses the delete so they aren't silently locked out. Open Employees, find the named staff, add a second store to their assignments, then come back to Stores and delete.
"The store selector isn't showing up"
The selector only renders when you have two or more stores on your account. With a single store, every dashboard page is already scoped to it and the selector would have nothing to choose between. Add a second store from this page and the dropdown appears in the header on the next page load.
"Add Store is greyed out"
You're at your plan's store cap. Look at the amber banner above the card for the exact number. Either delete a store you no longer use, or open Subscription to upgrade.
"My geo-fenced shop is still letting people clock in from home"
Three things to check. First, that the store actually has both latitude and longitude saved, the Geo-fence column should read Active. Second, that the radius is tight enough, 200 m is roomy on a small lot. Third, that the device clocking in has GPS permission granted in the browser, station devices ask for it on first use and the prompt can be dismissed. Re-prompt by reloading /stations/login on the device.
"The Hours column shows a dash even though I set the schedule"
Every day toggle is off on that store. Open the store with Edit, switch on the days the branch is open, set times for each, and save. Days toggled off are treated as closed and the Hours summary only shows days that are on.
"I deleted a store by mistake"
Contact us. The delete is a soft delete on the database, so the record can be restored as long as you reach out before any automated cleanup runs. Devices and employee assignments will need to be re-bound manually after the restore.
What's next?
- Devices: print the QR code each new branch hands to its tablets.
- Employees: assign staff to one or more stores and issue their POS PINs.
- Payment Types: configure the methods that show up at every store's register.
- Multi-Store Management: strategy and operations for scaling past one branch.
Stuck? Email [email protected]. The founder reads every message.