Multi-Store Management
Manage multiple laundry branches from a single LaundryVerse account. Navigate to Account > Stores in the dashboard.
1. Store Limits by Plan
The number of stores you can create depends on your subscription tier:
| Plan | Store Limit |
|---|---|
| Starter | 1 |
| Business | 5 |
| Pro | 10 |
| Enterprise | Unlimited |
A banner at the top of the page shows your current usage (e.g., "2 of 5 stores"). If you've reached your limit, upgrade your plan to add more.
Trial tenants get unlimited stores during the 14-day trial so you can fully evaluate the product against your real-world setup. When you subscribe, the chosen plan's store cap applies — if you have more stores than the plan supports, that plan's Subscribe button stays disabled until you delete down to its cap (or pick a higher tier).
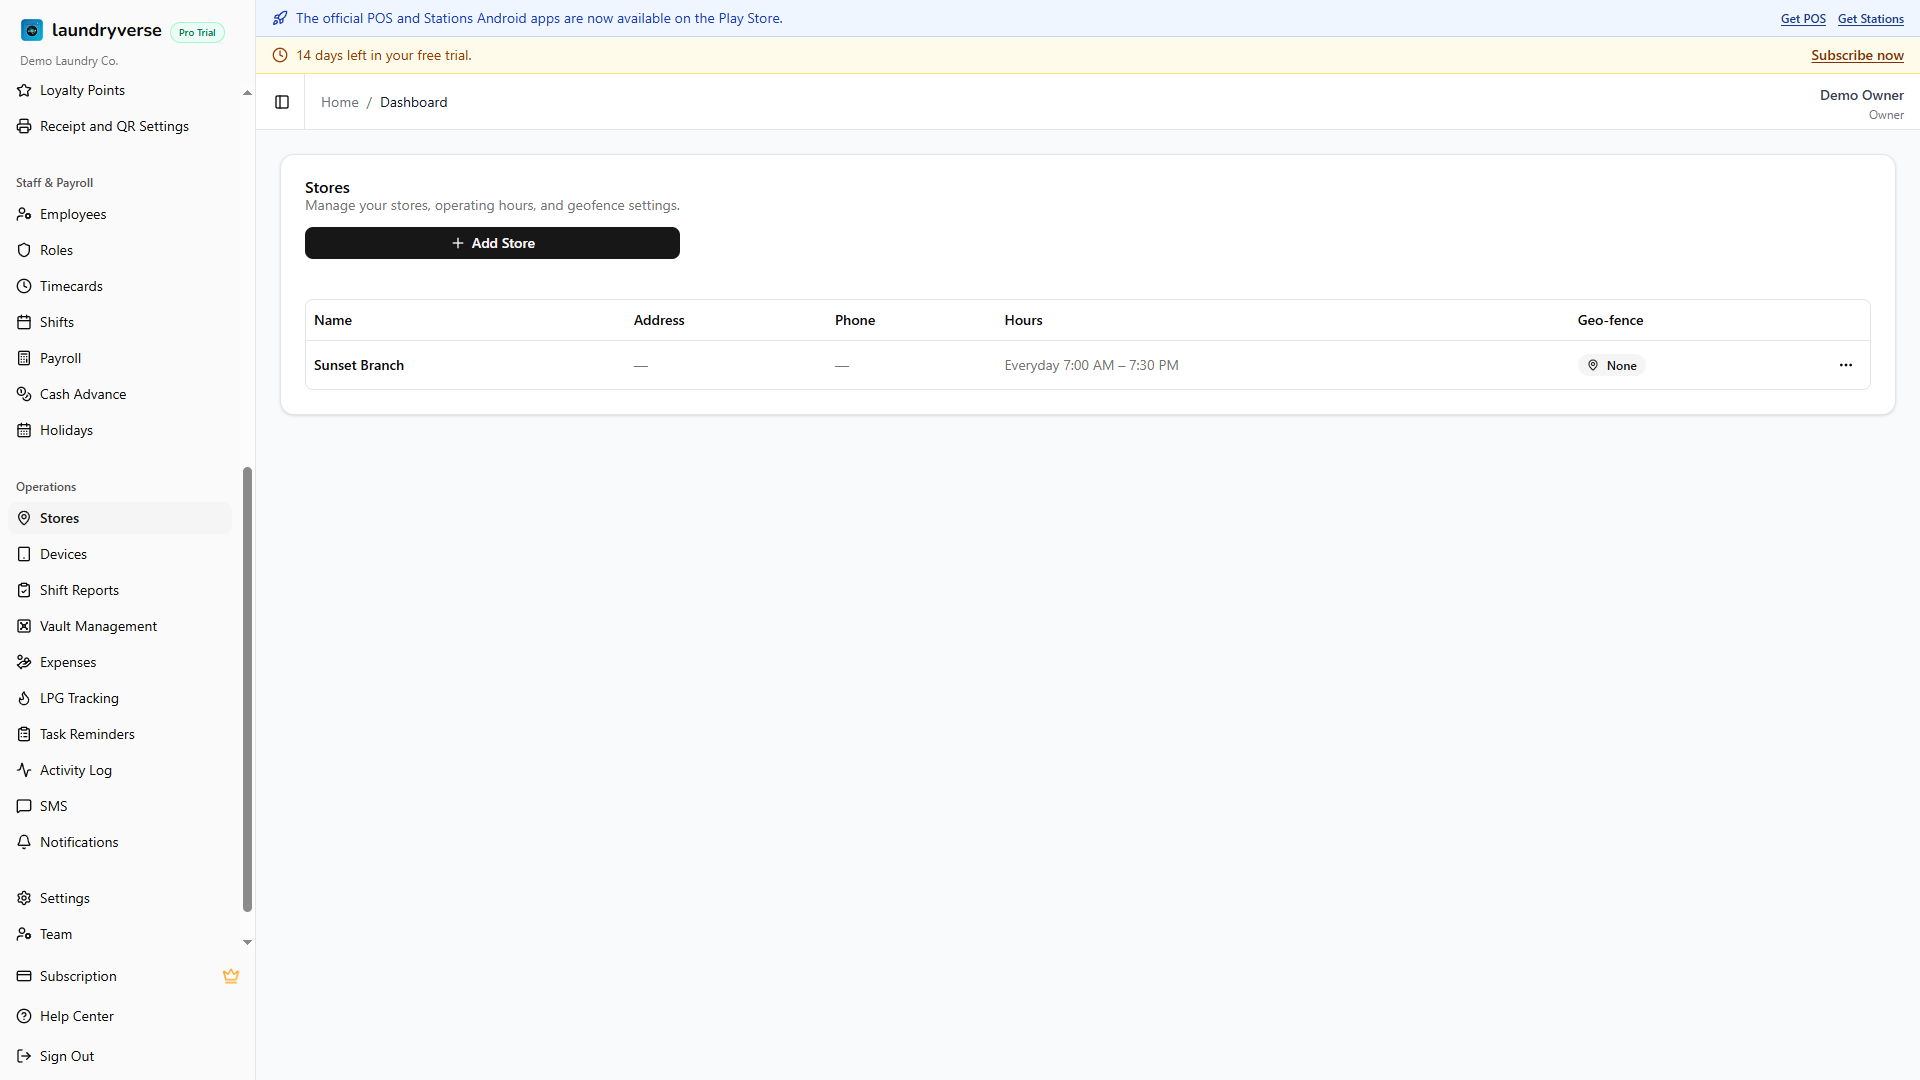
2. Stores Table
Each store is listed with:
| Column | Description |
|---|---|
| Name | The store's display name |
| Address | Street address (hidden on mobile) |
| Phone | Contact phone number (hidden on mobile) |
| Hours | Operating hours summary (e.g., "Mon–Fri 8:00 AM – 8:00 PM") |
| Geo-fence | Shows "Active" if geolocation fencing is configured, otherwise "None" |
3. Adding a Store
Click Add Store to open the store form:
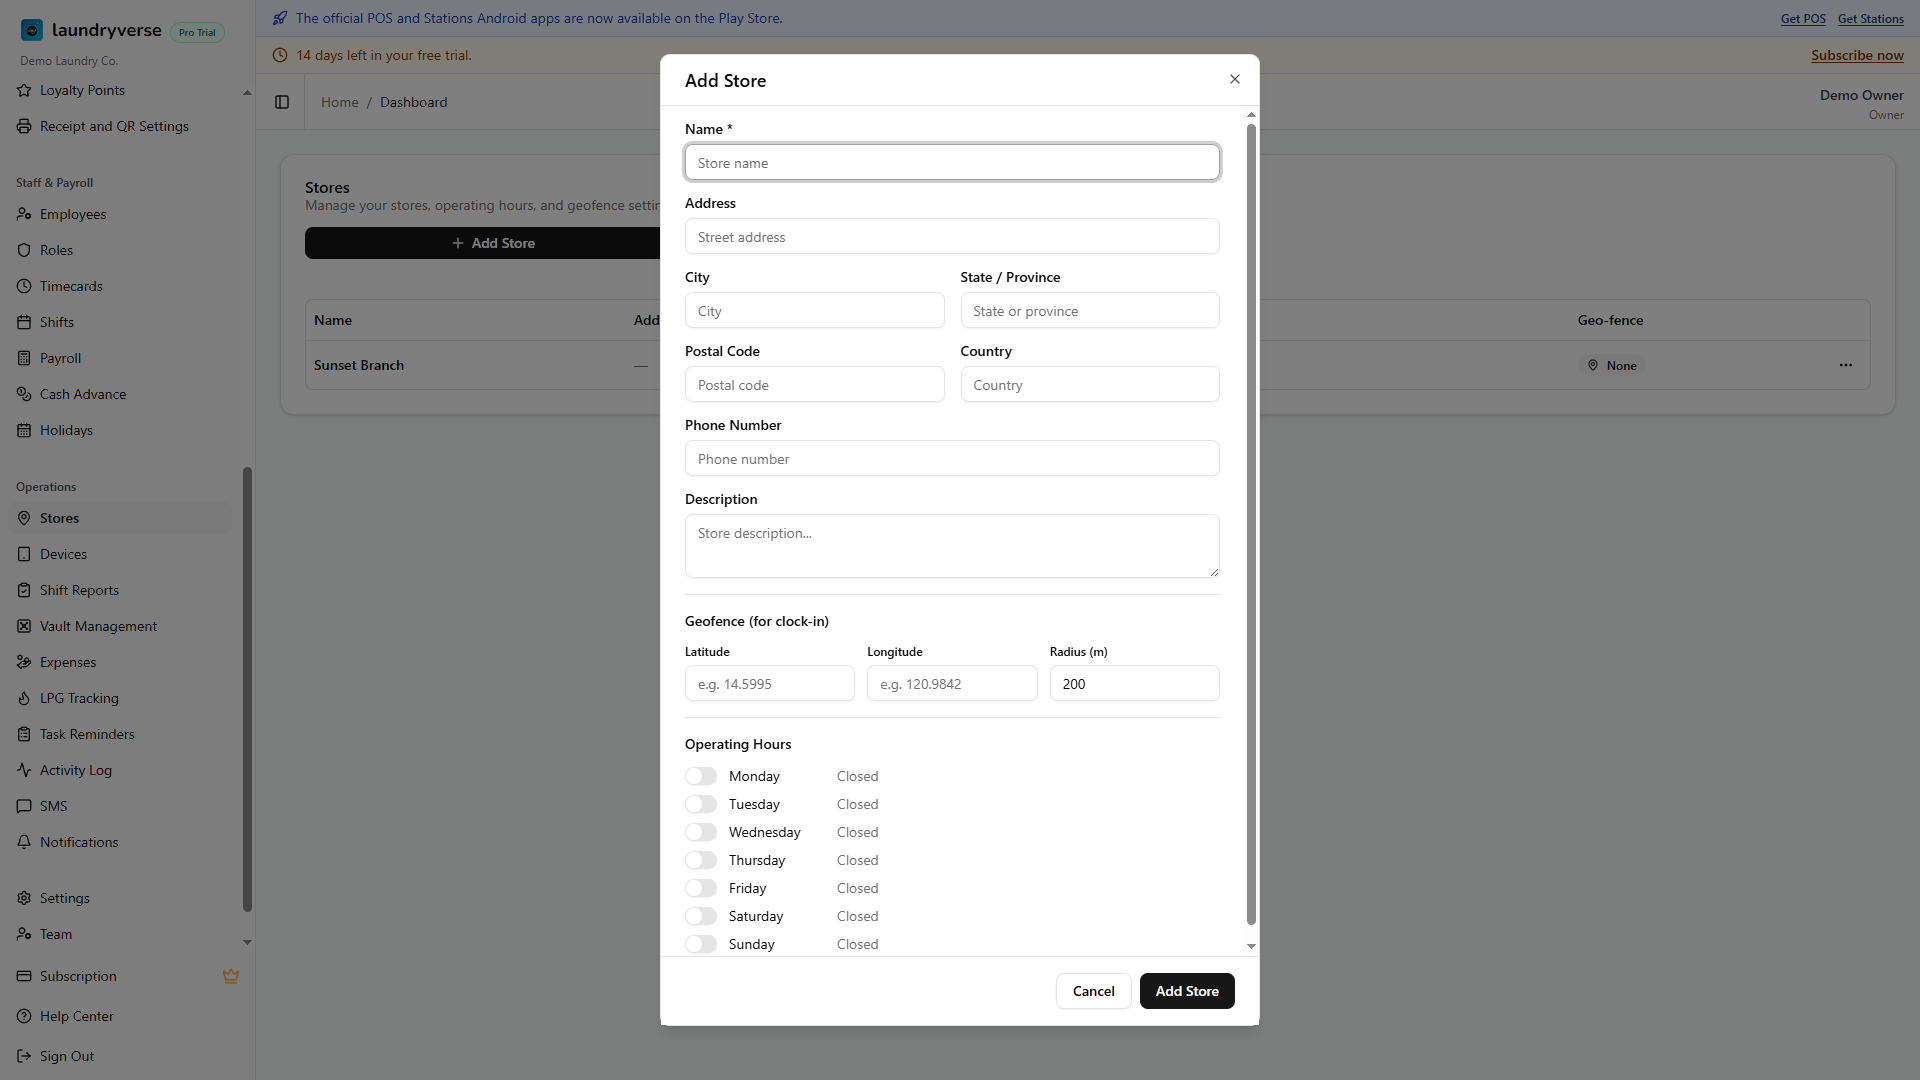
Basic Info
- Store name (required) — e.g., "Main Branch", "Mall of Asia"
- Address, City, State, Postal Code — physical location
- Phone — store contact number
Operating Hours
Toggle each day of the week on or off and set open and close times. Days that are toggled off are treated as closed.
Geo-fence (Optional)
Set a geographic boundary for clock-in verification:
- Enter latitude and longitude coordinates
- Set a radius in meters
When a geo-fence is active, employees using the Stations clock-in feature must be within the specified radius of the store to clock in.
Your existing items are hidden at a new branch until you choose what it sells, so its POS register opens empty. After adding a branch, go to Catalog > Items, switch the header selector to the new branch, and turn on the items it carries. Full steps in Per-Branch Item Availability.
4. Editing and Deleting Stores
Click the three-dot menu (⋯) on any store to:
- Edit — modify the store's details, hours, or geo-fence
- Delete — remove the store permanently
Deleting a store deactivates all devices assigned to it. This cannot be undone.
5. Global Store Selector
Once you have multiple stores, a store selector dropdown appears in the dashboard header. This filters all dashboard data to the selected store:
- Orders — only orders from the selected store
- Items — stock counts and item availability for the selected store
- Timecards — employee records at the selected store
- Payroll — payroll for the selected store's employees
Select All Stores to see combined data across all locations.
You can also control which items each branch sells from here: with a single branch selected, the items list lets you show or hide each item for that branch. See Per-Branch Item Availability.
6. Store Codes
Each store gets a unique 6-character store code used by employees to connect POS and Station devices. Store codes are managed from the Devices page — not from the Stores page. The same code works for both POS and Station login.
What's Next?
- Per-Branch Item Availability — Choose which items each branch sells
- POS Setup — Connect POS devices to your stores
- Stations Setup — Connect Station devices for employee clock-in
- Subscription & Billing — Upgrade to add more stores