Receipt and QR Settings
Receipt and QR Settings is where you customize the bottom of every printed receipt and bill, and decide which fields print on the order QR label that the customer carries home. Three tabs, one Save button, applies tenant-wide. About 3 minutes.
Changing receipt and QR settings requires the Manage items permission (dashboard:items:manage), the same permission that gates discounts, coupons, payment types, and loyalty. The default Owner, Admin, and Manager roles all hold it. Cashier does not, so the page is hidden from the cashier sidebar and the Save button returns an error from the server if a cashier somehow reaches the URL directly. To let another role configure receipts, grant Manage items to that role from Roles & Permissions.
Before you start
Receipt and QR settings apply tenant-wide. There is no per-store override, so every branch prints the same footer note and the same QR label fields once you save. The page is available on every plan, including Trial.
You'll need:
- An active LaundryVerse account.
- A rough idea of what you want at the bottom of receipts, a thank-you, a pickup reminder, a contact number, or a short promo line.
- (Optional) A test print on your real thermal printer to confirm character widths. The on-screen preview is accurate, but seeing it on the actual paper roll is faster than tweaking blind.
Store name, address, logo, and tax / BIR registration details print at the top of the receipt and are set elsewhere, see section 6.
1. Open the Receipt and QR Settings page
From the dashboard, navigate to Catalog -> Receipt and QR Settings in the sidebar.
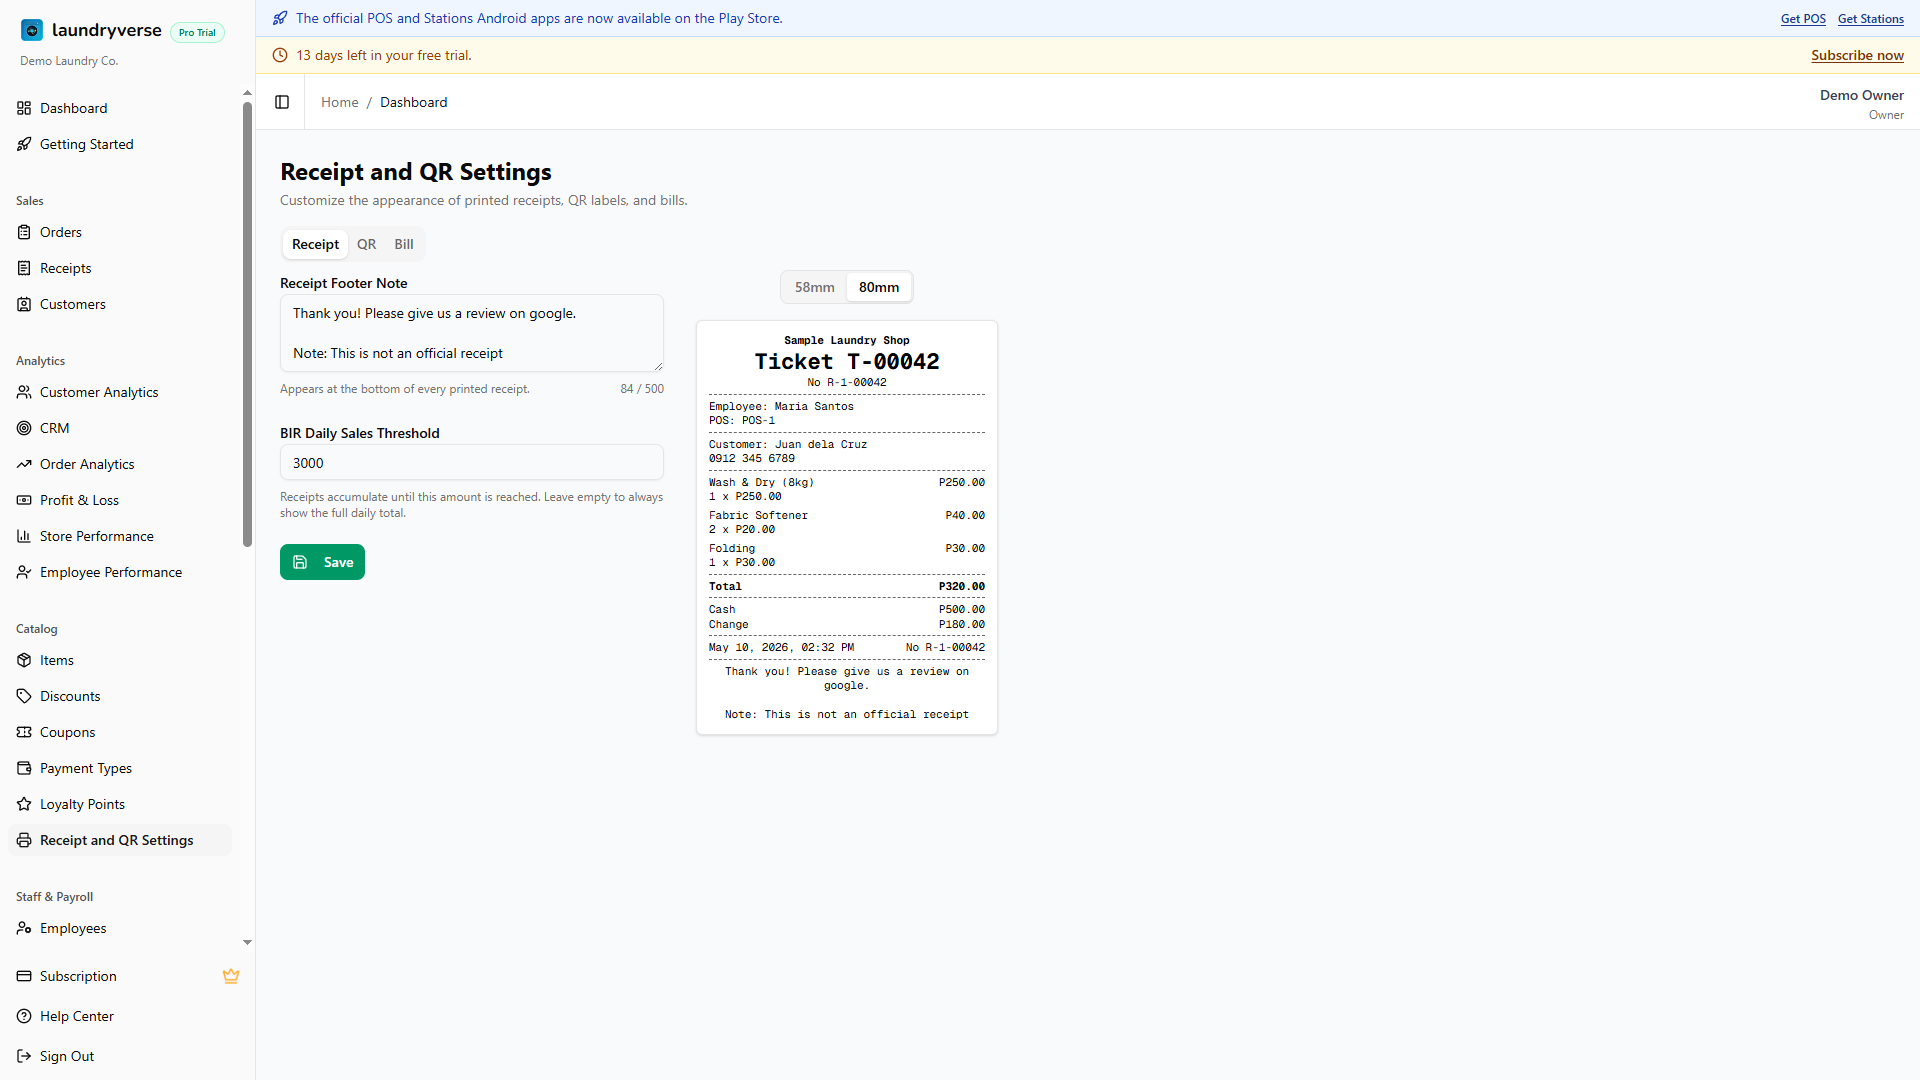
The page shows three tabs along the top, Receipt, QR, and Bill, and a centered preview that re-renders on every keystroke. Above each preview, a paper width toggle flips between 58mm and 80mm so you can see how the same content lays out on either common thermal roll size. The Save button sits below the form on every tab and commits all three tabs at once.
2. Set the receipt footer note
On the Receipt tab, type your message into the Receipt Footer Note textarea. The character counter on the right shows how close you are to the 500 character limit. Line breaks are preserved on the printed receipt, so you can split the note into a short stack of lines.
Good footer notes:
- Thank-you copy: Thank you! Visit us again. Tag us on FB at LaundryShopName.
- Pickup reminders: Pickup window 6 PM same day. Items unclaimed for 60 days are forfeited.
- Promo callouts: Refer 3 friends and get 1 wash free, ask the cashier.
- Contact info: phone number, address, and Facebook page handle.
The preview to the right re-renders as you type, so you can see the exact wrap before you save.
58mm thermal printers fit about 32 characters per line, 80mm fits about 48. Lines wrap automatically, but a wrap mid-phrase looks scrappy. Toggle the preview to 58mm to confirm wraps before printing, especially if your shop runs the narrower roll.
3. Configure the QR label fields
The QR tab controls what prints on the small QR sticker your cashier slaps on each laundry bag. The picker on the left lists every available field with an on/off switch and reorder arrows.
| Field | What prints |
|---|---|
| Ticket / Receipt # | Always printed, and always larger than the other lines. Can't be toggled off. |
| Customer name | The attached customer's name. Off prints a blank line at this position, on prints the name. |
| Customer phone | The customer's phone number. Useful for shops where staff call the customer when the order is ready. |
| Line items | The first item on the order. Extra items collapse to +2 more so the label doesn't overflow. |
| Payment status | Paid (Cash), Paid (GCash), Unpaid, etc. Handy for shops that take payment at pickup. |
| Total amount | The order total in pesos. |
Use the up / down arrows next to each row to set the print order. The picker shows N of 6 on at the top so you can see at a glance how dense the label will be. The preview on the right re-renders as you toggle, so you'll see exactly what the printed sticker looks like before you save.
The QR label is meant to be glanceable, not a full receipt. Most shops keep two or three fields on, typically customer name plus phone, or customer name plus line items. Turning on every field crowds the sticker and the QR code shrinks to make room.
4. Preview the receipt and the bill
The Receipt tab preview shows the full register receipt: store name, ticket number, employee, items, total, cash and change, and your footer note at the bottom. The Bill tab preview shows the simpler bill format, used for unpaid pickup slips, with the same footer note. Both previews respect the 58mm / 80mm paper toggle.
Each preview is fully live. Type into the footer textarea, toggle a QR field, or flip the paper width, and the preview updates in place without a refresh. There is no separate test print button, you confirm the layout on screen, then save, then print a real receipt at the POS register to verify on actual paper.
5. Save changes
The Save button is at the bottom of every tab and commits all three tabs at once, the footer note, the QR field order, and the QR toggles. Settings saved appears below the button on success.
The button disables if the footer note is over 500 characters, with a red counter on the right of the textarea. Trim the message and the button re-enables.
Changes apply from the next printed receipt onward. Receipts that already printed don't retroactively change, so a small wording tweak doesn't invalidate today's receipts. The same goes for QR labels, stickers already on bags keep their existing layout.
6. What lives elsewhere
Other receipt customization lives outside this page.
| What | Where to set it |
|---|---|
| Store name and address | Stores, printed at the top of every receipt. |
| Tax / BIR / TIN registration | Stores, prints in the receipt header for BIR-compliant tenants. |
| Payment type names | Payment Types, the labels that print on the Paid line (Cash, GCash (Maya), BPI Transfer). |
| Receipt number prefix | Auto-generated, no setting needed, follows the R-<storeNumber>-<seq> format. |
| Logo | Not yet supported on receipts. Track this on the roadmap. |
Receipt typography, line widths, and the overall layout are tuned for 58mm and 80mm thermal printers, there's nothing else to set on this page beyond the four blocks above.
Common issues
"The Save button is greyed out"
The footer note is over the 500 character limit. The counter on the right of the textarea turns red when you cross the line. Trim the message back under 500 and the button re-enables. Line breaks count as one character each.
"I saved but the printed receipt still shows the old footer"
The cached POS shift on the device may still be using the old settings. Close the current shift at the register, reopen it, and the next receipt picks up the new footer. If the change is mid-shift and you don't want to close, restart the POS app from the device tray, the next print pulls the latest settings.
"The QR label is too crowded"
You probably have too many fields toggled on. Open the QR tab and turn off the fields you don't actually use, the preview on the right will show the cleaner layout immediately. Most shops keep two or three fields on, anything beyond four starts to crowd the sticker and the QR code shrinks to make room.
"I want the customer's phone above their name on the QR label"
Use the up / down arrows on the left of each row in the QR field picker to reorder. The picker order on screen matches the print order on the sticker, top of the list prints at the top of the label.
"The preview looks fine but the actual print wraps weirdly"
Confirm the paper width toggle above the preview matches your real thermal printer, 58mm shops should preview at 58mm, 80mm shops at 80mm. The on-screen preview uses the same character widths the printer driver uses, so once the toggle matches, the wraps you see on screen are exactly what prints on the paper.
What's next?
- Stores: set the store name, address, and BIR registration that print at the top of every receipt.
- Payment Types: customize how each payment method labels itself on the Paid line.
- Printer Setup: pair the thermal printer if you haven't yet.
- Order Board (POS): the cashier-side view where QR labels are scanned to advance loads.
Stuck? Email [email protected]. The founder reads every message.