Setting Up the Printer & Cash Drawer
Set up a printer so your staff can print receipts and QR labels at the counter. The easiest and most reliable way is the LaundryVerse POS app for Android, which has printing built in. This guide sets it up in the Android app first, then covers how to print from a computer using a web browser.
You can skip this step and come back later. The POS works without a printer, and receipts can always be viewed on screen and printed afterward.
Set up printing in the Android app (recommended)
The LaundryVerse POS app for Android prints straight to your printer over Bluetooth, USB, or your network, and cuts the paper automatically after each receipt and QR label. You can connect more than one printer and choose which one handles receipts and which handles QR labels. Nothing extra to install, and no special web browser needed.
Don't have the Android app yet? Get the LaundryVerse POS app on Google Play.

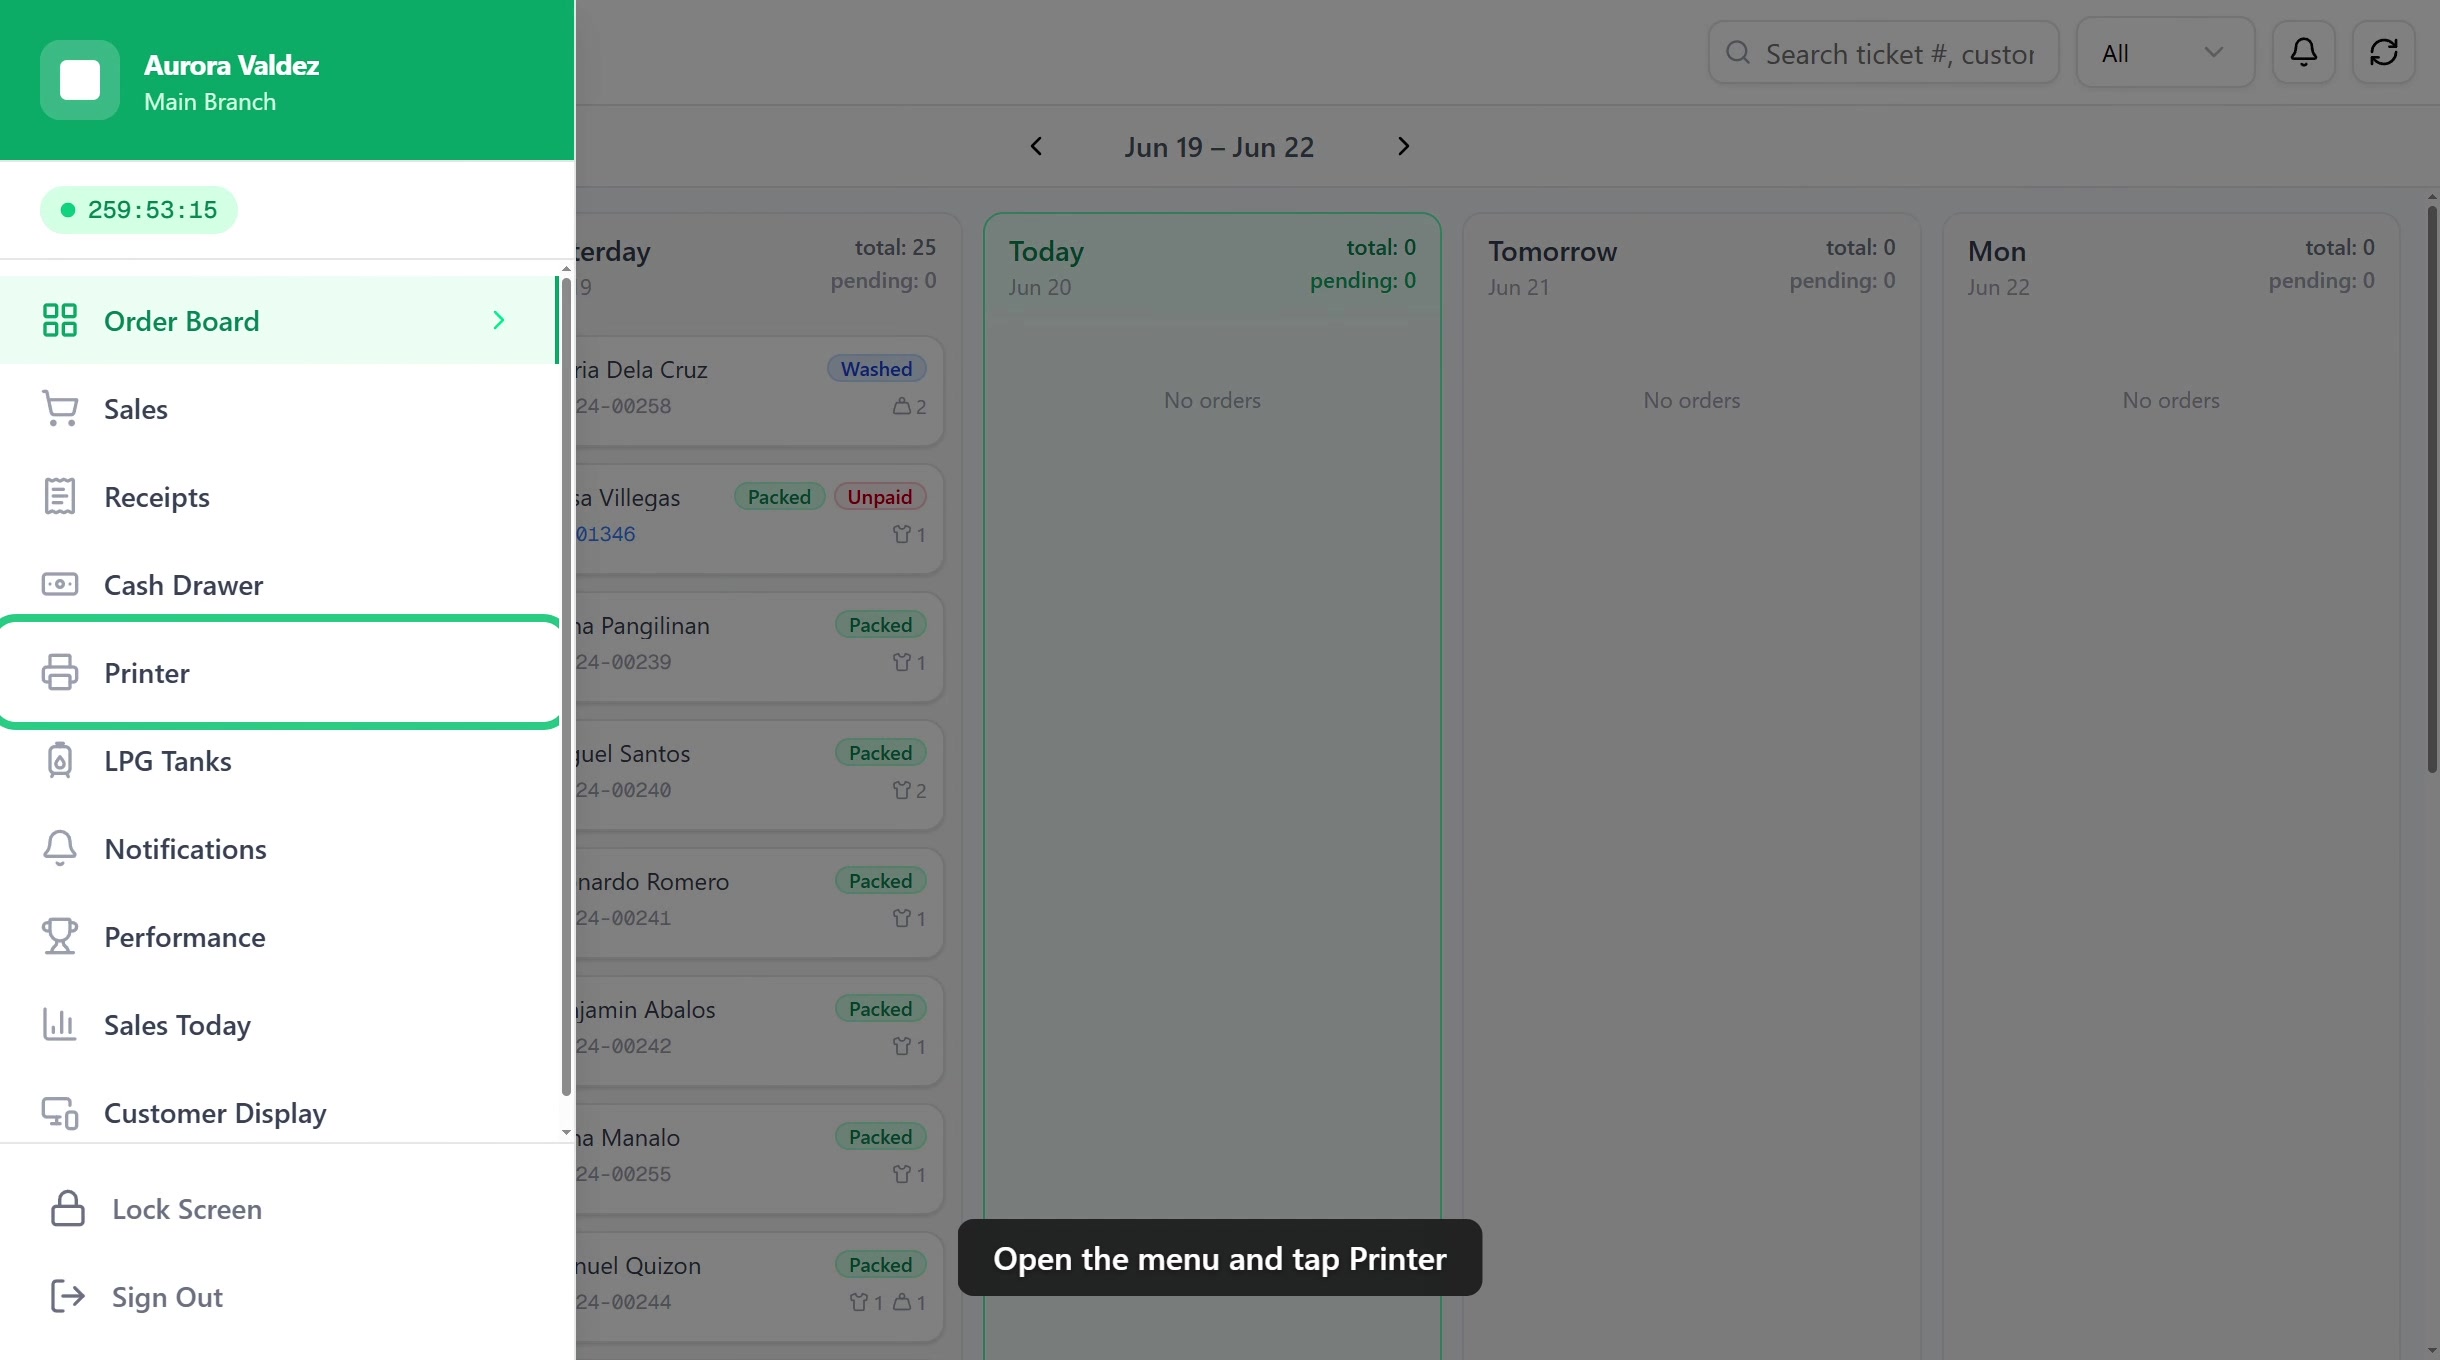
1. Open Printer settings
In the POS, tap the menu (top left) and select Printer. Tap Add printer to set up your first one.
2. Connect your printer
Choose how the printer connects:
- Bluetooth: pair the printer once in your device's Bluetooth settings, then tap Scan paired and pick it from the list.
- USB: plug the printer in, tap Find printers, then allow access when the app asks.
- Network: for a printer shared on your shop's network, enter its IP address and port.
3. Choose what the printer prints
- Name the printer something you'll recognize, like Front counter.
- Set the paper width to match your roll: 80mm for standard receipts or 58mm for compact labels.
- Under This printer handles, pick Receipts, QR labels, or both.
- Turn on Auto-print receipt on charge to print a receipt the moment you charge a sale, and Auto-print QR labels on checkout to print load labels automatically.
4. Test print, then save
Tap Test Print to confirm the printer works, then tap Save.
Connect more than one printer
Add a second printer the same way. A common setup is one 80mm printer for receipts and one 58mm label printer for QR labels.
Assign Receipts to your wide receipt printer and QR labels to your label printer. Each one then prints only its own jobs, so receipts and load labels never come out of the wrong machine.
Which connection should I use?
- USB is the most reliable for a printer that sits at a fixed counter.
- Bluetooth is best when the printer can't be wired to the device, like a wall-mounted printer.
- Network is for a printer shared by several devices over your shop's WiFi or LAN.
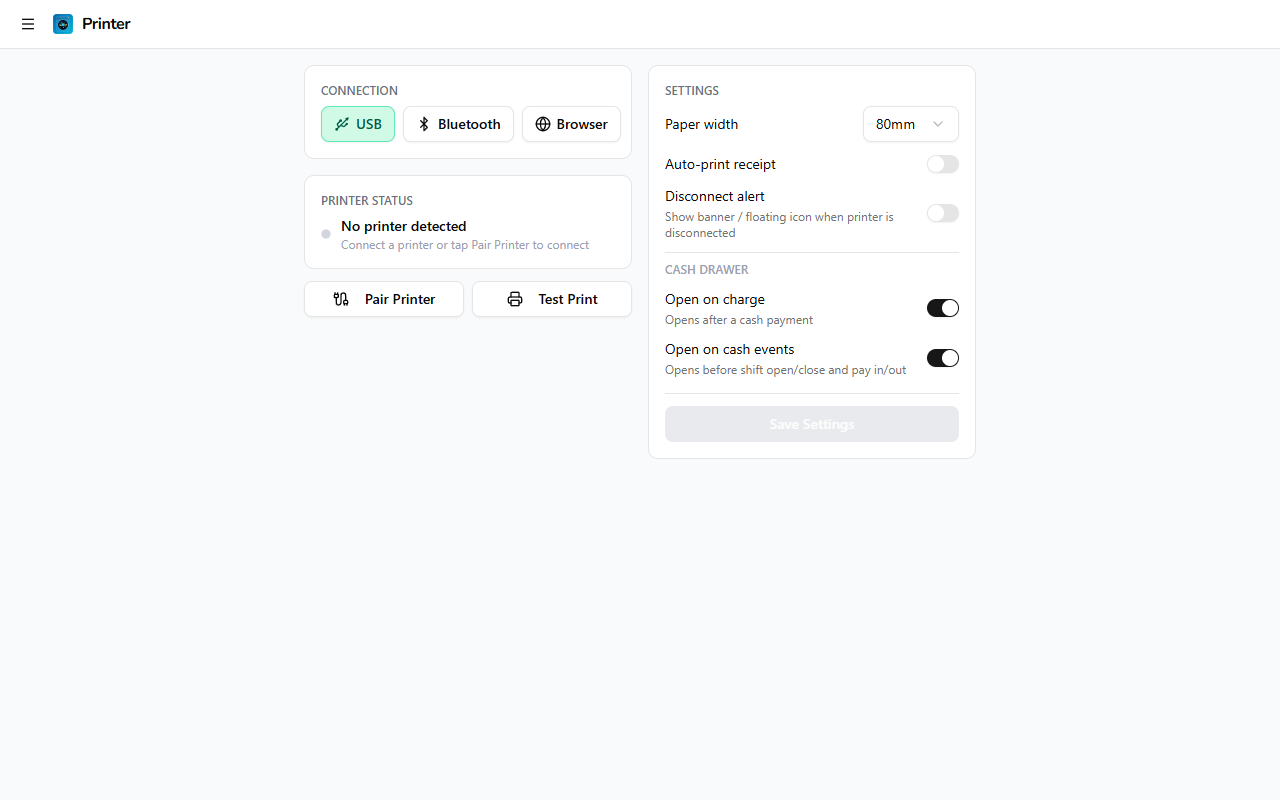
Cash drawer automation
If your printer has a connected cash drawer, LaundryVerse can open it automatically. Connect the cash drawer's RJ-11 (telephone-jack-style) cable to the Cash Drawer Port on the back of your thermal printer:

| Event | What it does |
|---|---|
| Open on charge | Opens the drawer after a cash payment is processed |
| Open on cash events | Opens the drawer for shift open, shift close, pay-in, and pay-out actions |
Turn on the events you want, then save.
Printer and cash drawer settings are saved per device. If you have several POS stations, set up each one separately.
Print from a computer (Chrome or Edge)
Prefer to run the POS in a web browser on a computer instead of the app? You can still print to a thermal printer using Chrome or Edge. Firefox and Safari can't drive thermal printers directly, so they fall back to standard browser printing.
Before you start
You'll need:
- A thermal receipt printer (80mm or 58mm) connected by USB or Bluetooth. A standard inkjet or laser printer also works through the browser's own print dialog.
- Chrome or Edge on the computer, for USB or Bluetooth printing.
- (Optional) A cash drawer with an RJ-11 cable that plugs into the back of the thermal printer (see Cash drawer automation above).
Which connection to use
| Order | Method | Best for | Why this rank |
|---|---|---|---|
| 1st | USB | Wired thermal printers | Most reliable. Reconnects on its own after a power cycle |
| 2nd | Bluetooth | Wireless thermal printers | Works, but needs a manual re-pair after a power cycle |
| 3rd | Browser | Any printer, including inkjet or laser | Universal, but shows the system print dialog every time |
Use USB first. Once you plug the printer in, the browser detects it and reconnects on its own when the printer power-cycles.
Use Bluetooth only if USB isn't an option, like a printer too far from the computer. The browser can't auto-reconnect after the printer is turned off and on, so staff tap Pair Printer again each morning.
Use Browser printing as a fallback when USB and Bluetooth aren't available, like an inkjet or laser printer. This route prints through your operating system's print dialog, so staff confirm each print.
USB and Bluetooth printing in a browser use the Web Serial and Web Bluetooth features, which are only available in Chrome and Edge. Firefox and Safari only see the standard Browser option.
Open the Printer page
In the POS, tap the menu (top left) and select Printer. You'll see two panels: connection and status on the left, print and cash drawer settings on the right.
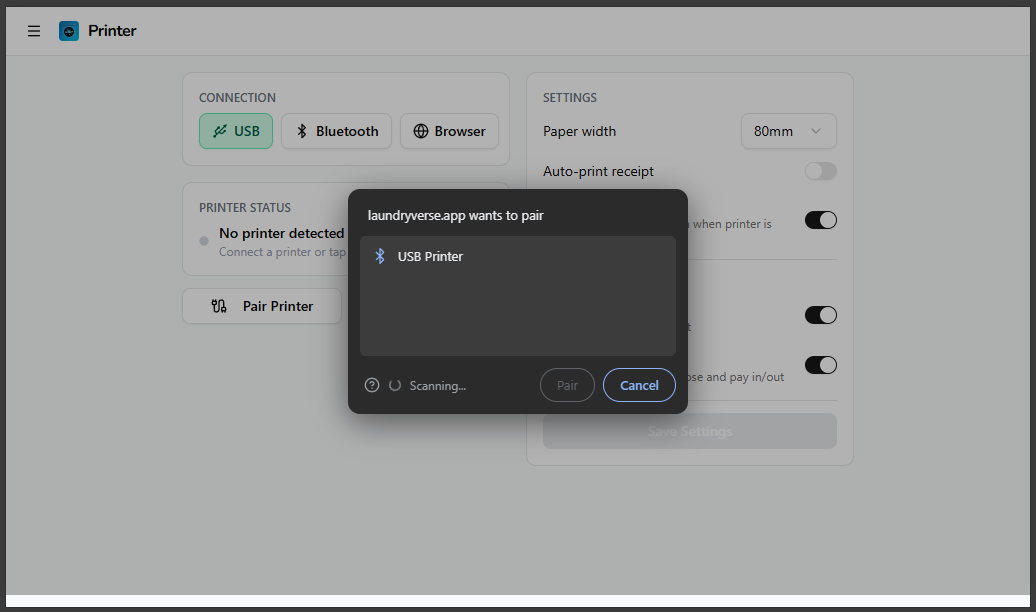
Pair the printer
Tap USB first. If USB isn't supported on this computer, tap Bluetooth. If neither works, tap Browser, which needs no pairing.
- Tap Pair Printer.
- The browser shows a permission dialog listing nearby printers. Select yours and click Connect.
- The printer is paired. The Printer Status section shows the printer name and a green dot.
Once paired, tap Test Print. If a clean receipt comes out, pairing is done. If nothing prints or the receipt is garbled, see Troubleshooting.
Configure print settings
On the right panel, set the paper width (80mm standard or 58mm compact) to match your roll, and turn on Auto-print receipt so a receipt prints after every successful charge. Cash drawer options are in the same panel (see Cash drawer automation).

Troubleshooting
A USB printer shows "Access denied" on Windows (browser)
Windows uses a built-in printer driver (usbprint) that blocks the browser from talking to the printer over USB. Replace it with WinUSB using a free tool called Zadig:
- Plug in the thermal printer via USB.
- Download and open Zadig.
- Go to Options → List All Devices.
- Select your thermal printer from the dropdown, for example "POS80 Printer USB".
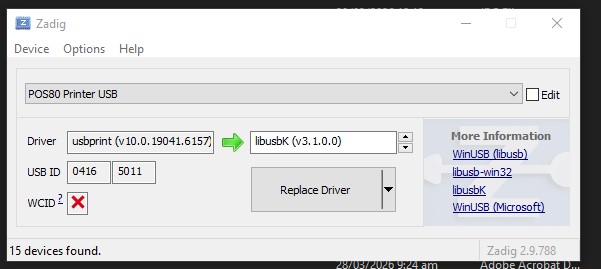
Do not select the wrong device. Pick the thermal receipt printer, not your regular inkjet or laser printer (for example HP or Epson). Replacing the wrong driver will break that device.
- On the right, use the arrows to set the target driver to WinUSB.
- Click Replace Driver.
Afterward your thermal printer won't appear in Windows printer settings anymore. This is expected, and the browser can now reach it over USB.
To revert: open Device Manager, find the printer, right-click, choose Update Driver, then "Search automatically for drivers."
A Bluetooth printer doesn't reconnect after power cycling (browser)
This is a Web Bluetooth limitation in the browser, not a LaundryVerse bug. To reconnect after turning the printer off and on:
- Go to Printer in the POS.
- Tap Pair Printer.
- Select your printer and click Pair.
If this happens daily, switch the connection to USB, which reconnects without staff input. In the LaundryVerse app, this browser limitation doesn't apply.
Bluetooth pairing fails or hangs
Some thermal printers pair unreliably the first time. Try this:
- Turn the printer's Bluetooth off and back on (usually a button on the printer).
- Remove any old pairing from the device's system Bluetooth settings.
- Pair the printer fresh, then connect it again in the POS.
If it still fails twice in a row, connect the printer over USB instead. USB is more reliable for the same printer in most cases.
The printer isn't detected
- Make sure the printer is powered on and the USB cable is fully seated, or that Bluetooth is on.
- Try a different USB port. Some hubs don't pass the right signal.
- In the app, tap Find printers (USB) or Scan paired (Bluetooth) again. In a browser, refresh the page and tap Pair Printer again.
The cash drawer doesn't open
- Check that the drawer's RJ-11 cable is in the printer's Cash Drawer Port, not a phone or network port. They look similar.
- Some printers need a specific kick-pulse setting in their own configuration. Check the printer manual.
- Turn on Open on charge and process a small test sale.
Browser printing shows the wrong layout
- Browser printing uses your operating system's print settings. Make sure paper size and margins are set correctly there.
- For thermal printers, USB or Bluetooth give much cleaner results than browser printing. Switch back to USB if you can.
What's next?
Your printer is ready. Time to ring up a real order:
- Your First Order walks through the full order flow, from adding items to printing the receipt.
Stuck? Email [email protected]. The founder reads every message.