Processing Payments
The checkout screen is where every sale becomes money in the drawer. Open it from the cart, type the amount, tap the per-method commit chip (for example Add CASH Payment or Add G-CASH Payment), and then tap Charge. The success screen prints the receipt and tells you how much change to hand back. About 3 to 4 minutes.
Charging a sale requires the Use register permission (pos:register), the same permission that gates the entire register flow. The default Owner, Admin, Manager, and Cashier roles all hold it, because a cashier needs to take payment to finish a single sale. Applying discounts and coupons at the register is gated by a second permission, Apply discounts (pos:discounts), which all four default roles also hold. To restrict either, edit the role in Roles & Permissions. Without Use register, the Charge action returns an error from the server.
Before you start
The checkout opens on top of the register cart and uses the device's active shift to record the sale. Cash payments hit the cash drawer on the same shift, card and e-wallet payments do not.
You'll need:
- A device activated and an employee logged in. See POS Setup.
- An active shift open for the current employee. See Shifts.
- At least one item in the cart. See Register for browsing and adding items.
- Payment types configured in the dashboard. Every tenant ships with Cash, GCash, and Bank Transfer as defaults. Manage the full list from Payment Types.
- (Optional) A thermal printer paired if you want receipts to print automatically and the cash drawer to kick on cash sales. See Printer Setup.
The checkout works on every plan, including Trial. No subscription gate.
1. Opening the checkout
With at least one item in the cart, tap the green Charge button in the cart footer. The full-screen checkout opens.
The screen has two panels:
| Panel | What it shows |
|---|---|
| Left | The autofocused amount input, quick-amount badges, the on-screen numpad (tablet and desktop only), and the payment-method row with one commit chip per method |
| Right (tablet/desktop only) | Order summary, applied payments, the live remaining balance, and the bottom Charge action |
Cash is pre-selected as the payment type (CASH is always the first chip in the method row) and the amount input is pre-filled with the full order total. For a single-method cash sale, the only thing you need to do is hand the cash over, tap Add CASH Payment, and then tap Charge.
On phones, applied payments and the live Remaining pill live in a sticky bottom bar that stays visible while you type. The amount input is autofocused, which triggers the device's native numeric keyboard, so there is no on-screen numpad on phone. Mobile now has parity with desktop for remove-coupon and points-to-earn display.
2. Picking a payment type
Each payment method has its own commit chip in the method row. The row sits along the bottom of the left panel on tablet and desktop, or right below the order summary on phones. Tap a chip to select that method, then tap it again (now labeled Add <METHOD> Payment) to commit the typed amount. Selected chips turn solid emerald.
The chips are populated from the Payment Types list in the dashboard. CASH is always the first chip in the row, followed by the rest in the order configured in the dashboard. By default the list contains:
- Cash, of type
CASH. The only payment type that affects the cash drawer. - GCash, of type
GCASH. - Bank Transfer, of type
OTHER.
Add more from Payment Types, for example a Maya entry or a Card entry for terminal sales. The chip order after CASH matches the order in the dashboard.
The amount input is autofocused on open and pre-filled with the order total. When you switch methods, the input clears or pre-fills with the remaining balance depending on the selected method, so switching from Cash to GCash mid-entry won't carry over an extra-bill amount you'd already typed.
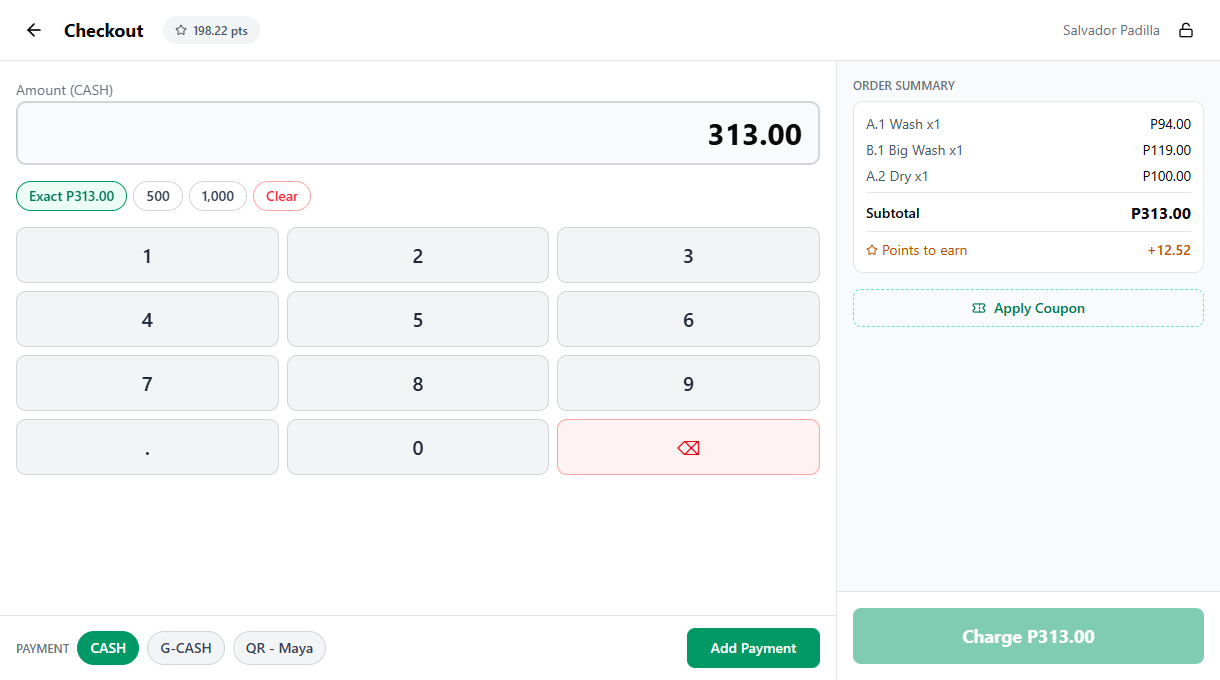
3. Entering the amount
The big number near the top of the left panel is the live amount input. It is autofocused on open. On tablet and desktop, use the on-screen numpad to type. On phone, the device's native numeric keyboard appears automatically, so there is no on-screen numpad. Either way, you can also tap a quick-amount badge to skip typing:
| Badge | What it does |
|---|---|
| Exact | Fills the input with the exact remaining balance |
| 20 / 50 / 100 / 200 / 500 / 1000 | Common cash denominations, shown only when Cash is selected and only for amounts greater than the remaining balance. These quick-fills now appear on phone, tablet, and desktop. |
| Clear | Empties the input so you can start over |
For Cash payments, if the entered amount is larger than the remaining balance, the Change line appears under the input in emerald, showing exactly how much to hand back:
Order total: P215
Customer pays: P500
Change: P285
For GCash, Bank Transfer, Card, and any other non-cash type, the amount is taken as-is. The system assumes the customer paid the exact amount on the terminal or app side, so no change is calculated.
4. Recording one payment
For a straight single-method sale, the per-method commit chip (for example Add CASH Payment or Add G-CASH Payment) is the step before Charge. The flow:
- Confirm the payment method chip is the right one (CASH is selected by default).
- Confirm the amount matches what the customer is handing over (or what the terminal shows for non-cash).
- Tap Add
<METHOD>Payment, the commit chip for the selected method.
The entry appears in the Applied Payments list on the right (or in the sticky bottom bar on mobile) with the payment type name, the amount, and the change due if any. When the running total covers the order, the Payment complete check renders and the Charge button on the right panel becomes enabled.

5. Recording multiple payments
To split across methods, just keep adding entries. After each commit, the method row auto-selects Cash again and the amount input refreshes for the new remaining balance, so the next entry is one tap of a different method chip plus one tap on its Add <METHOD> Payment commit chip.
To remove a payment that you've already added, tap the small X on the right side of the entry (in the Applied Payments list on desktop and tablet, or in the sticky bottom bar on mobile). The remaining balance recalculates and you can re-enter.
The full split-tender walkthrough lives in its own guide: Split Payments. Use that doc when the customer mixes cash and GCash, two different cards, or any combination of methods on one order.
To accept less than the full total now and collect the rest later, see Partial Payments. That flow surfaces a Pay Partial button under the disabled Charge button once you've recorded at least one payment that doesn't cover the order.
6. Finalizing the sale
When the order is fully paid, tap Charge on the right panel (or in the sticky bottom bar on mobile). Behind the scenes the system:
- Records the receipt against the active shift, the current store, and the cashier on duty.
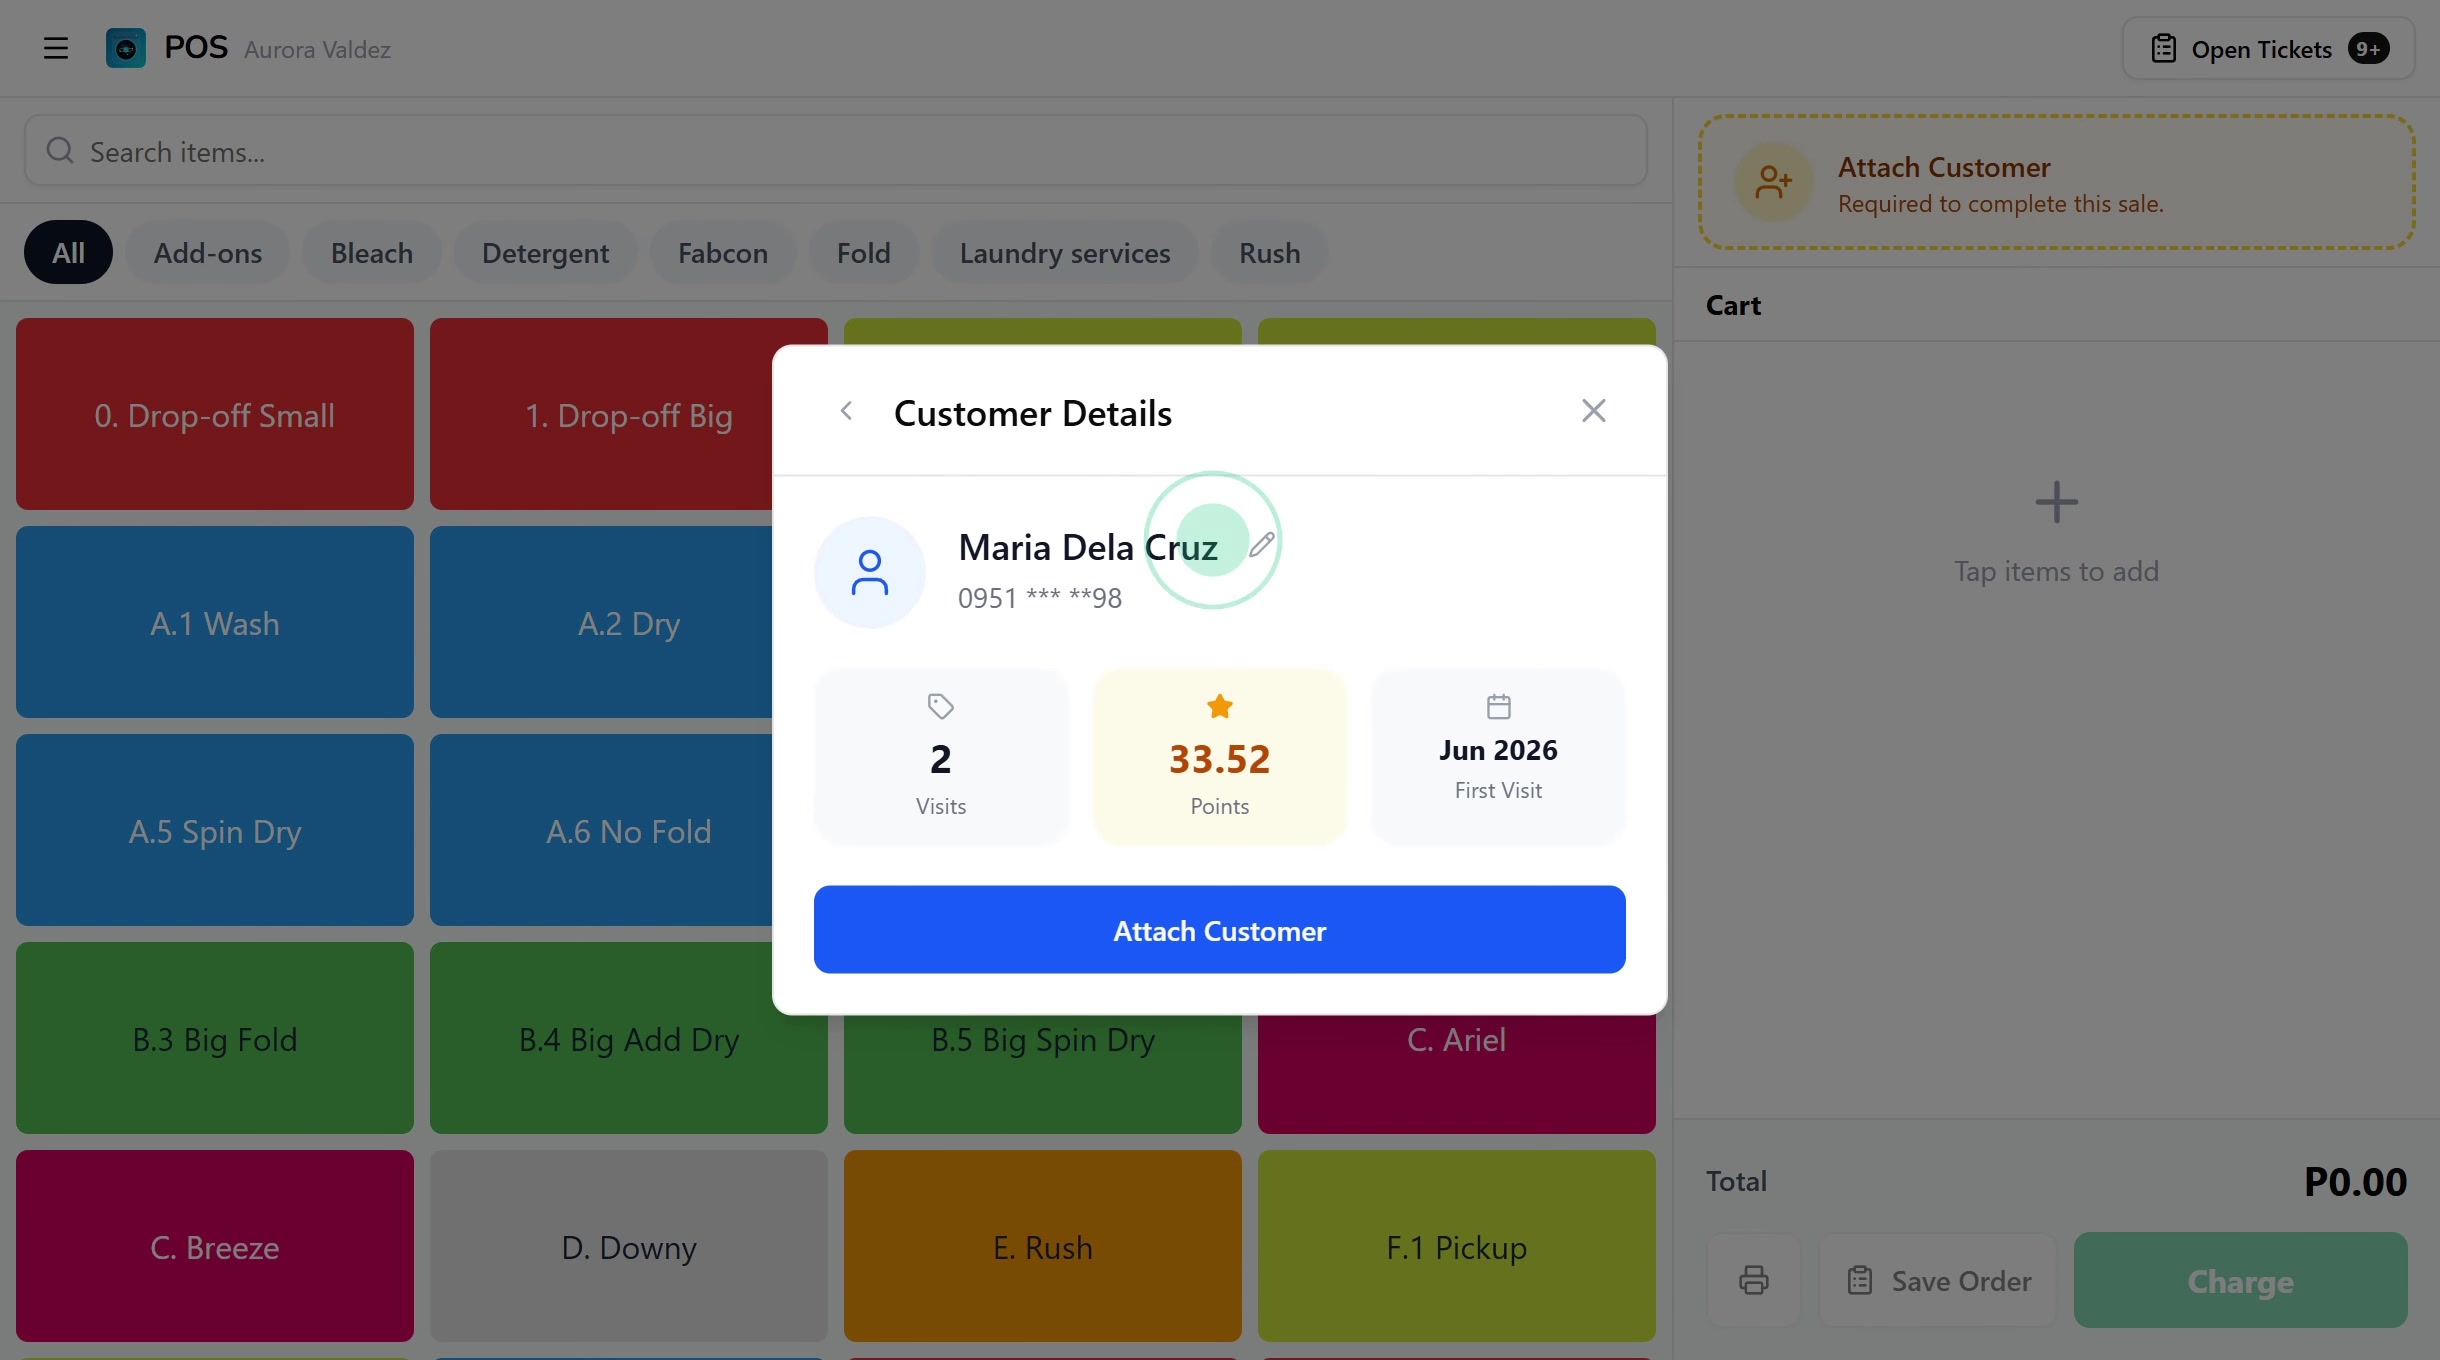
- Awards loyalty points to the attached customer (if one is attached).
- Computes change for cash entries and stores the change amount on the payment line.
- Sums every cash entry into the Cash payments total that the shift report uses to compute expected cash at close. See Shifts for the full expected-cash math.
The Payment Complete success screen appears with the receipt number and (if a customer is attached) the points earned for the sale and the customer's new balance.
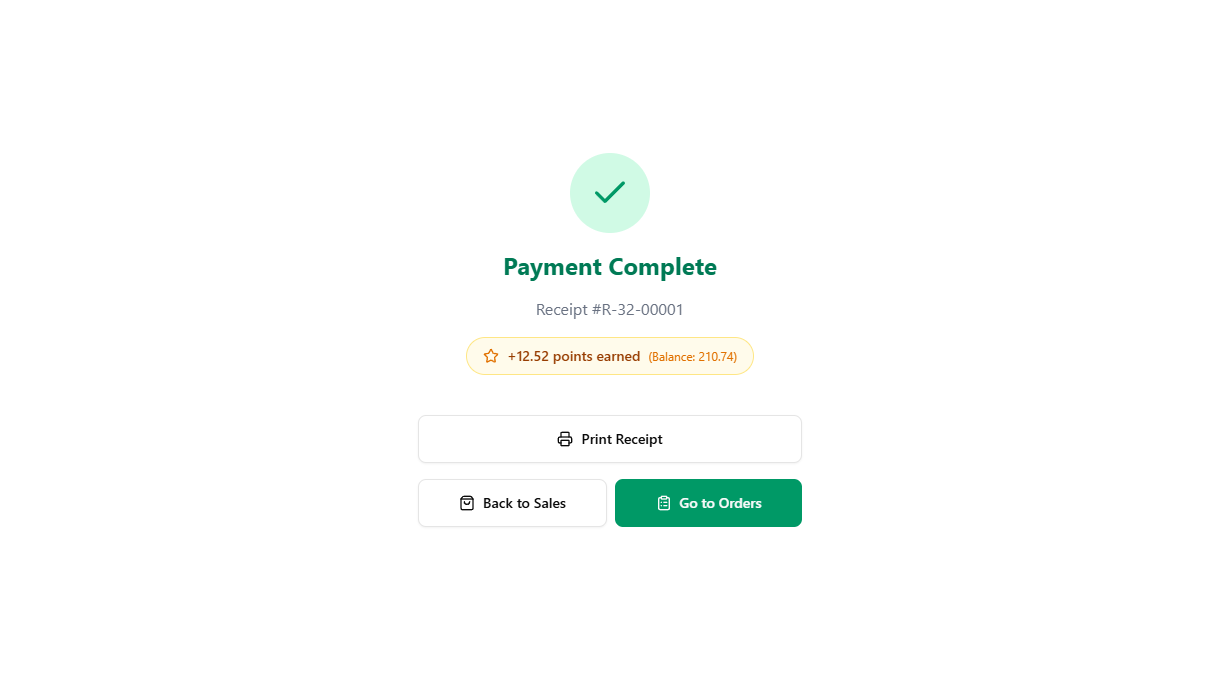
From the success screen you can:
- Print Receipt to print the customer copy on a paired thermal printer. If the printer is set to Auto-print on charge, the slip already came out, this is just a reprint.
- Print QR Labels to print the per-load QR sticker sheet for the order, used by the wash and dry stations.
- No Change to flag short change if you couldn't give exact change. See Short Change.
- Back to Sales to return to the register with an empty cart, or Go to Orders to land on the Order Board.
If a printer is paired and Auto-print receipt is on, the slip prints automatically when you tap Charge. If at least one payment is cash and Open drawer on cash events is on, the cash drawer also kicks at the same moment. Both settings live on the Printer Setup page.
7. What prints on the receipt
The auto-printed receipt mirrors the order summary on screen, plus a few extras the printer can render and the screen cannot:
- Store name, receipt number, date and time, cashier name, device name.
- Customer name if one is attached.
- Every line item with quantity, unit price, and line total.
- Discounts, coupon, loyalty points redeemed, and any prior deposit, each on their own line.
- Order total, every payment by type and amount, and the change amount on cash sales.
- Points earned and the customer's running balance, if a customer is attached.
- The receipt footer note from Receipt Settings, if one is configured.
The exact same shape is stored on the receipt record, so reprints from the success screen and from Receipts on the dashboard look identical to the auto-printed copy.
Common issues
"Wrong amount typed and the payment is already added"
Tap the small X next to the entry in Applied Payments (or in the sticky bottom bar on mobile) to remove it. The remaining balance recalculates. Type the correct amount and tap the per-method commit chip again, for example Add CASH Payment.
"Payment type missing from the picker"
The method chips are populated from the dashboard's Payment Types list (with CASH always first). If GCash, Maya, or a Card option is missing, open Payment Types on the dashboard and add it. The new chip shows up on the next register load on every device.
"Change calculation looks off"
Change is only computed when the selected payment type is Cash and the entered amount is greater than the remaining balance. Switching to GCash or Card hides the Change line, since the terminal handles change on its side. If you accidentally typed a cash-style overpayment under a non-cash chip, switch back to Cash before tapping Add CASH Payment.
"Charge is greyed out"
Two reasons. First, the order isn't fully covered yet, and the Remaining pill (in the sticky bottom bar on mobile, or in the right panel on tablet and desktop) shows what's still owed. Second, no payments have been added, only the amount input is filled. The per-method commit chip (for example Add CASH Payment) is the step that turns the typed amount into a recorded entry. Charge only finalizes what's already been committed.
"Partial payment recorded by mistake"
If you tapped Pay Partial when the customer was actually paying the full amount, the order is now saved as an open ticket with a deposit. Open it from Open Tickets, enter the remaining balance, and tap Charge to finalize the rest. The deposit shows as Previously Paid on the second checkout so you only collect what's still owed.
"Auto-print didn't fire after Charge"
The printer isn't paired with this device, or Auto-print receipt is off. Open Printer Setup, pair the printer over USB or Bluetooth, and turn on Auto-print. Reprint the current sale from the success screen with the Print Receipt button. Reprints from older sales live on the Receipts page on the dashboard.
"Customer wants a refund"
Refunds are handled from the order detail, not from the register. Open the order from Open Tickets or the Order Board, tap the receipt, and use the Refund action. Refunding requires the Process refunds permission (pos:refund), held by all four default roles.
What's next?
- Split Payments: mix two or more methods on a single order.
- Partial Payments: take a deposit now and collect the balance later.
- Short Change: flag and resolve change owed when the drawer is short.
- Attaching Customers: link the sale to a customer for loyalty and history.
- Shifts: how cash payments roll up into the close-shift report.
- Payment Types: add, rename, or remove the methods that appear in the pills.
Stuck? Email [email protected]. The founder reads every message.