Setting Up the POS
Before your staff can take orders, you need to set up at least one POS device. This guide walks you through generating a store code, activating a device, logging in with a PIN, and opening your first shift.
Want the end-to-end version? Watch the 10-minute real-shop walkthrough, covers POS setup, your first order, Stations, and closing the shift, all recorded in an actual laundry shop.
1. Generate a Store Code
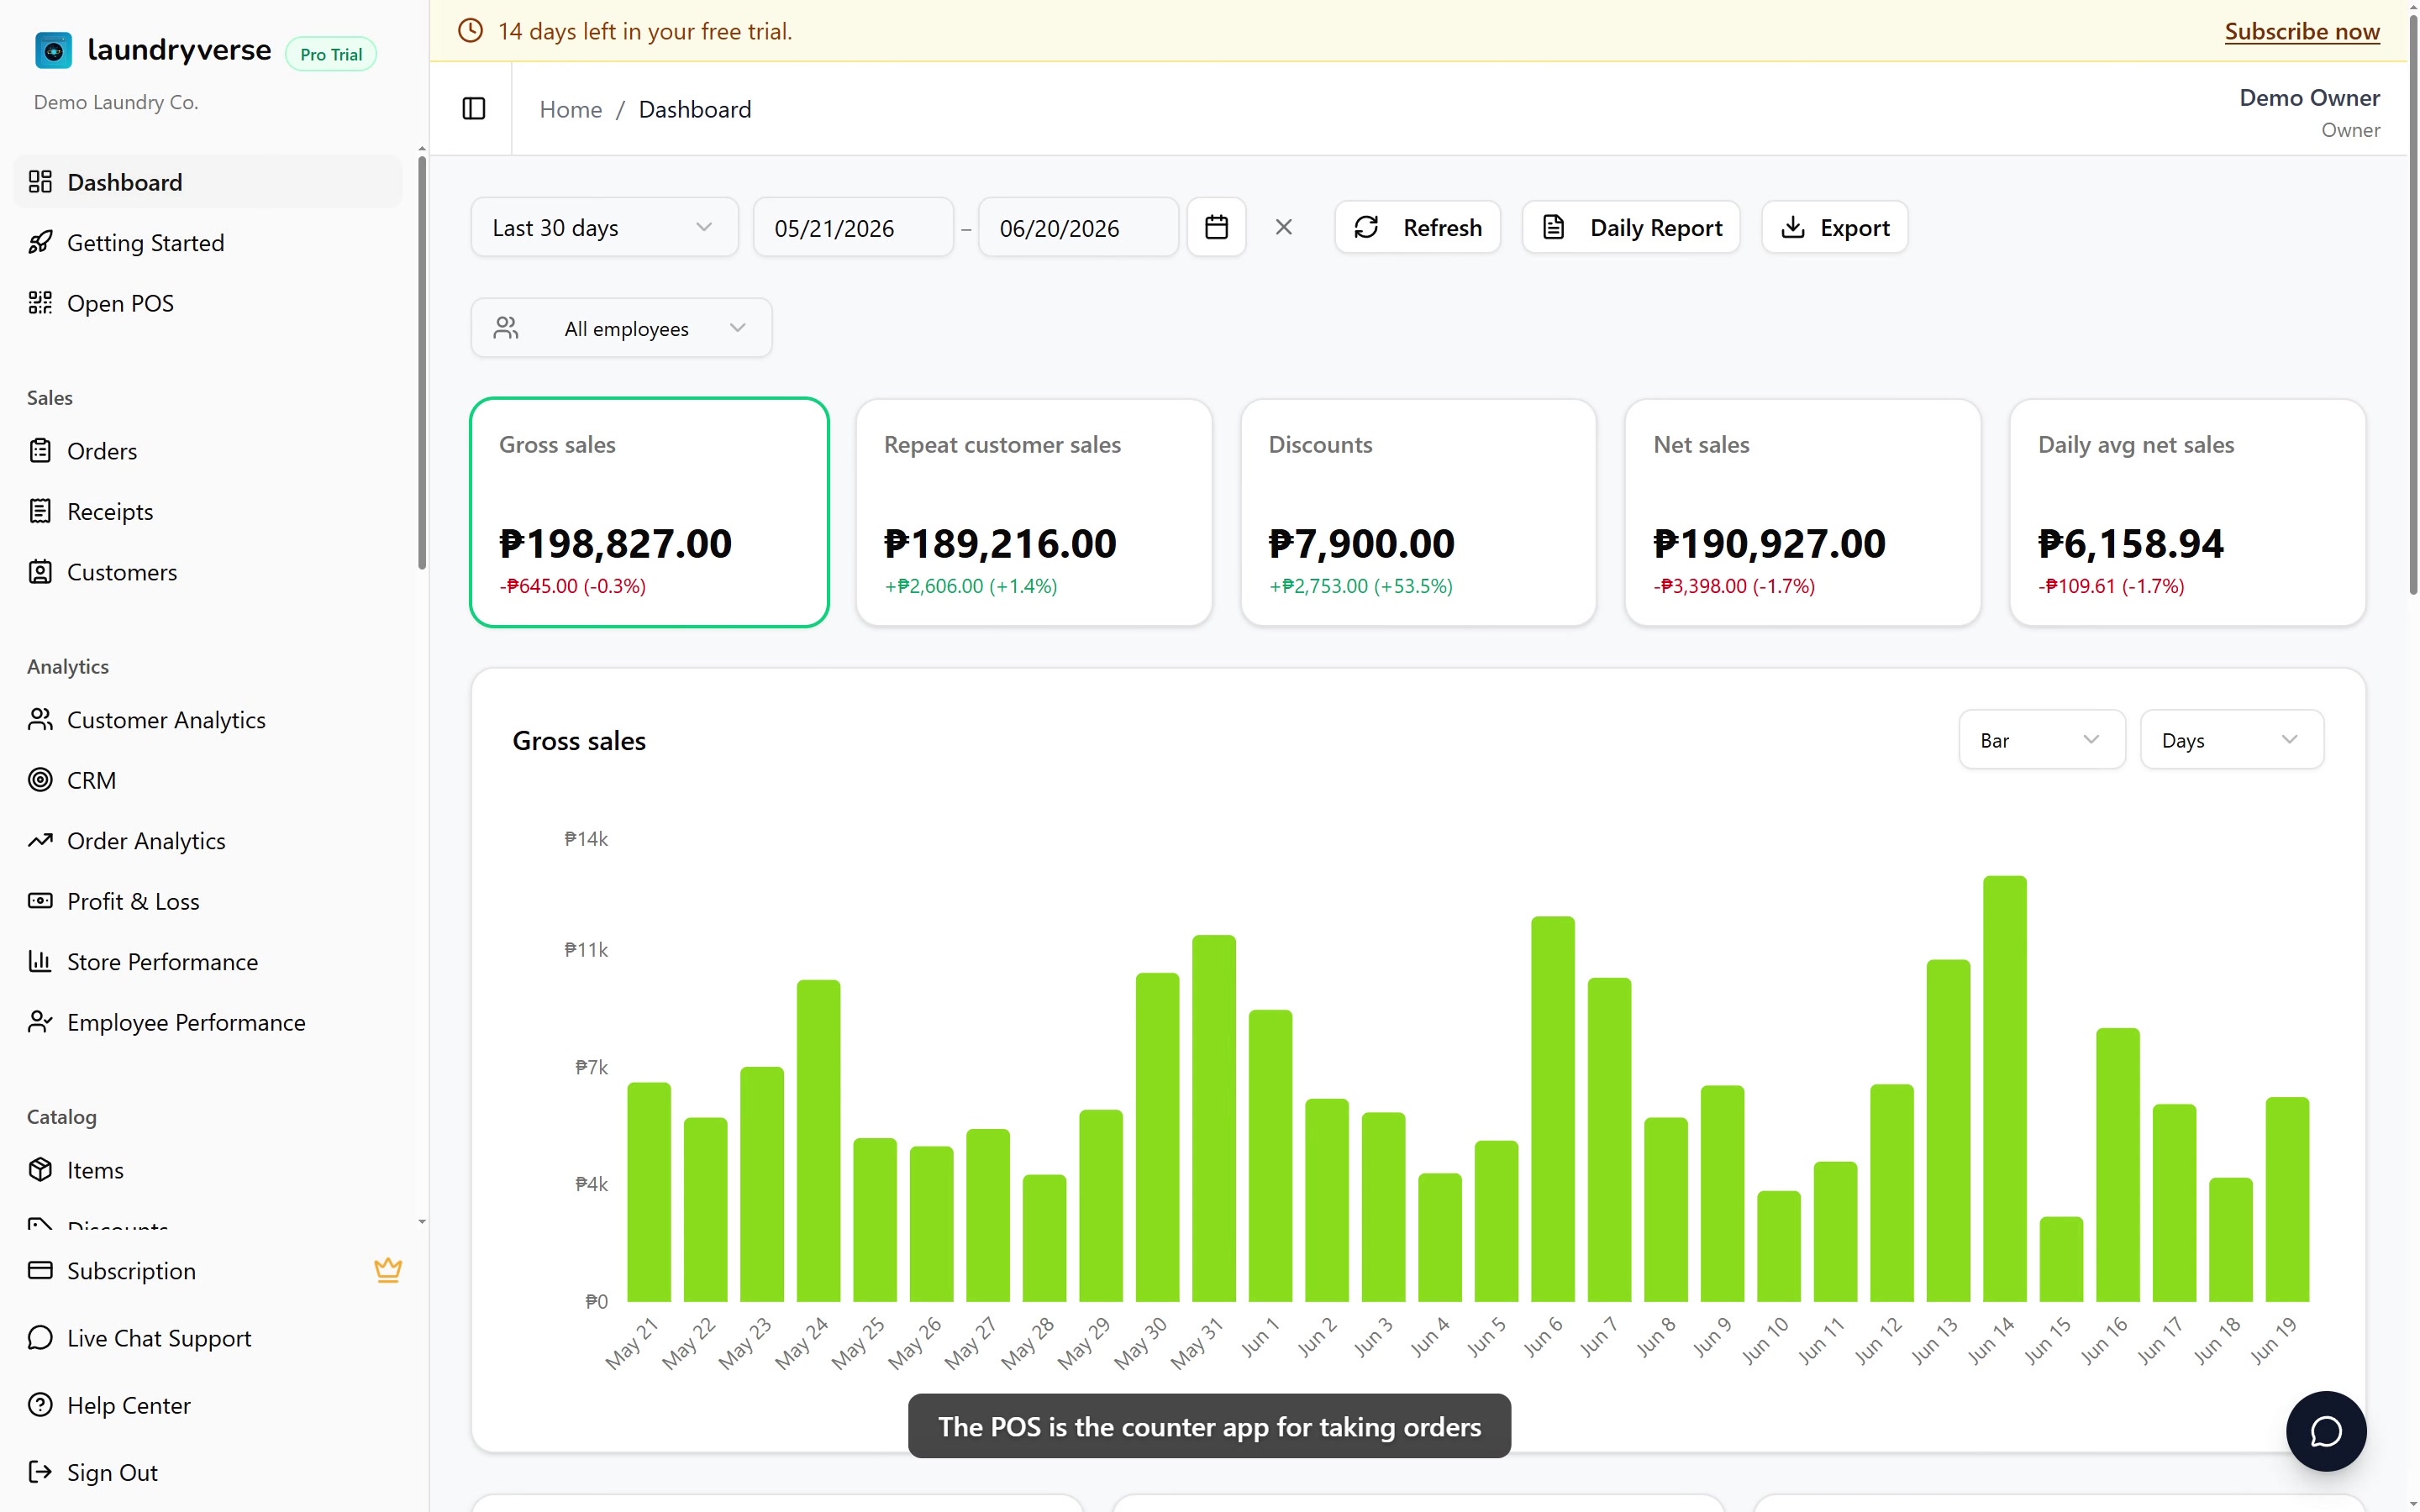
From the admin dashboard, go to Operations > Devices and click the POS Links button. This opens a dialog showing each of your stores with:
- A 6-character store code (e.g.,
QIE23X) - A QR code that employees can scan
- A copy-able link to the POS login page
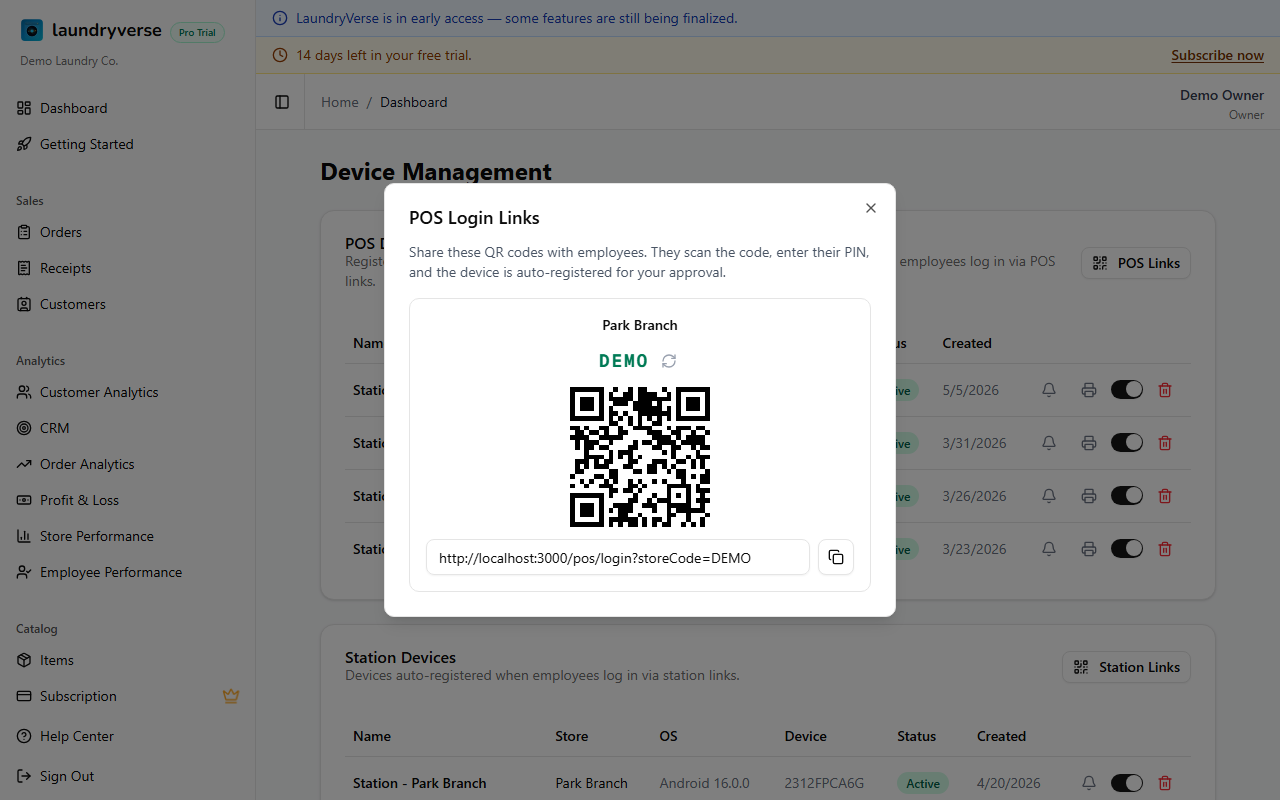
If a store doesn't have a code yet, click Generate Code to create one. You can also regenerate a code at any time — this invalidates the old code for security.
Print the QR code and tape it near the POS tablet. Employees can scan it with the device's camera to jump straight to the login screen.
2. Install the App
Install LaundryVerse on the device before entering the store code. The install path depends on the device:
Android tablet or phone (Recommended)
The native LaundryVerse POS Android app is on the Play Store:
Download LaundryVerse POS on Google Play →
- Open the Play Store on the device and search for LaundryVerse POS (or use the link above)
- Tap Install and wait for the download to finish
- Open the app — you'll land directly on the store code entry screen
Once installed, scanning the store-code QR (from the Devices > POS Links dialog) with the phone camera opens the app directly — no browser tab in between. The Android app is registered as the official handler for laundryverse.app/pos URLs.
iPad or Safari (Install as PWA)
Apple doesn't allow third-party app stores, so on iPad you install LaundryVerse as a Progressive Web App (PWA) — same full-screen experience, just a different install path:
- Open laundryverse.app/pos in Safari
- Tap the Share button (square with arrow)
- Scroll down and tap "Add to Home Screen"
- Tap Add to confirm
The app icon appears on the home screen. Open it from there for all future sessions.
Other browsers (web fallback)
If you can't install the app (e.g., a desktop machine for demoing the flow), laundryverse.app/pos works directly in any modern browser. On Chrome you can also install it as a PWA from the three-dot menu → "Install app" — same full-screen experience as iPad.
3. Activate the Device
With the app installed and open (or laundryverse.app/pos loaded in the browser fallback), connect the device to your store. There are two ways:
Option A: Scan the QR Code
Use the device camera to scan the QR code from the POS Links dialog. On Android with the app installed, this opens the app directly to the PIN login screen.
Option B: Enter the Store Code
Enter the 6-character store code from the POS Links dialog and tap Continue. The device connects to your store and shows the PIN login screen.
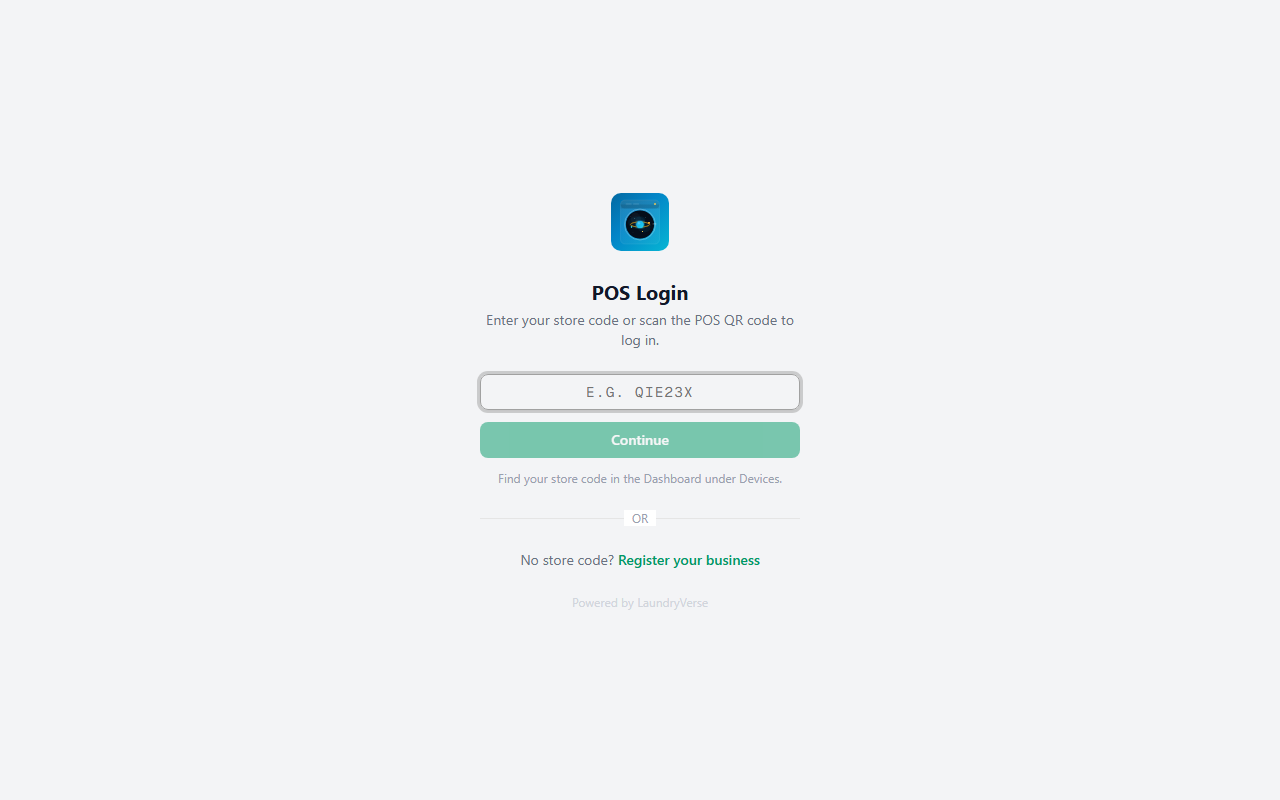
The device remembers the store after the first login. Returning employees will skip the store code step and go straight to PIN entry.
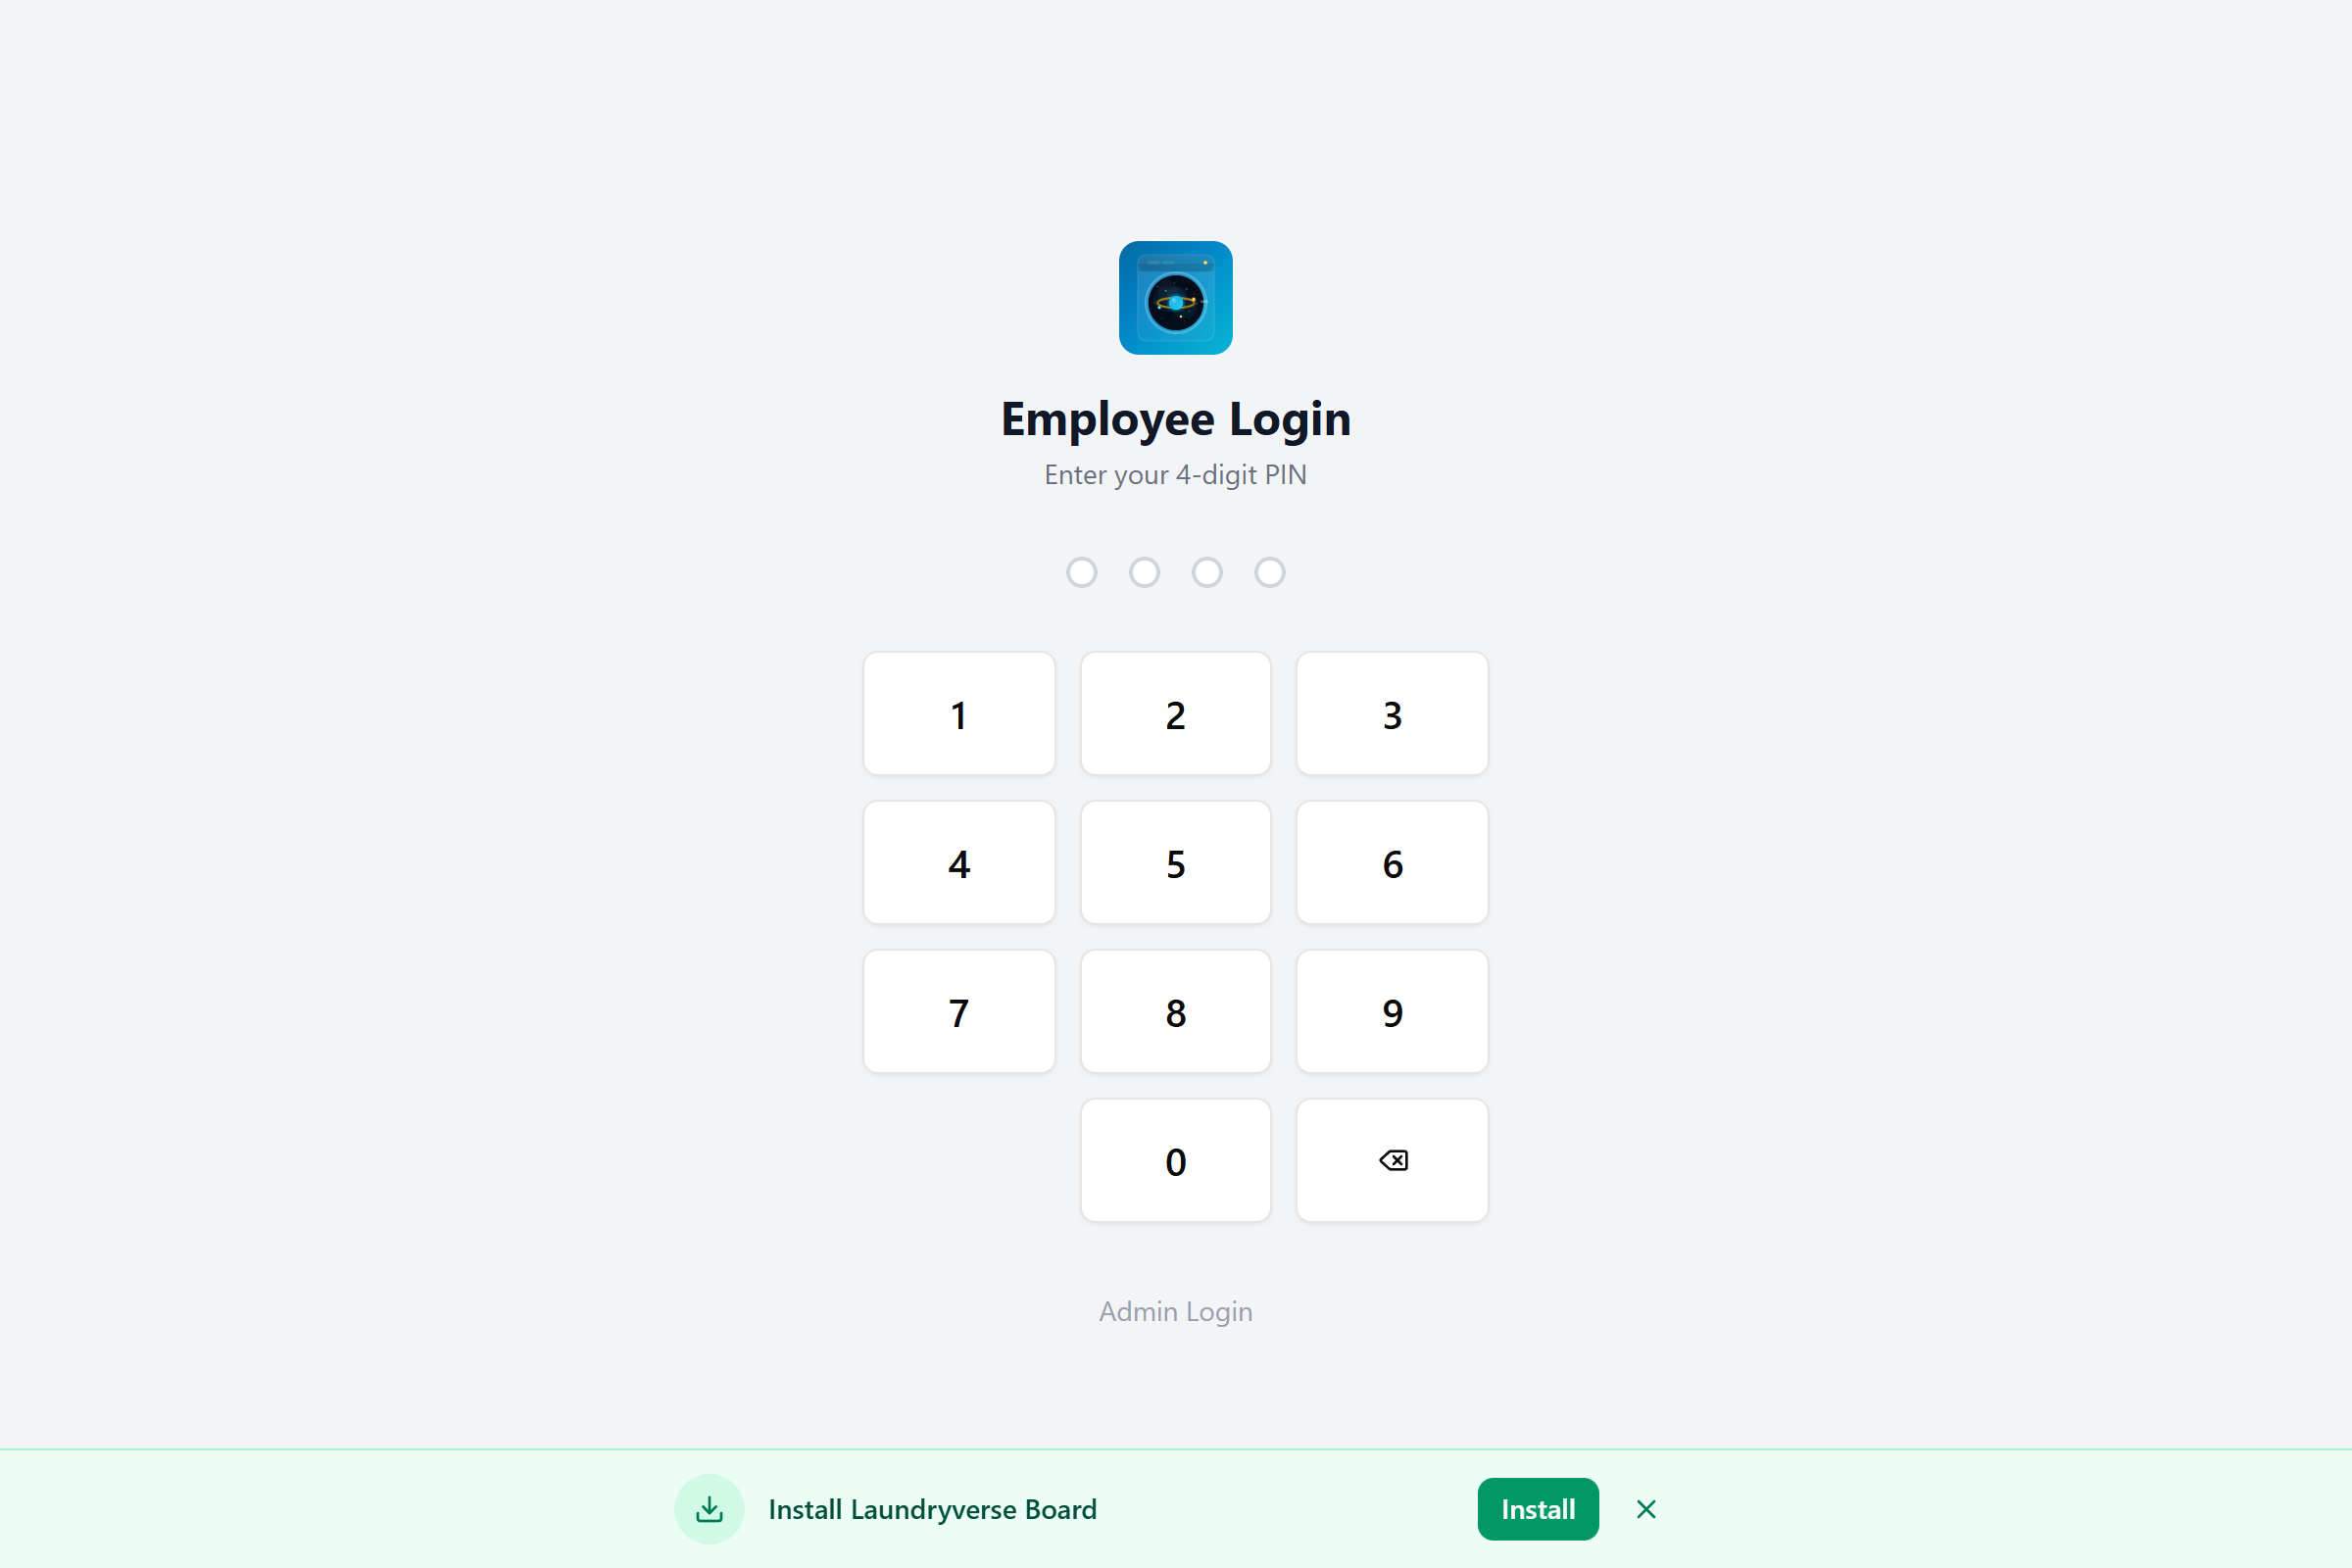
4. Log In with a PIN
Each employee has a unique 4-digit PIN (set up in Dashboard > Employees). Enter the PIN on the keypad — it auto-submits after the 4th digit.
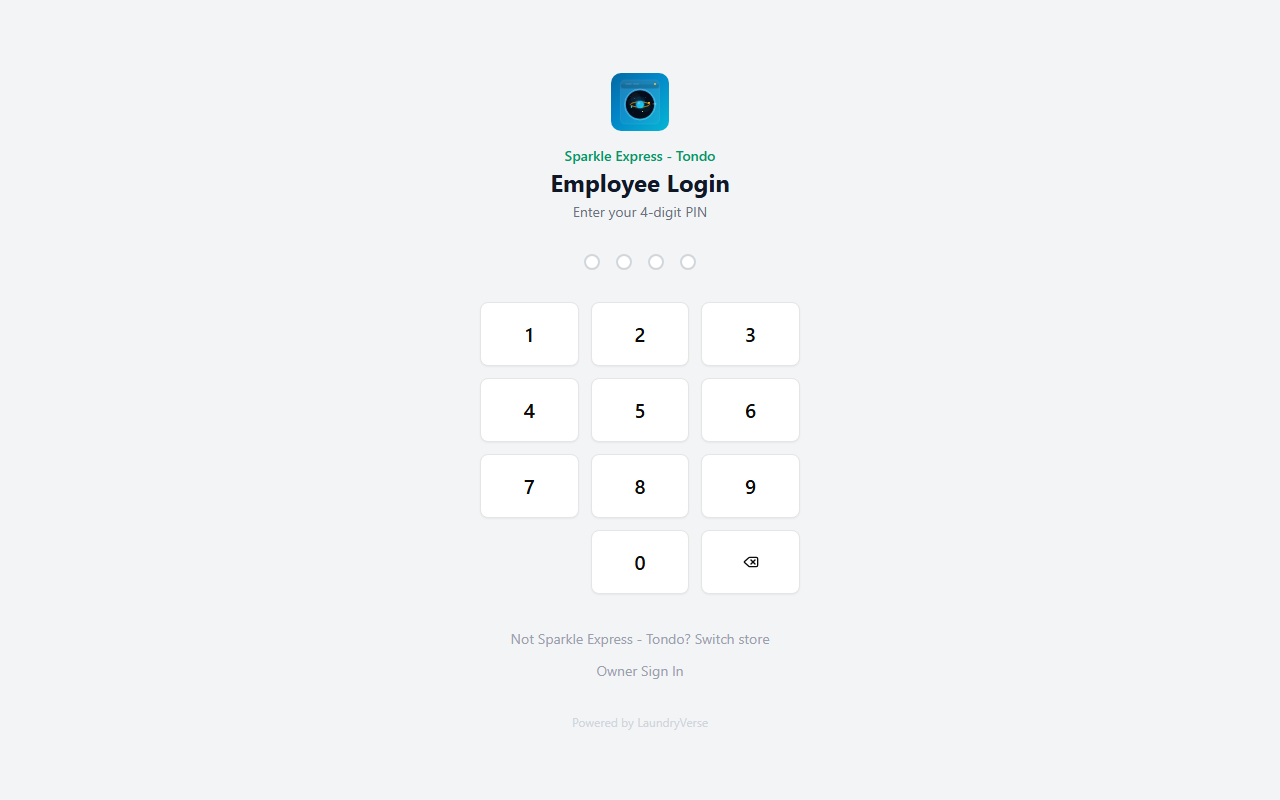
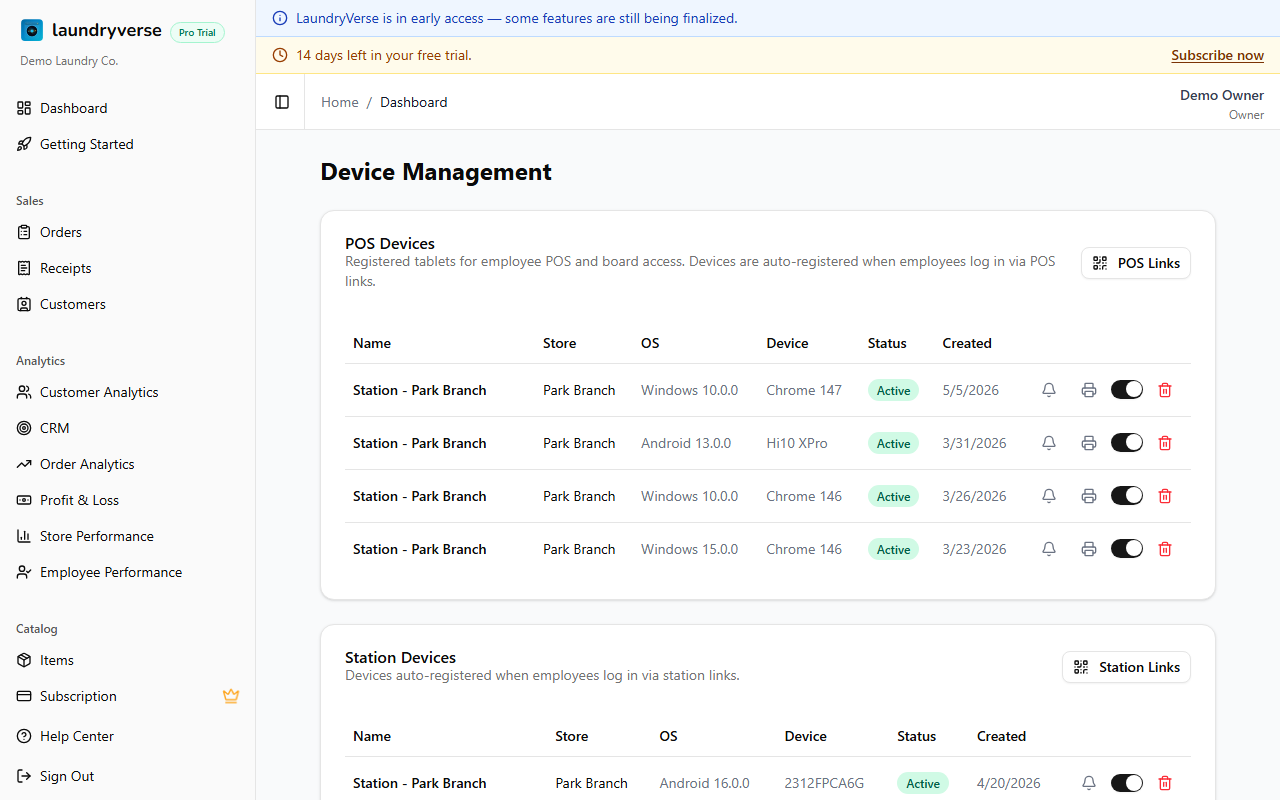
The device auto-registers on first login and appears in your Devices table on the dashboard. There's no manual device setup needed — just scan and log in.
The number of POS devices you can register depends on your subscription plan. If you hit the limit, deactivate unused devices from Dashboard > Devices or upgrade your plan.
5. Open a Shift
After logging in, you'll be prompted to open a shift if one isn't already active. Enter the starting cash in the drawer (or leave it at 0) and tap Open Shift.
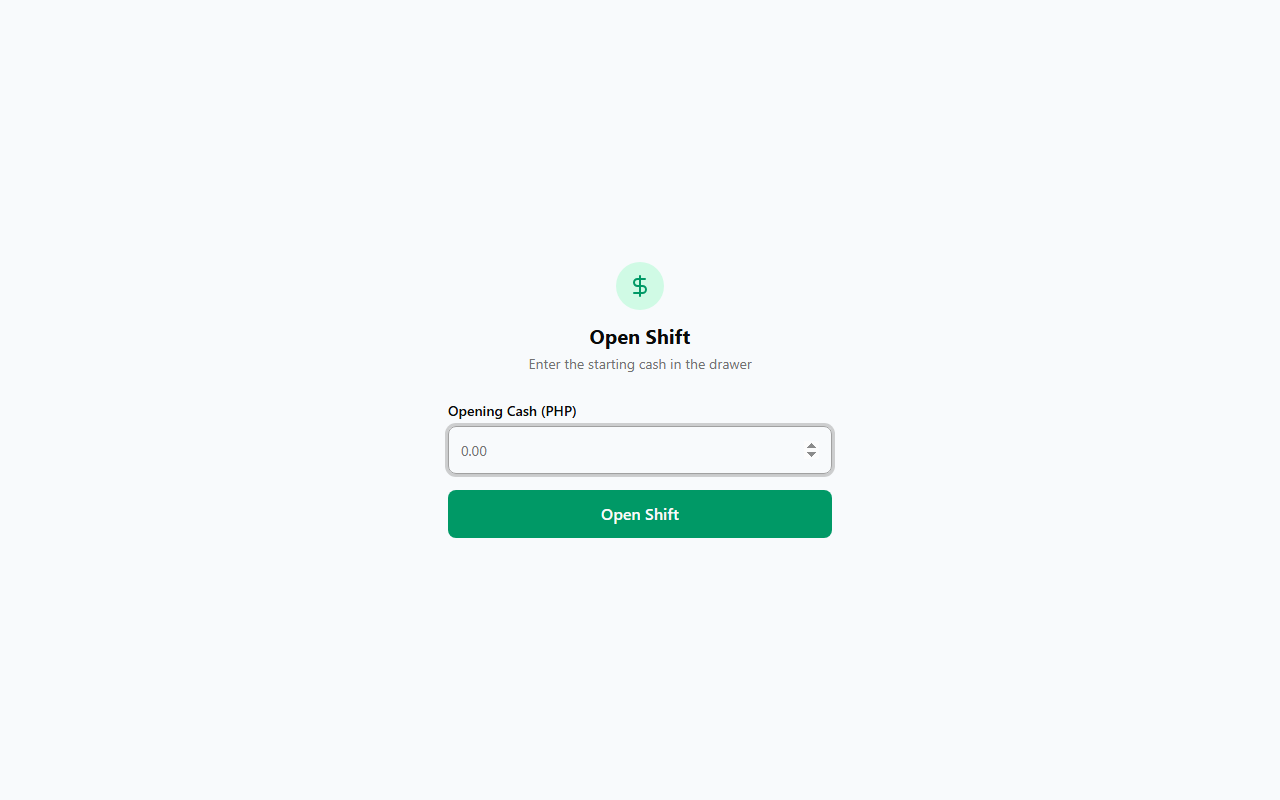
Shifts track all cash transactions during the work period. When the shift ends, the closing employee counts the drawer and records the amount — LaundryVerse calculates any discrepancies automatically.
If you configured cash drawer automation, the drawer can open automatically when a shift starts — before or after entering the starting cash amount.
Managing Devices
From Dashboard > Devices, you can:
| Action | How |
|---|---|
| View all devices | POS and Station devices are listed in separate tables |
| Deactivate a device | Toggle the Active switch off — the employee can no longer log in on that device |
| Delete a device | Click the delete action — the store code regenerates automatically for security |
| Configure printer | Click the printer icon to set paper width, auto-print, and cash drawer settings per device |
What's Next?
Your POS device is activated and ready. Continue with the setup:
- Set up the printer & cash drawer — Connect a receipt printer for this device
- Create your first order — Walk through the full order flow