Partial Payments
A partial payment lets you take a deposit at drop-off and collect the rest when the customer comes back. The order is saved as a partially paid open ticket, the deposit is recorded as its own receipt, and the balance is settled later from the same register. This guide covers when to use it, how to record a deposit, and how to charge the remaining balance. About 3 to 4 minutes.
Taking a partial payment uses the same Use POS register permission (pos:register) that gates the rest of the checkout. The default Owner, Admin, Manager, and Cashier roles all hold it, because a deposit at drop-off is part of the everyday counter flow.
Collecting the balance later loads the partially paid open ticket back into the register, which also runs under Use POS register. If you edit the saved cart before charging, the add and remove permissions kick in: Add items to open tickets (orders:items_add) is held by all four roles, while Remove items from open tickets (orders:items_remove) is held only by Owner and Admin by default. See Register for the full edit split.
To change any of this, edit the role in Roles & Permissions.
Before you start
The Pay Partial button is a branch of the normal checkout, not a separate screen. It appears in the same place the Charge button lives, once you've added at least one payment that doesn't cover the order total. You'll need:
- A device activated and an employee logged in. See POS Setup.
- An active shift open for the current employee. See Shifts.
- At least one item in the cart. See Register for browsing and adding items.
- Payment types configured in the dashboard. Every tenant ships with Cash, GCash, and Bank Transfer as defaults. Manage the full list from Payment Types.
- (Optional) A thermal printer paired if you want the deposit slip to print automatically. See Printer Setup.
Partial payments work on every plan, including Trial. No subscription gate.
1. When to use a partial payment
A partial payment is the right flow whenever the customer wants to leave something behind but can't pay the full total yet. The most common cases:
- Drop-off laundry. Customer leaves the clothes and pays a deposit, then settles the rest at pickup.
- Large orders. Customer pays what they have on hand and returns later to pay the balance.
- Reservations. Customer secures the order with a down payment, the loads are scheduled, and the balance is collected on completion.
If the customer is paying the full amount but mixing methods, that's a split payment, not a partial. If the customer is leaving the order with no money down, that's a plain open ticket created with Save Order, not a partial.
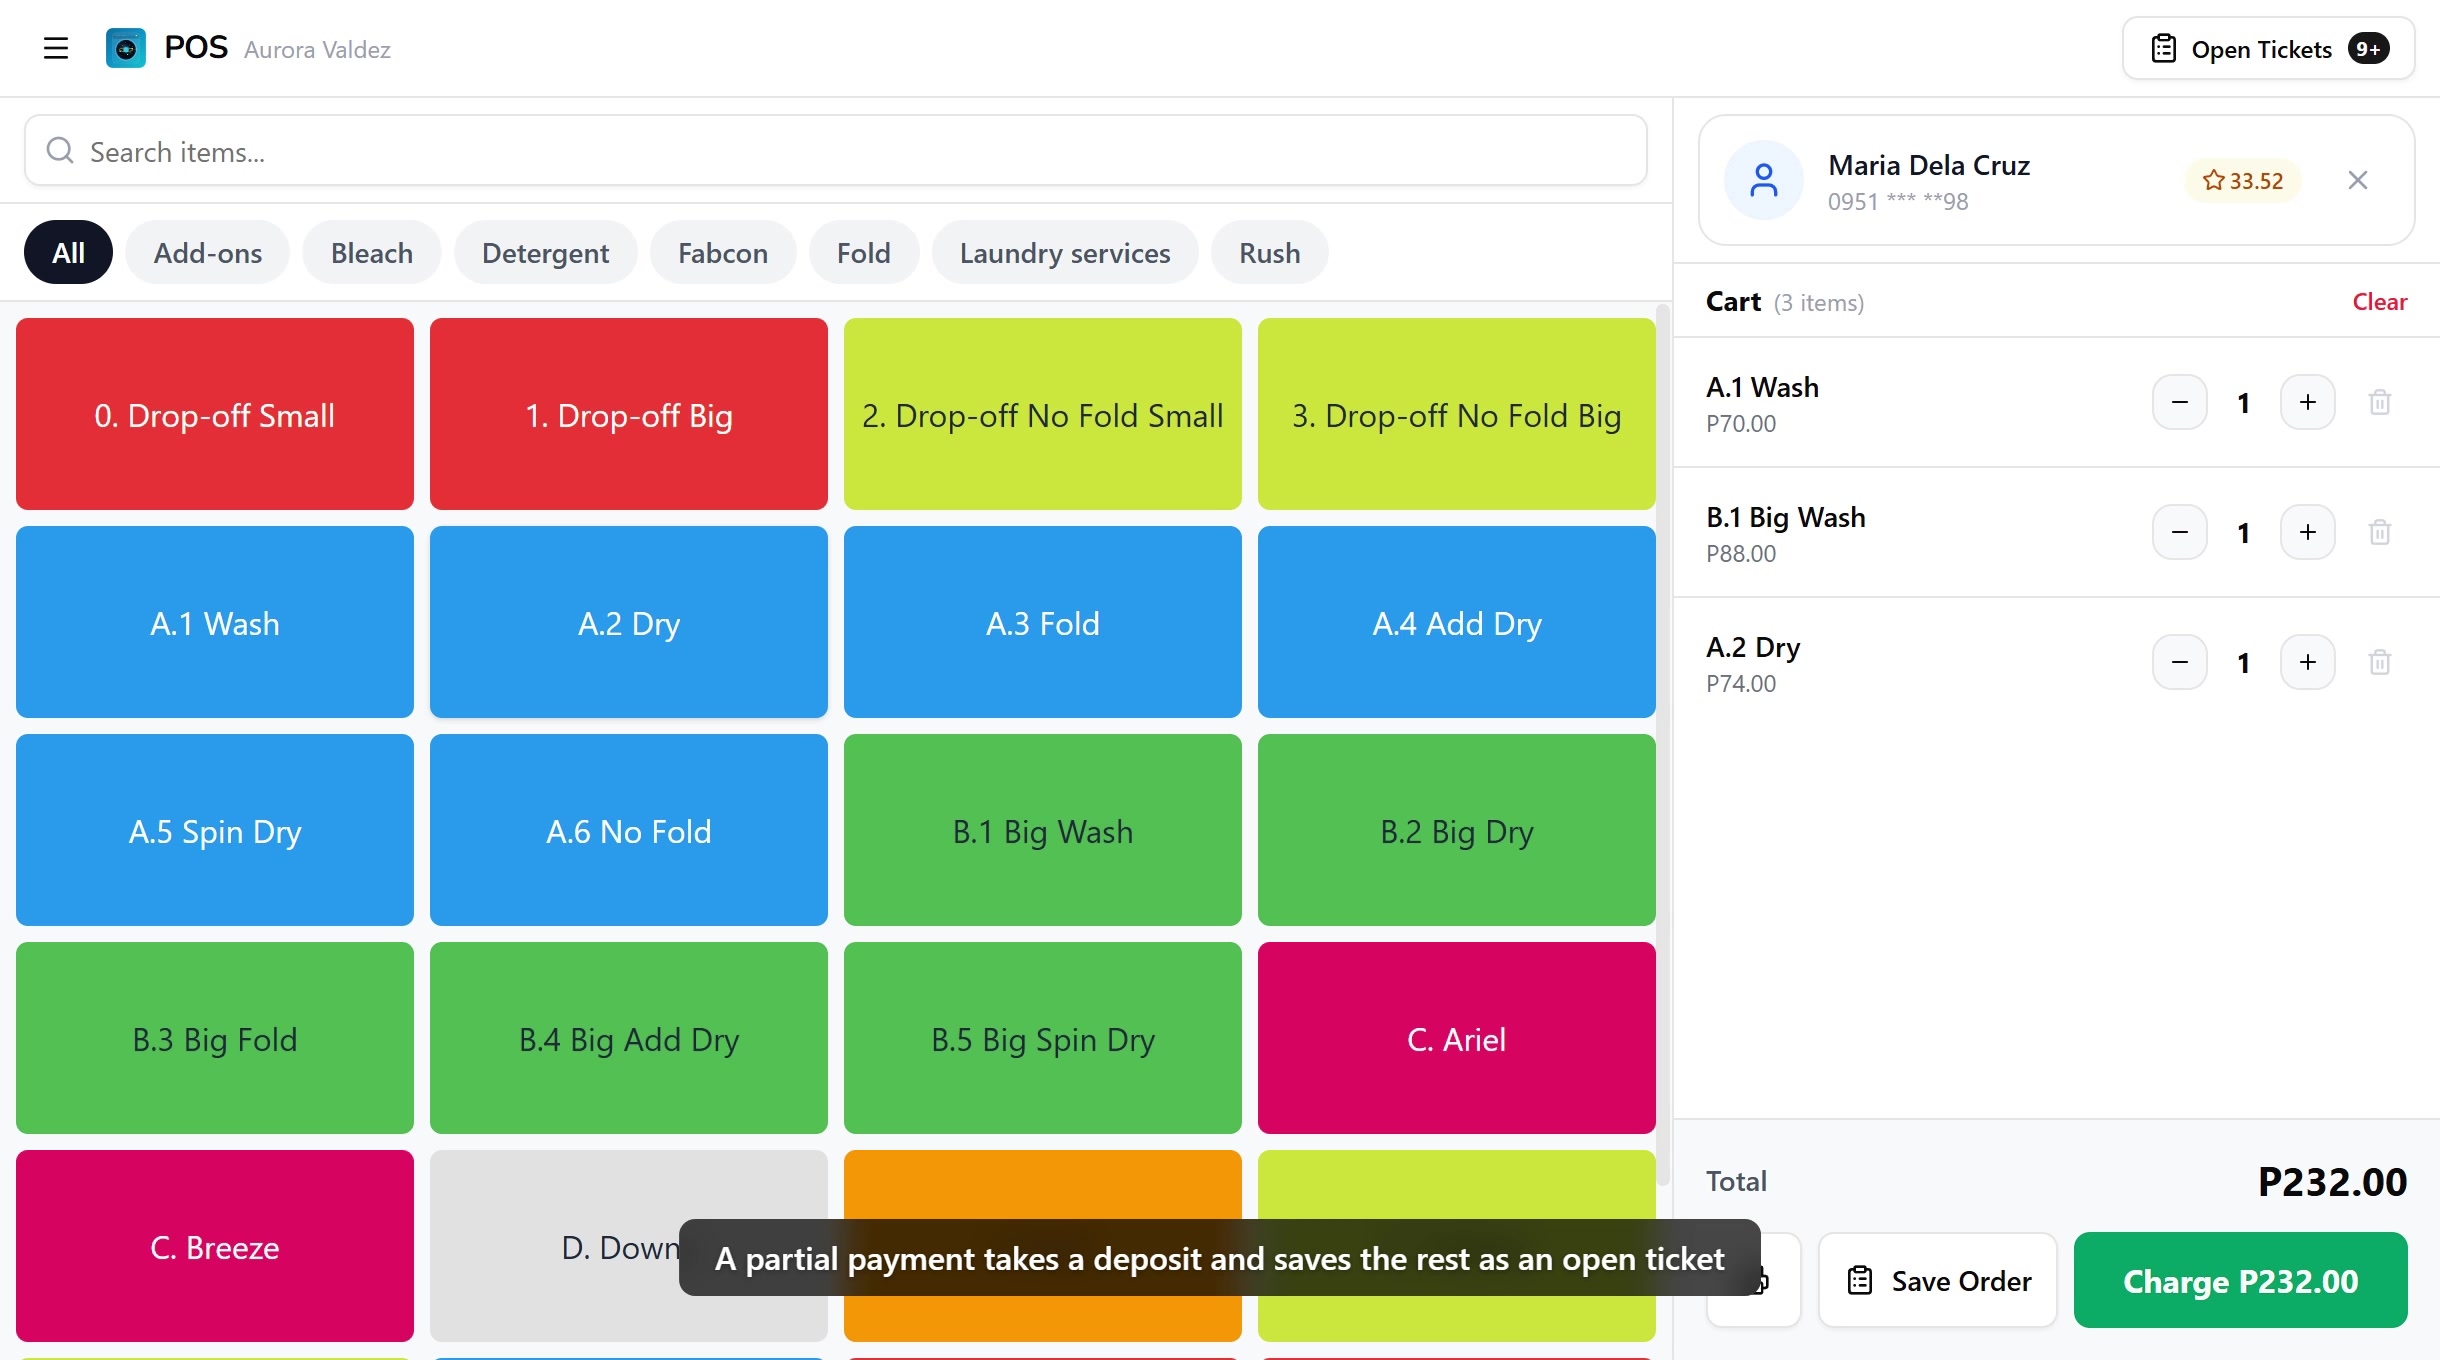
2. Opening the checkout
With at least one item in the cart, tap the green Charge button in the cart footer. The full-screen checkout opens with the amount input autofocused and ready, and a row of payment method chips above it with CASH selected first.
On phone, tapping the amount input brings up the device's native numpad, so you type the deposit the same way you'd type any number on your phone. On tablet and desktop, an on-screen numpad sits below the input for finger-friendly entry. The order summary, applied payments, and remaining balance live in the sticky bottom bar at the foot of the screen on mobile, and in the right-hand panel on tablet and desktop. For the full layout walkthrough, see Processing Payments.
3. Entering the deposit amount
Type the deposit straight into the amount input, or tap one of the cash-bill quick-fills (500, 1000, and so on) that sit under the input on both mobile and tablet. The key rule is the entered amount must be less than the order total. If you type a number equal to or larger than the total, the flow becomes a normal full charge, and the Pay Partial button never appears.
A few examples:
| Order total | Customer pays | What happens |
|---|---|---|
| ₱1,500 | ₱500 | Pay Partial appears, balance ₱1,000 |
| ₱1,500 | ₱1,500 | Normal charge, no partial option |
| ₱1,500 | ₱2,000 | Cash overpayment, change ₱500, normal charge |
For Cash, the amount is recorded as the deposit. For GCash, Bank Transfer, or any non-cash type, the same rule applies, the entered amount is what the customer is leaving on file as a deposit.
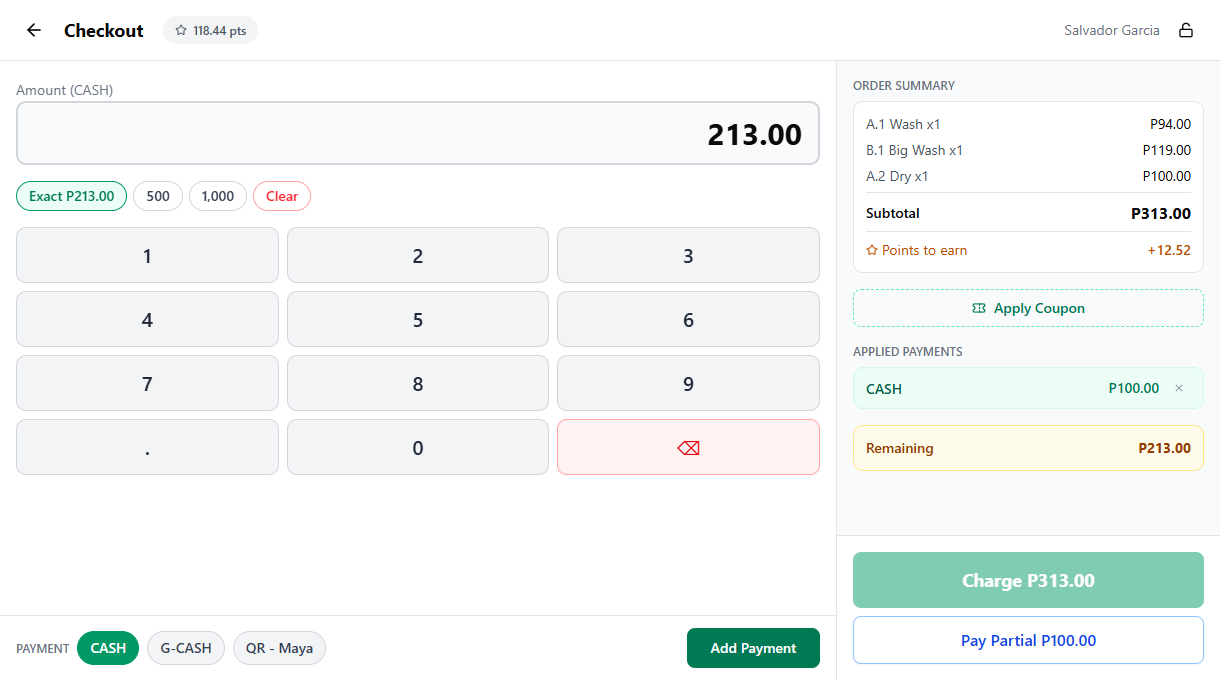
4. Recording the deposit
Each payment method has its own commit chip. With the deposit amount typed in and the right method selected, tap the matching button: Add CASH Payment for cash, Add G-CASH Payment for GCash, Add BANK TRANSFER Payment for bank transfer, and so on for any other type you've configured. The entry lands in the Applied Payments list, and the Remaining pill in the sticky bottom bar recalculates on the spot.
Once the order is not fully covered, the Pay Partial button appears below the disabled Charge button. The button label shows the exact deposit, for example "Pay Partial ₱500.00", so you can read back the amount before committing.
| Button | When it appears | What it does |
|---|---|---|
| Charge | Order is fully paid | Finalizes the order as paid |
| Pay Partial | At least one payment added, total not fully covered | Records the deposit and saves a partially paid open ticket |
To split the deposit across methods (some cash, some GCash), keep committing entries with the per-method buttons before tapping Pay Partial. Type the cash amount and tap Add CASH Payment, then switch to GCash, type that amount and tap Add G-CASH Payment. Every applied payment counts toward the deposit, the Remaining pill in the sticky bar updates each time, and the Pay Partial label rolls up to the new total. See Split Payments for the full multi-method flow.
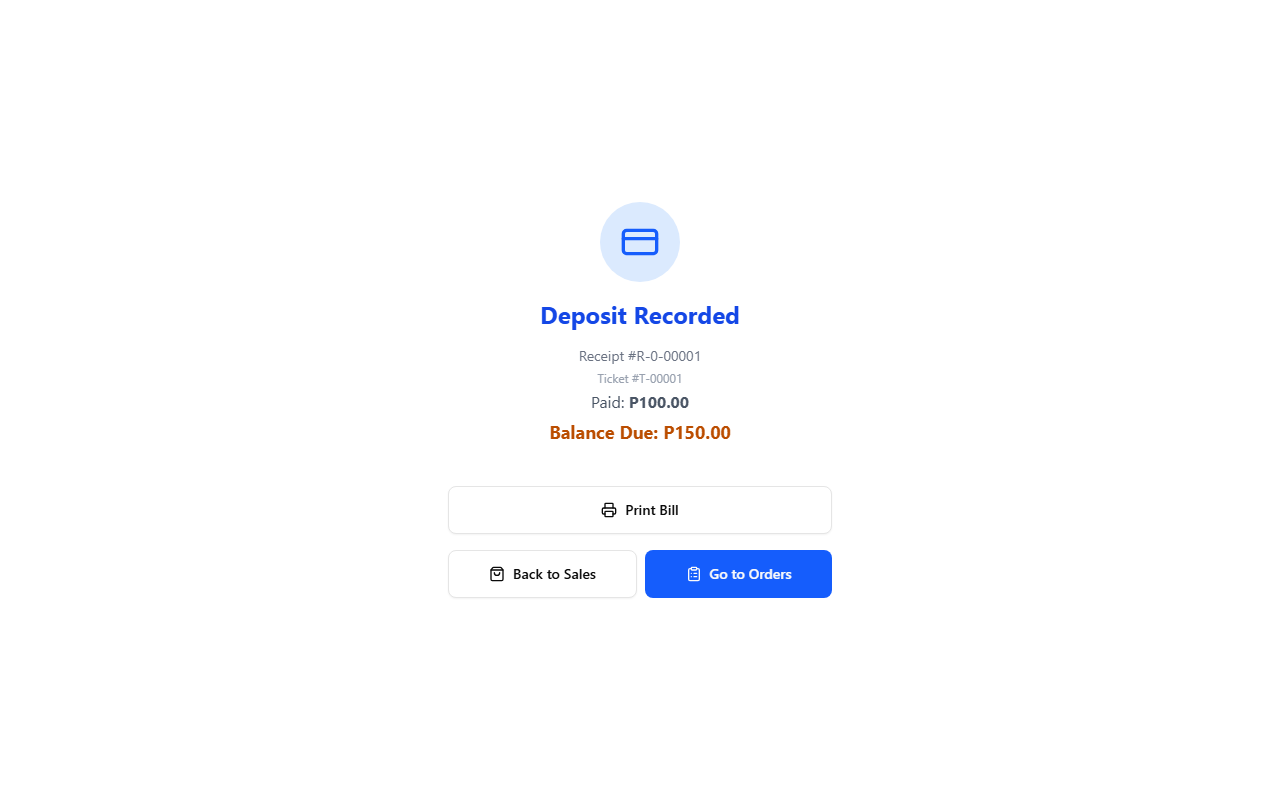
5. Confirming the deposit
Tap Pay Partial. The confirmation screen replaces the checkout and shows:
- A "Deposit Recorded" heading.
- The receipt number for the deposit slip.
- The ticket number if a new open ticket was created for this order.
- Paid in green, the amount you just collected.
- Balance Due in amber, what's still owed.
If a thermal printer is paired and Auto-print receipt is on, the deposit slip prints automatically. The slip lists the deposit amount, the running balance, the payment methods used, and the customer name if one is attached, so the customer walks away with proof of what they left and what they still owe.
From the confirmation screen you can also:
- Print Bill to print or reprint the deposit slip.
- Print QR Labels to print the per-load QR stickers for the order.
- Back to Sales to return to the register with an empty cart.
- Go to Orders to land on the Order Board.
6. Finding partially paid orders
A partially paid order shows up in two places, the same two places a fully unpaid open ticket does. See Open Tickets for the full list view, this section covers the partial-specific markers.
In the Open Tickets dialog
Tap Open Tickets in the register's top bar. Partially paid tickets carry an amber Partial badge with the paid amount and the remaining balance rendered beneath the total.
On the Order Board
On the Order Board, partially paid orders carry an amber dot and a Partial badge on the card. Fully unpaid orders carry a red dot and an Unpaid badge, so a quick glance separates the two at the counter.
7. Collecting the remaining balance
When the customer returns to pay the rest:
- Tap Open Tickets in the register's top bar.
- Tap the partially paid ticket. The register reloads with the original items in the cart.
- Tap Charge in the cart footer to open the checkout.
- The checkout already knows about the deposit. The order summary shows Previously Paid with the deposit amount deducted, and the amount input pre-fills with the remaining balance only.
- Confirm the payment method chip, then tap the matching commit button (for example Add CASH Payment), and finish with Charge.
The final charge writes a second receipt for the balance and marks the order fully paid. The Partial badge drops off the ticket. For the full checkout walkthrough see Processing Payments.
Example scenario
A customer drops off laundry worth ₱1,500 and pays a ₱500 deposit:
- Add items to the cart, tap Charge.
- Type 500 into the amount input (or tap the 500 cash-bill quick-fill), then tap Add CASH Payment.
- The Remaining pill in the sticky bottom bar shows ₱1,000, and the Pay Partial ₱500.00 button appears under the disabled Charge button.
- Tap Pay Partial. The confirmation reads Paid ₱500, Balance Due ₱1,000.
- Hand the customer the deposit slip, tap Back to Sales.
Later, the customer returns:
- Tap Open Tickets, find the order (Partial badge, Paid ₱500, Balance ₱1,000).
- Tap the ticket, the register reloads with the original items.
- Tap Charge, the checkout pre-fills the ₱1,000 balance.
- Leave CASH selected, tap Add CASH Payment, then Charge. Order finalized.
Common issues
"I don't see a Pay Partial button"
The button only appears once you've committed a payment that doesn't cover the order. Check the Applied Payments list (in the sticky bottom bar on mobile, right-hand panel on tablet), if it's empty, type the deposit and tap the matching per-method button like Add CASH Payment first. Also check the amount, a deposit equal to or larger than the total reads as a full charge and hides Pay Partial.
"I tapped Pay Partial when the customer was paying in full"
The order is now saved as a partially paid open ticket. Find it from Open Tickets, the deposit you took is already on file as Previously Paid. Charge the remaining balance, the order becomes fully paid and drops off the open-tickets list.
"The deposit slip didn't print"
The printer isn't paired with this device, or Auto-print receipt is off. Open Printer Setup, pair the printer over USB or Bluetooth, and turn on Auto-print. Reprint the current deposit from the confirmation screen with the Print Bill button.
"I want to refund the deposit"
The deposit is recorded as a normal receipt against the active shift. Open the receipt from Receipts on the dashboard, or from the order detail on the Order Board, and use the Refund action. Refunding requires the Process refunds permission (pos:refund), held by all four default roles.
"Charging the balance asks for the wrong amount"
The checkout reads Previously Paid from the deposit receipts on the order. If the total looks off, open the order from the Order Board and check the receipt list, every deposit you took should appear as its own line. Missing or duplicated receipts there usually mean the order was edited after the deposit was taken, which can change the running total. See Order Detail for the receipt list.
What's next?
- Open Tickets: find and load partially paid orders back into the register.
- Processing Payments: the full checkout flow that Pay Partial branches off of.
- Split Payments: mix two or more methods on a single deposit or full charge.
- Order Board: track drop-off loads through wash, dry, and fold while they wait for the balance.
Stuck? Email [email protected]. The founder reads every message.