Split Payments
A split payment lets one customer pay a single order using two or more payment methods at the same time, for example half cash and half GCash, or two different cards. Everything stacks inside the same checkout, the running balance ticks down with each entry, and the order finalizes as a normal paid sale the moment the total is covered. This guide covers when to split, how to add each method, and how to remove or correct an entry before charging. About 3 to 4 minutes.
Splitting payments uses the same Use POS register permission (pos:register) that gates the normal single-method charge. The default Owner, Admin, Manager, and Cashier roles all hold it, because mixing cash and GCash on one order is part of the everyday counter flow.
There is no separate gate for adding a second or third payment line. The cashier role hits the same processPosCharge server check on the final tap of Charge as a single-method sale. To restrict any of this, edit the role in Roles & Permissions. Without Use POS register, the Charge action returns an error from the server.
Before you start
A split payment is a variation of the normal checkout, not a separate screen. It happens inside the same full-screen checkout the single-method Processing Payments flow uses. The only difference: instead of typing the full total and tapping one commit button, you type the amount for each method and tap that method's own Add <Method> Payment chip, then tap Charge once Remaining hits zero. You'll need:
- A device activated and an employee logged in. See POS Setup.
- An active shift open for the current employee. See Shifts.
- At least one item in the cart. See Register for browsing and adding items.
- Payment types configured in the dashboard. Every tenant ships with Cash, GCash, and Bank Transfer as defaults. Manage the full list from Payment Types.
- (Optional) A thermal printer paired if you want the receipt to print automatically when you finalize. See Printer Setup.
Split payments work on every plan, including Trial. No subscription gate.
1. When to split a payment
Split the payment whenever the customer is paying the full total now but not all in one method. Common cases at the counter:
- Cash plus e-wallet. Customer hands over some cash and pays the rest by GCash because their wallet balance is short.
- Two cards or two e-wallets. Customer maxed out one card or app and finishes on a second.
- Loyalty points plus cash. The discount from points covers part of the total and the customer pays the rest in cash. (The points line shows on the order summary, not in the applied-payments list.)
- Family or group payment. Two people split the bill, each paying a different method.
If the customer is paying less than the full total now and coming back for the rest, that's a partial payment, not a split. The shapes look similar in the applied-payments list, but the finalization is different, split ends in a normal Charge, partial ends in a Pay Partial that saves an open ticket.
2. Opening the checkout
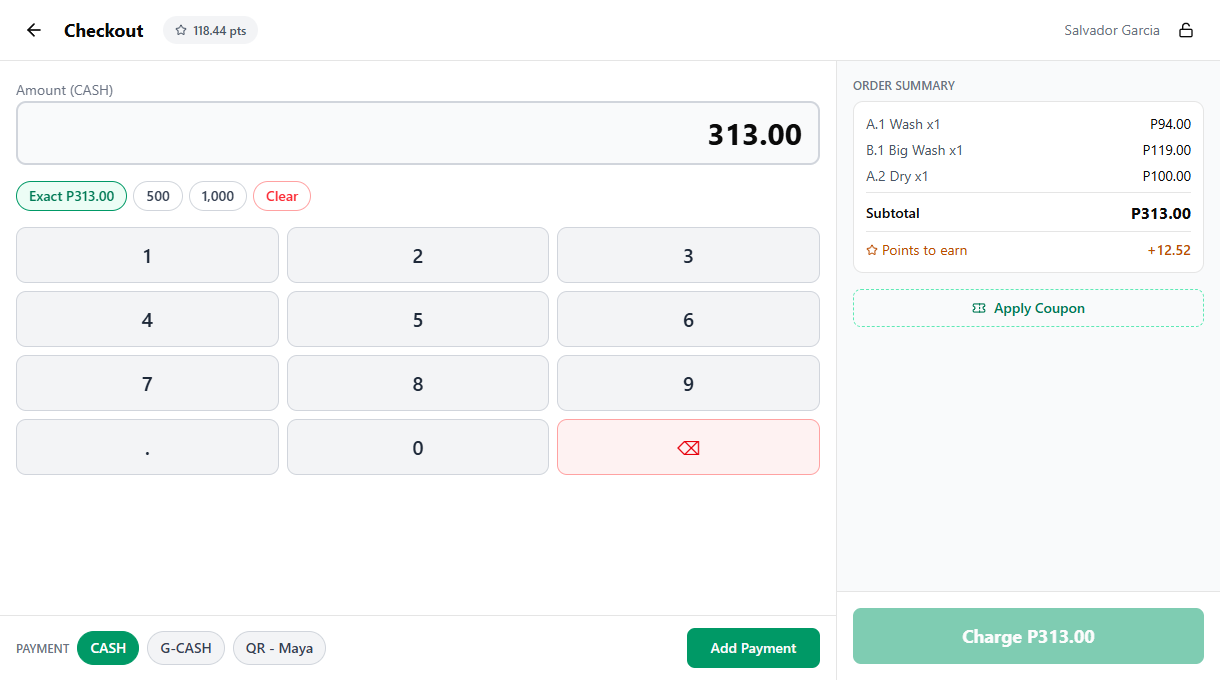
With at least one item in the cart, tap the green Charge button in the cart footer. The full-screen checkout opens with the order total pre-filled in the amount input. Cash is always the first chip in the commit row, and every active payment method has its own commit chip below the amount input, Add CASH Payment, Add G-CASH Payment, Add QR-Maya Payment, and so on.
The amount input is autofocused. On a phone, the device's native numpad slides up automatically, there is no on-screen numpad. On a tablet or desktop, the on-screen numpad still appears next to the input.
On desktop and tablet, the right panel shows the order summary, the Applied Payments list, and the live Remaining balance. On mobile, the same applied payments and Remaining pill live in the sticky bottom bar so they stay visible while you type.
For the full layout walkthrough, see Processing Payments.
3. Recording the first payment
The first payment works exactly like a single-method sale, except you enter a partial amount instead of the full total, and you commit it using that method's own chip.
- Enter the amount the customer is paying with the first method. Type with the device's native numpad on phone, the on-screen numpad on tablet or desktop, or tap a quick-amount badge.
- Tap the commit chip for the method you're committing, for example Add CASH Payment for cash, Add G-CASH Payment for GCash. Cash is always the first chip.
The entry lands in the Applied Payments list with the payment type name and the amount. The remaining balance recalculates and the amount input typically pre-fills with the new remaining balance, so the next entry is one chip tap away.

| Quick-amount badge | What it does |
|---|---|
| Exact | Fills the input with the exact remaining balance |
| 20 / 50 / 100 / 200 / 500 / 1000 | Common cash bill denominations, shown when you're about to commit a CASH entry and only for amounts greater than the remaining balance. These now appear on mobile too, not just on tablet. |
| Clear | Empties the amount input so you can re-type |
For CASH entries only, if the amount you type is larger than the remaining balance, the Change line appears under the input in emerald. The system records the change on the cash line and the next entry pre-fills with zero remaining. For GCash, Bank Transfer, Card, and any other non-cash method, no change is calculated, the amount is taken as the exact amount the customer paid on the terminal or app side.
4. Recording more payments
Keep repeating the same two steps for each additional method:
- Enter the amount the customer is paying with the next method.
- Tap that method's commit chip, for example Add G-CASH Payment, Add QR-Maya Payment, or Add CARD Payment.
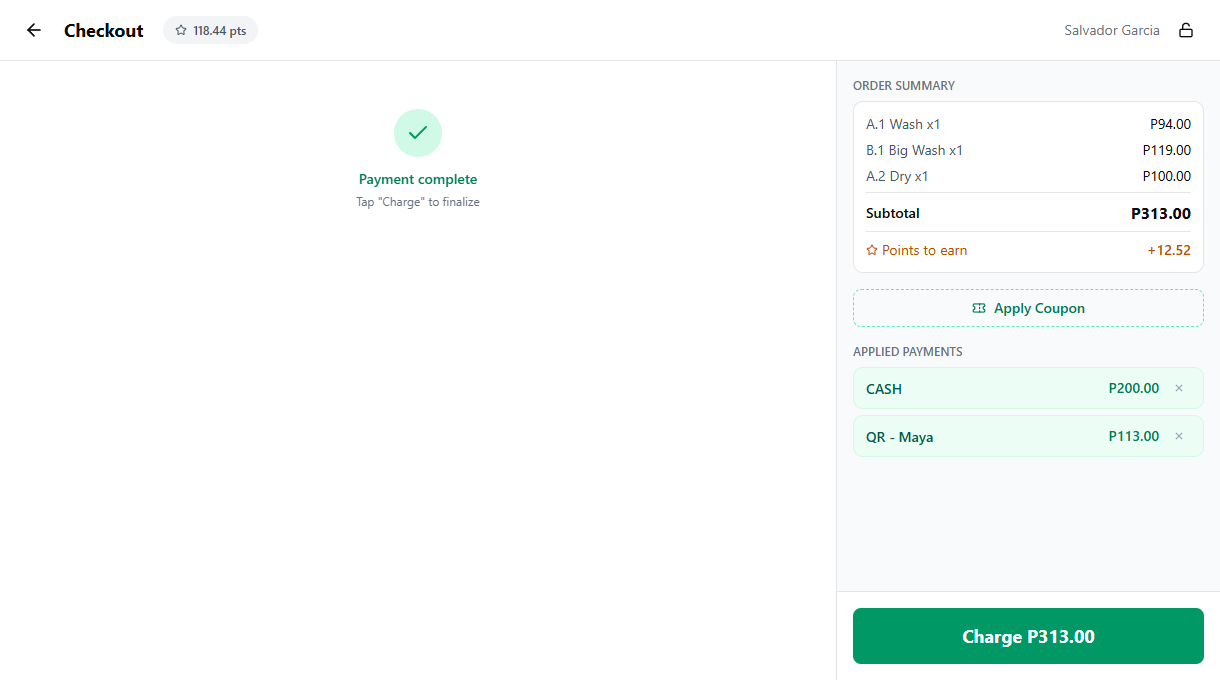
Each entry stacks in the Applied Payments list. The Remaining balance on the right panel, or in the sticky bottom bar on mobile, shows how much is still owed. The Charge button stays disabled until the running total covers the order.
There is no hard limit on the number of entries. You can split across three or four methods, or even add two separate entries for the same method (for example, two different cash payments from two different people, each committed with Add CASH Payment).
5. Removing or correcting an entry
To remove a payment you've already added, tap the small X on the right side of the entry in the Applied Payments list. The remaining balance recalculates and the entry disappears. Type the corrected amount, then tap the commit chip for the right method to re-add it.
This is the only way to fix a wrong amount or a wrong payment type after committing. The entry itself is not editable in place, the X-then-re-commit pattern is the supported flow.
6. Finalizing the charge
Once the running total covers the order, the Payment complete check renders below the entry area and the Charge button becomes enabled, on the right panel on desktop and tablet, in the sticky bottom bar on mobile. Tap Charge to finalize the sale.

Behind the scenes the system records one receipt with every payment line broken out by type and amount, awards loyalty points to the attached customer if one is attached, sums every cash entry into the shift's Cash payments total, and stores the change amount on cash lines that had overpayment. The success screen shows the receipt number and, if a customer is attached, the points earned and the new balance.
For everything that prints on the receipt and the full success-screen rundown, see Processing Payments.
Example scenario
A customer has a ₱1,500 laundry order and wants to pay ₱1,000 in cash and the rest by GCash:
- Add items to the cart, tap Charge.
- The amount input is pre-filled with ₱1,500. Tap Clear, type 1000, then tap Add CASH Payment.
- The cash entry lands in Applied Payments. Remaining shows ₱500, and the amount input typically pre-fills with the new ₱500 balance.
- Tap Add G-CASH Payment to commit the remaining ₱500 by GCash.
- Payment complete appears and the Charge button enables. Tap Charge.
- One receipt prints with two payment lines, Cash ₱1,000 and GCash ₱500.
Same idea for a P500-cash + P300-GCash split on a P800 order: type 500, tap Add CASH Payment, then type 300, tap Add G-CASH Payment, and tap Charge once Remaining hits zero.
Common issues
"Charge stays greyed out after I added a payment"
The order isn't fully covered yet. Check the Remaining balance, on the right panel on tablet and desktop, in the sticky bottom bar on mobile. That number is exactly how much is still owed. Type the gap and tap the commit chip for the next method. If Remaining reads zero and Charge still looks disabled, the button is enabled but rendered in muted state, give it a tap.
"Wrong amount typed and the payment is already added"
Tap the X on the right of the entry in Applied Payments. The remaining balance recalculates and the entry disappears. Type the correct amount and tap the commit chip for the right method to re-add it. Edit-in-place is not supported, the remove-then-re-commit pattern is the only way.
"Customer changed their mind, wants to pay it all in cash now"
Remove every non-cash entry with the X button, then type the full remaining balance and tap Add CASH Payment. Or, just clear all entries and start the checkout over with a single cash commit. Nothing is committed until you tap Charge.
"Wrong payment type committed and the entry is already in Applied Payments"
Same fix as the wrong amount. Tap the X on the entry, type the amount again, and tap the commit chip for the right method. The remaining balance recalculates automatically.
"I want to give the customer change on one of the cash entries"
Change is only computed when you commit through Add CASH Payment and the typed amount is larger than the remaining balance at that moment. If you typed exact change for one entry and want to overpay later, just enter an amount larger than the new remaining balance and commit it as cash. The Change line renders under the input and the change amount is stored on that payment line. If you committed an overpayment through a non-cash chip by mistake, remove the entry with the X and re-commit it through Add CASH Payment.
"Loyalty points aren't showing in Applied Payments"
Points redeemed via the points discount apply as an order-level discount, not a payment. They reduce the running total on the order summary, so the Remaining balance you split across cash and GCash already accounts for them. The applied-payments list only holds methods backed by a Payment Type from the dashboard. The mobile checkout shows the same points-to-earn line and the same remove-coupon control as desktop, so nothing about the loyalty math changes between layouts.
"Auto-print didn't fire after Charge"
The printer isn't paired with this device, or Auto-print receipt is off. Open Printer Setup, pair the printer over USB or Bluetooth, and turn on Auto-print. Reprint the current sale from the success screen with the Print Receipt button.
What's next?
- Processing Payments: the full single-method checkout flow that split branches off of.
- Partial Payments: customer pays less than the full total now and comes back for the balance.
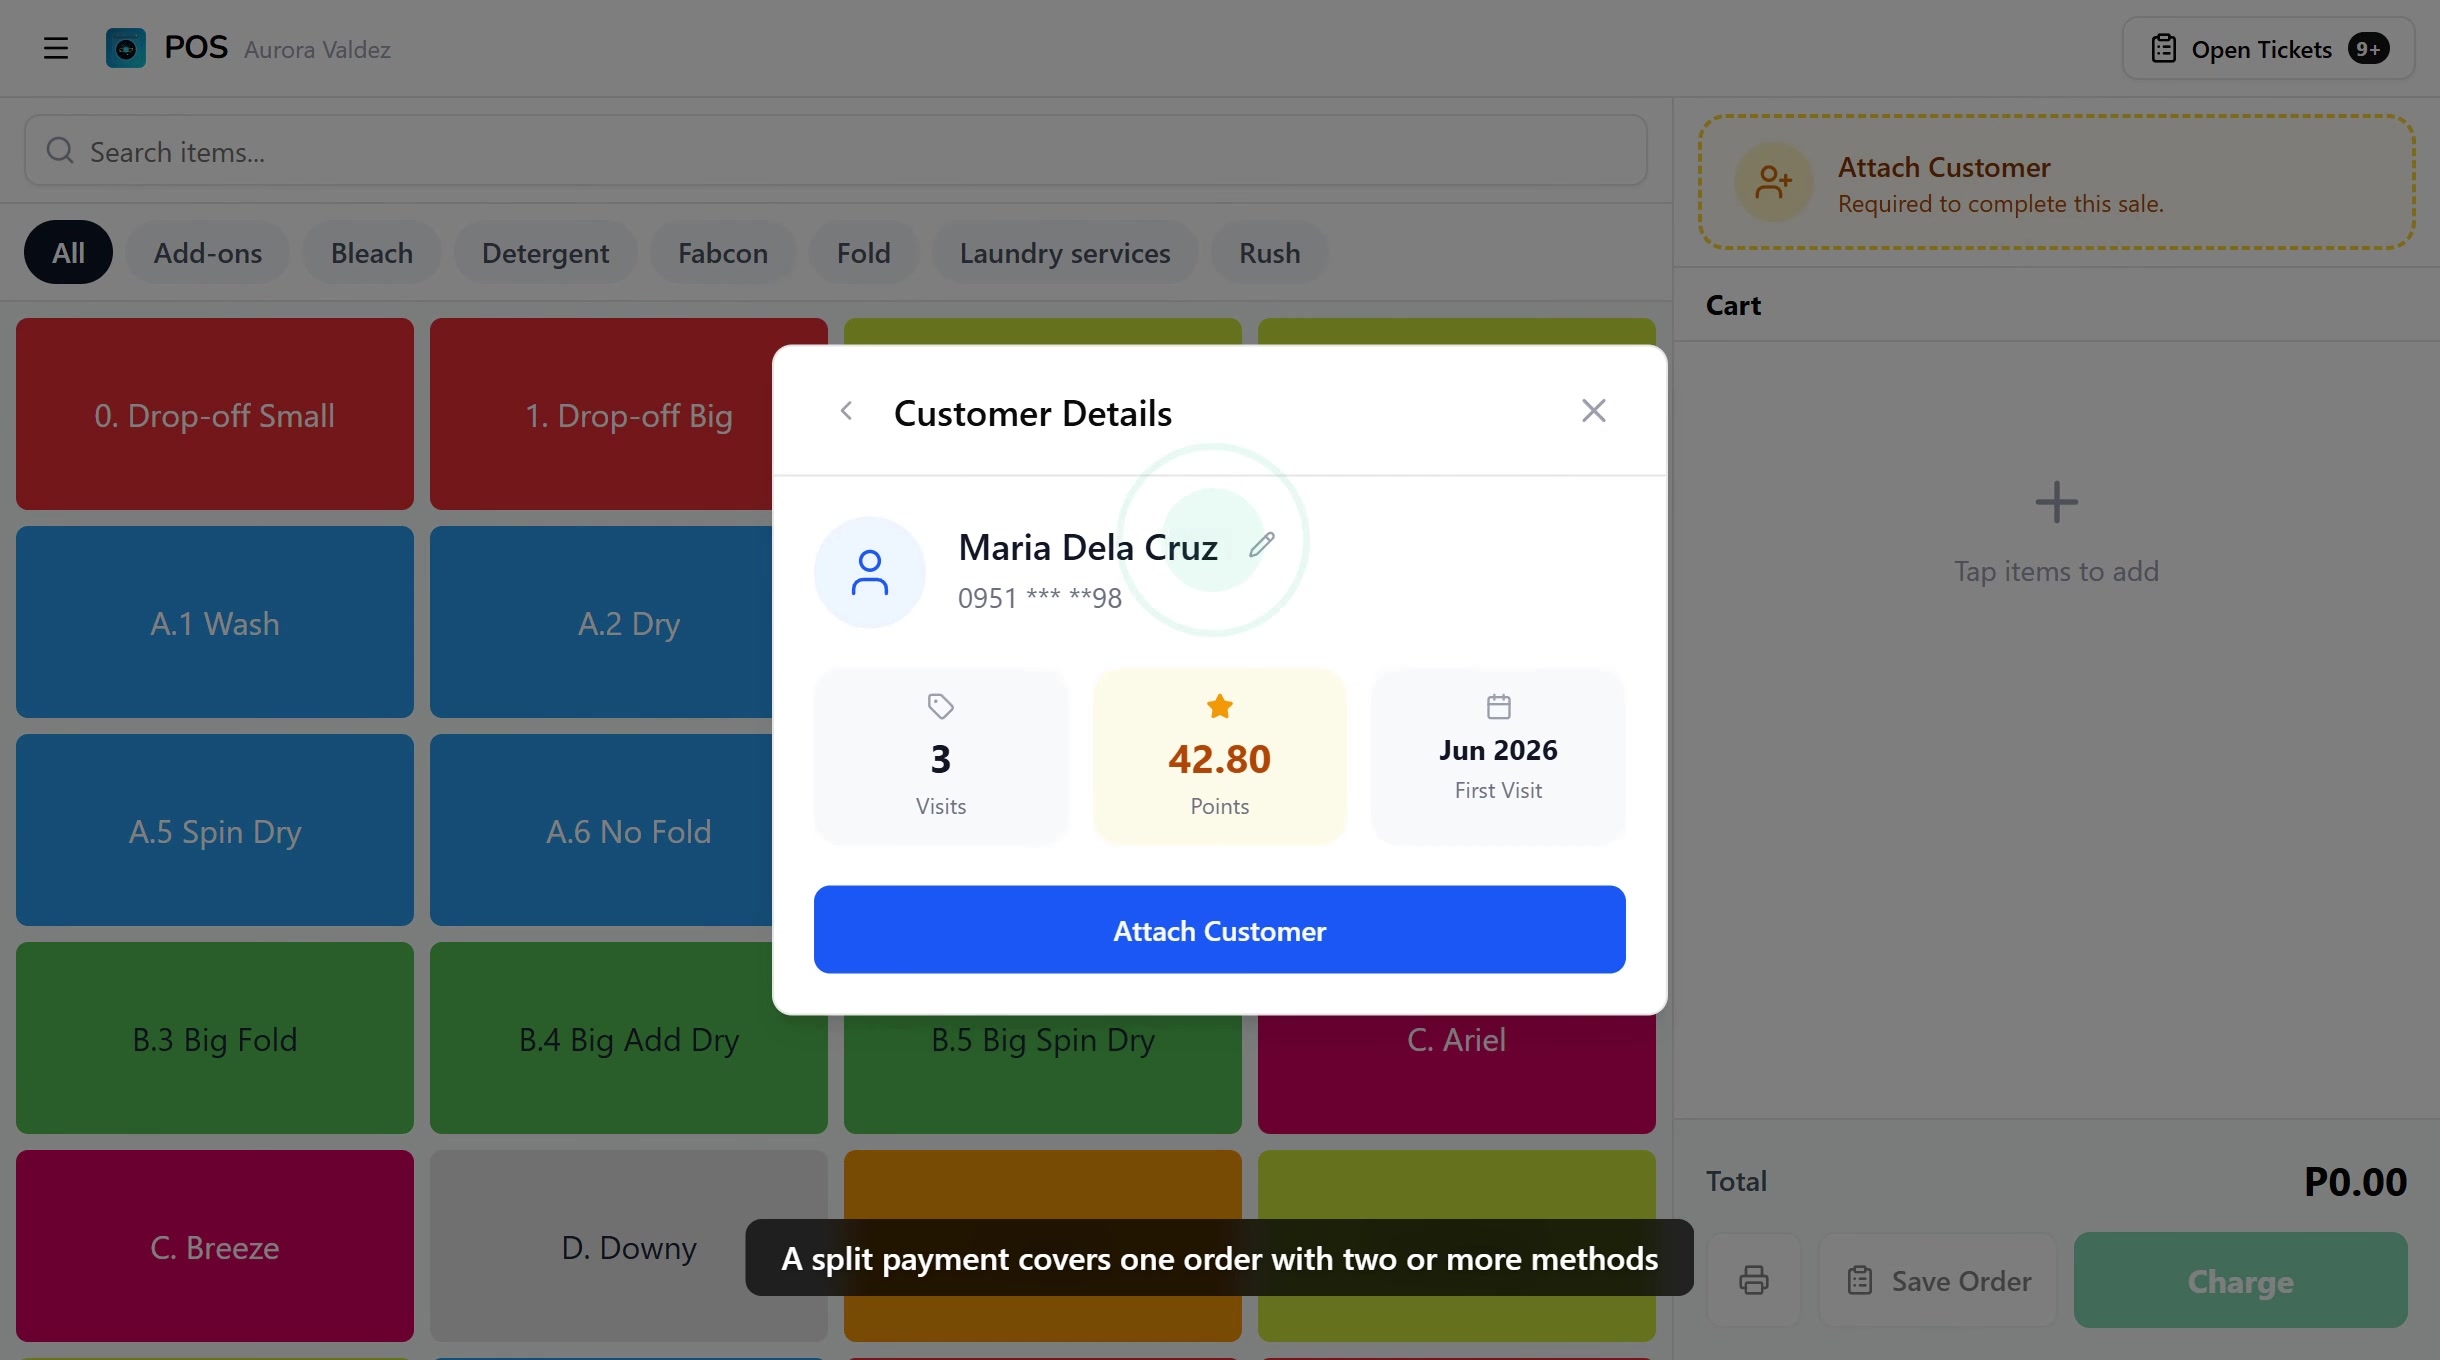
- Attaching Customers: link the order to a customer profile so points apply across the split.
- Payment Types: add, rename, or remove the methods that appear in the pills.
- Register: the full counter flow from open shift to charge.
Stuck? Email [email protected]. The founder reads every message.