Payroll & Compliance
Turn your shift schedules and staff clock-ins into wages, with overtime and holiday rates worked out for you under Philippine labor rules. Navigate to Staff & Payroll > Payroll in the dashboard. About 3 minutes.
Payroll, Shift Scheduling, and Holidays are available on Business plans and above.
Running payroll requires the Manage payroll permission (payroll:manage). Owners, Admins, and Managers have it by default. Cashiers can clock in and out on the POS but cannot review or generate payroll. Assign the permission to other staff via Dashboard > Roles & Permissions.
Before You Run Payroll
Payroll pulls from a few things you set up once, then maintain week to week:
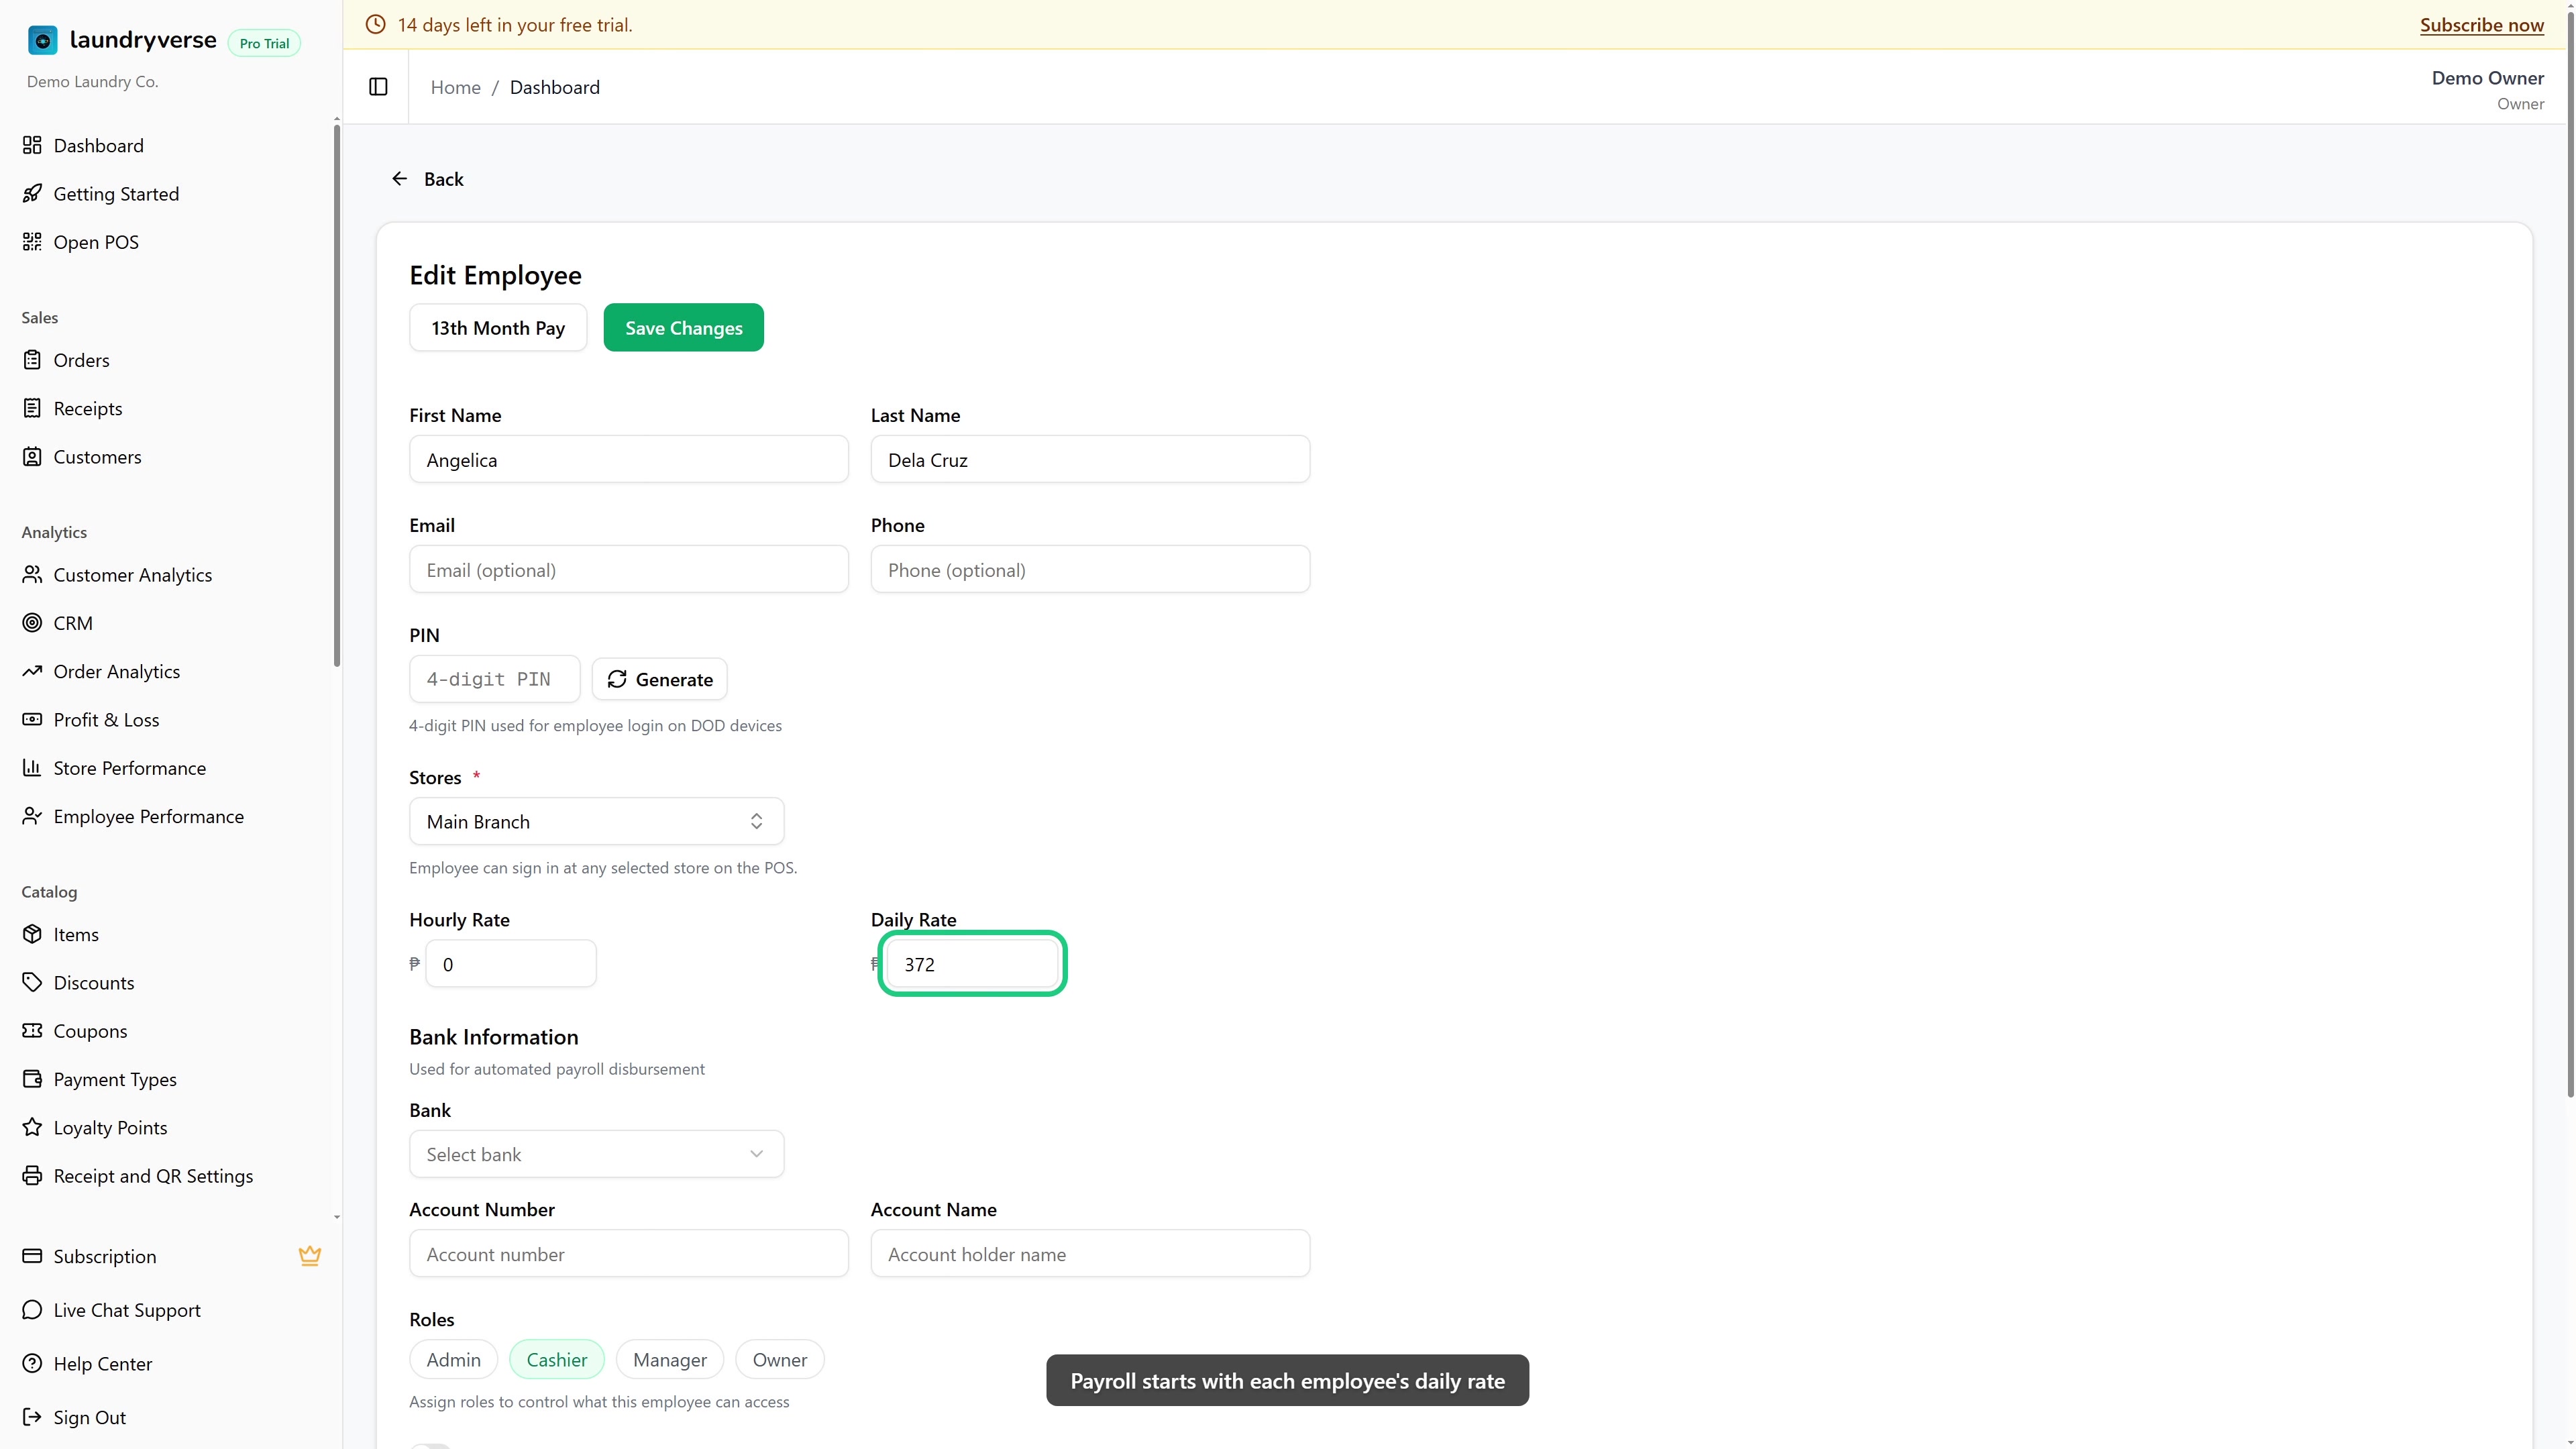
- A daily rate for each employee. The daily rate is the pay for a standard eight-hour day. Every hourly and overtime rate is worked out from it (hourly rate is the daily rate divided by 8). Set it on each employee's profile. See Employees.
- A shift schedule. Build each week on the shift scheduler. Create your own shift templates, then drag and drop them onto the grid to put each employee on a shift. See Scheduling & Shifts.
- Clock-ins. Staff clock in and out from the POS or the Stations screen. Every punch lands in your Timecards automatically, so there is nothing to enter by hand.
- A holiday calendar. Days on your holiday calendar are paid at the correct premium automatically. Set this up before running payroll for any week that contains a holiday. See Holidays.
- Cash advances (optional). Any approved cash advance (a "vale") is deducted from the employee's net pay when you generate payroll. See Cash Advance.
Most shops run payroll weekly. A common pattern is to cover the previous week, Monday to Sunday, calculate on Monday, and release wages by Tuesday.
1. Pick the Pay Period
The default payroll view is the Shift Review tab. Use the date range at the top to pick the pay period you want to review. This date range is shared with the Timecards page for convenience.
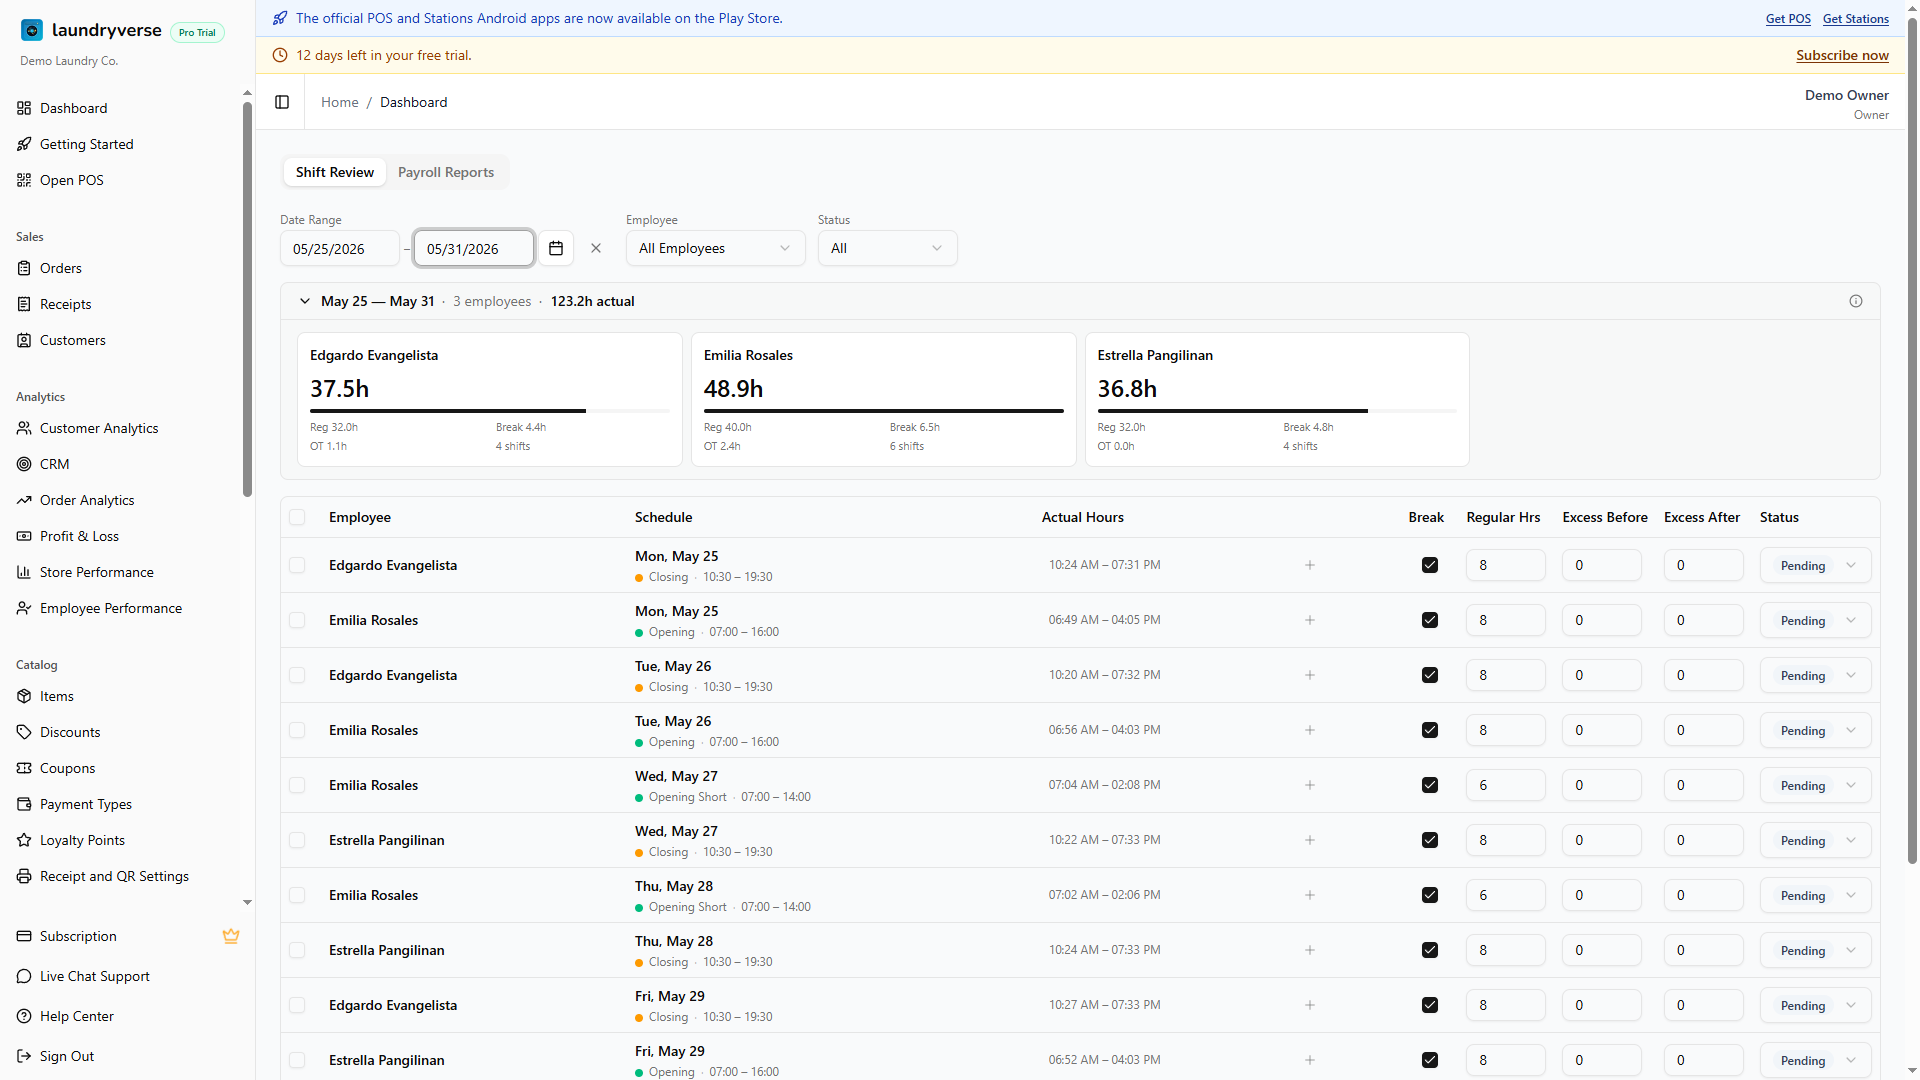
2. Review and Adjust the Hours
Each row pairs the scheduled shift with the actual clock-in and clock-out, so you can spot any gaps before you approve.
| Column | What it means |
|---|---|
| Schedule | The shift the employee was scheduled for |
| Actual Hours | The real clock-in and clock-out from the POS or Stations |
| Break | Deducts the unpaid one-hour break. Leave it on for a full shift, clear it when no break was taken |
| Regular Hrs | Hours worked within the scheduled shift |
| Excess Before | Time worked before the shift starts. Counts as overtime |
| Excess After | Time worked after the shift ends. Counts as overtime |
Excess Before and Excess After are your overtime hours, paid at the overtime premium on top of the daily rate.
If an employee forgets to clock out, their hours stay at zero until the record is closed. Open their time record on the Timecards page and add the missing clock-out by hand before you approve.
3. Approve the Shifts
Once you have reviewed each row and confirmed the regular and overtime hours are correct, tick the checkbox in the header to select every shift, then choose Approve All.
Only approved shifts are counted when you generate payroll.
4. Generate Payroll
Choose Generate Payroll. LaundryVerse calculates each employee's pay from their approved hours, daily rate, and any holidays in the period, following Philippine labor rules for overtime and holiday premiums. When it finishes, open the report to see the results.
5. Review the Report
The Payroll Reports tab lists each employee's hours, basic pay, overtime, holiday pay, and gross pay for the period. Any approved cash advances are already deducted from net pay.
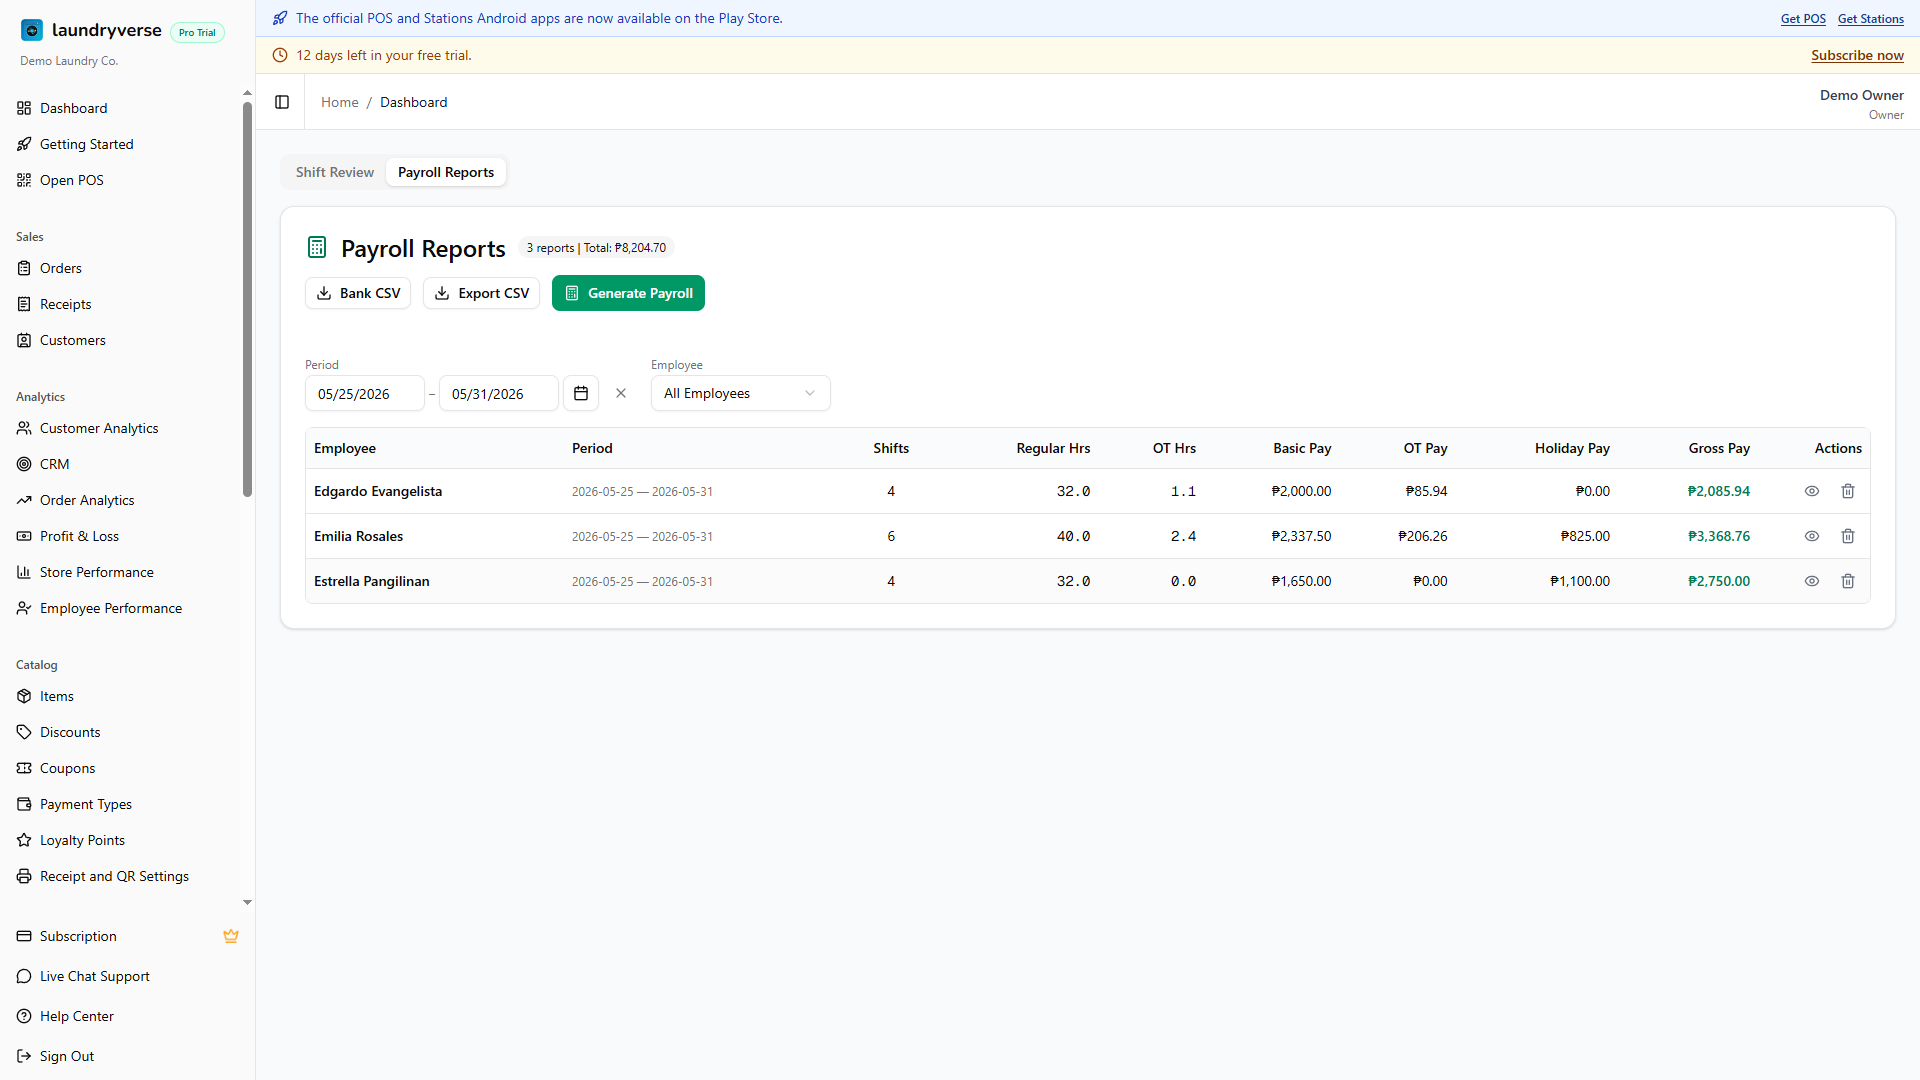
When you are ready to pay, export a full breakdown with Export CSV, or a Bank CSV transfer file that uses each employee's saved bank details and net pay.
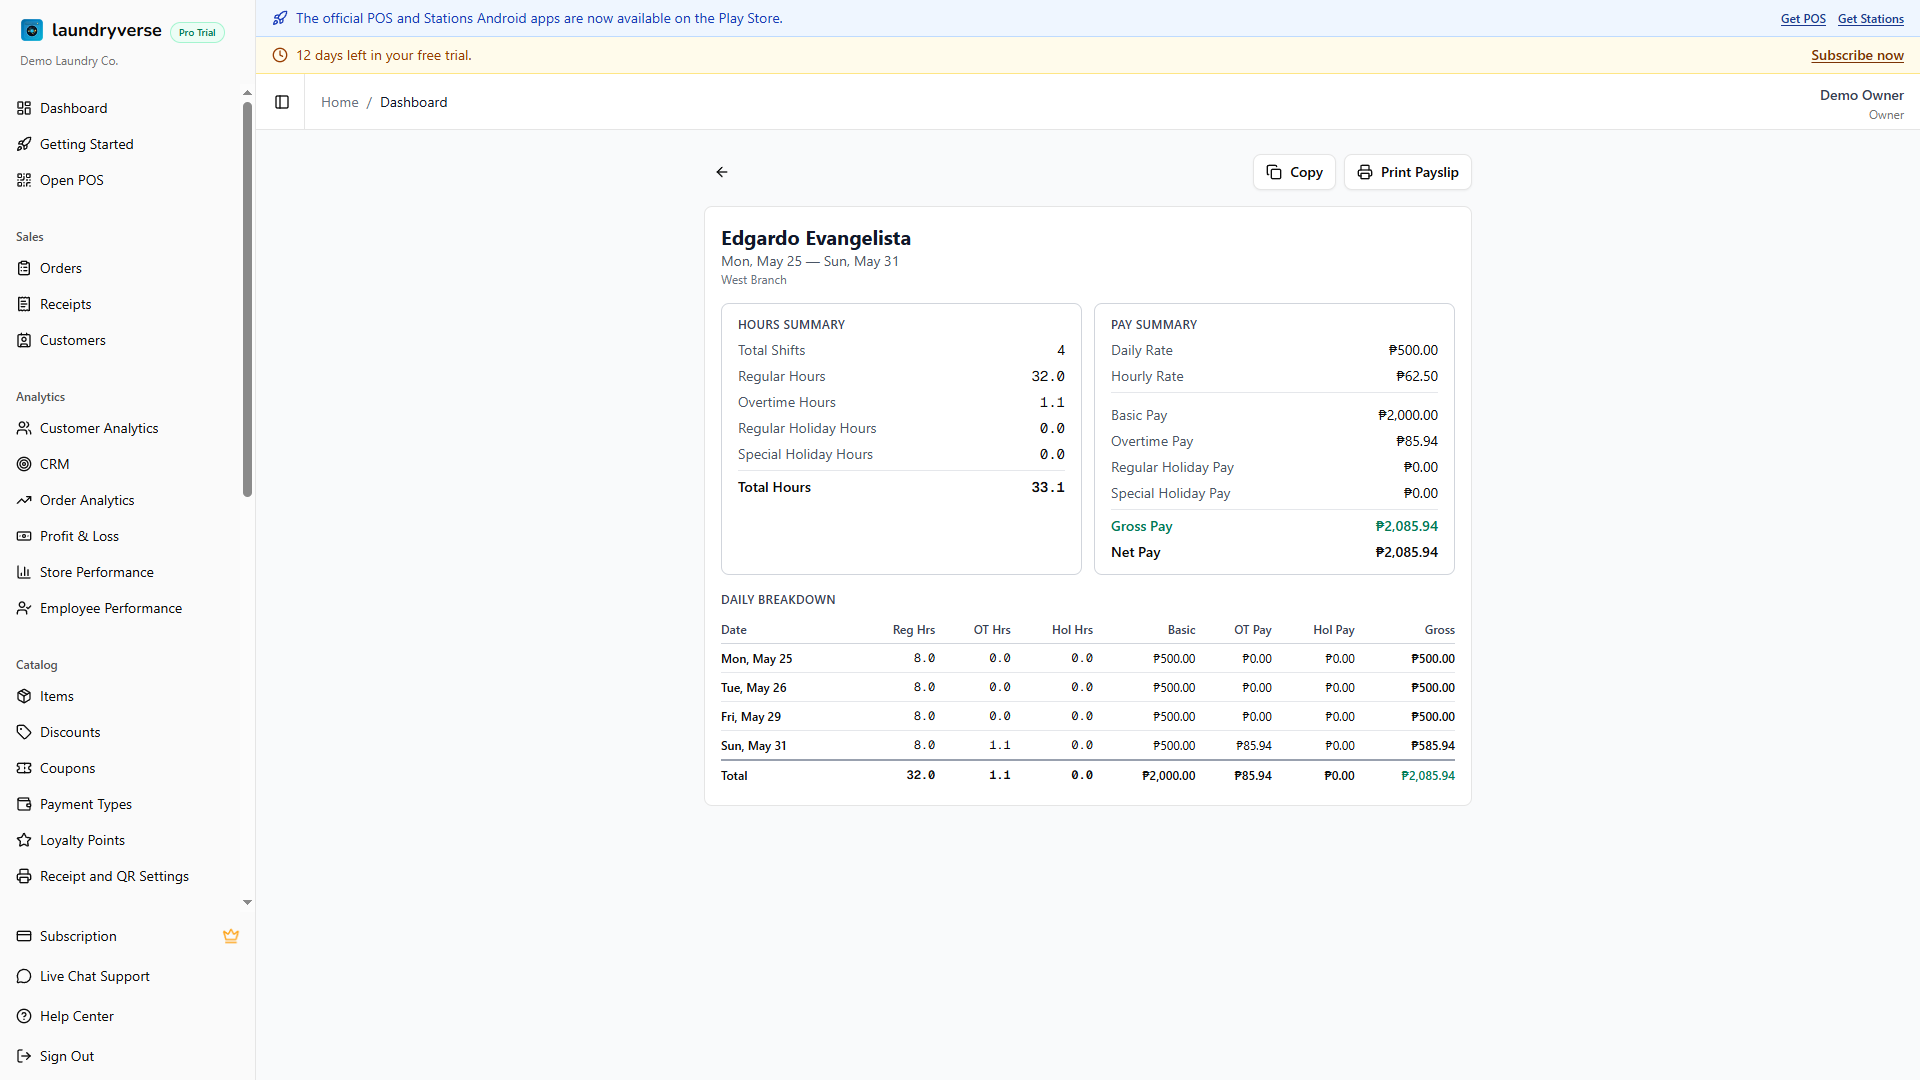
6. Check Each Payslip
Open any employee to double-check their payslip. It shows the hours summary, the pay summary, and a day-by-day breakdown. From here you can print the payslip or copy it to send to your staff.
Made a Mistake? Delete and Redo
Spotted a wrong figure after generating? Delete that payroll report and its shifts go back to approved status. Fix the hours on the Shift Review tab, then generate it again.
When a Holiday Isn't on the List
The holiday calendar covers the official Philippine holidays, and you can add the rest yourself. Some holidays move each year or depend on a government declaration, such as Eid al Adha or a local city charter day. When one isn't listed, add it manually so payroll applies the correct premium:
- Go to Staff & Payroll > Holidays.
- Choose Add Holiday.
- Enter the name and date, and pick the type (Regular Holiday for 200%, or Special Non-Working Holiday for 130% if worked).
See Holidays for the full details.
Common issues
"An employee was skipped during payroll"
They have no daily rate set. The Shift Review tab shows an amber warning naming anyone with a zero daily rate, and they are left out of the run. Open their profile, set the daily rate, then generate again. See Employees.
"A shift shows zero hours"
There is no matching clock-out. Either the employee never clocked out (the row shows "Waiting on clock-out"), or no time record matched the shift at all. Open the Actual Hours cell on that row, add or edit the time record with the correct clock-out, then re-check the hours before approving.
"The holiday premium wasn't applied"
The day was not on your holiday calendar when payroll ran. Add the holiday on the Holidays page (including declared ones like Eid al Adha that aren't in the default list), delete the affected report so its shifts go back to approved, then generate again. See Holidays.
"A cash advance wasn't deducted"
Only advances that are still pending and dated within the pay period are deducted. Check the Cash Advance page: the advance may have been cancelled, dated outside the period, or already deducted in an earlier payroll run. See Cash Advance.
"The Generate Payroll button isn't showing"
No shifts are approved yet. The button only appears once at least one shift in the period has an approved status. Select the shifts you have reviewed and choose Approve All first.
What's next?
- Scheduling & Shifts: build the weekly schedule and manage timecards.
- Holidays: set up the holiday calendar so premiums apply automatically.
- Cash Advance: record advances that deduct from net pay.
- Employees: set each employee's daily rate and bank details.
Stuck? Email [email protected]. The founder reads every message.